featured, Food

German Night

GermanJagerschnitzel (1)

I don’t know if any of you guys have done much digging into your family name & origins, but it is something that is a HUGE interest to me. I’ve traced my family tree back REALLY far. I’m fortunate that my family kept a LOT of papers and diaries. I’ve been able to research using sites like Ancestry to corroborate a lot of my family history that has been passed down, and fill in any gaps. One thing that I always knew growing up, was that our family was originally from Germany. My family immigrated to New York very early on, and many of my relatives remain there today! This simple connection has always left me eager to learn more about my German roots.

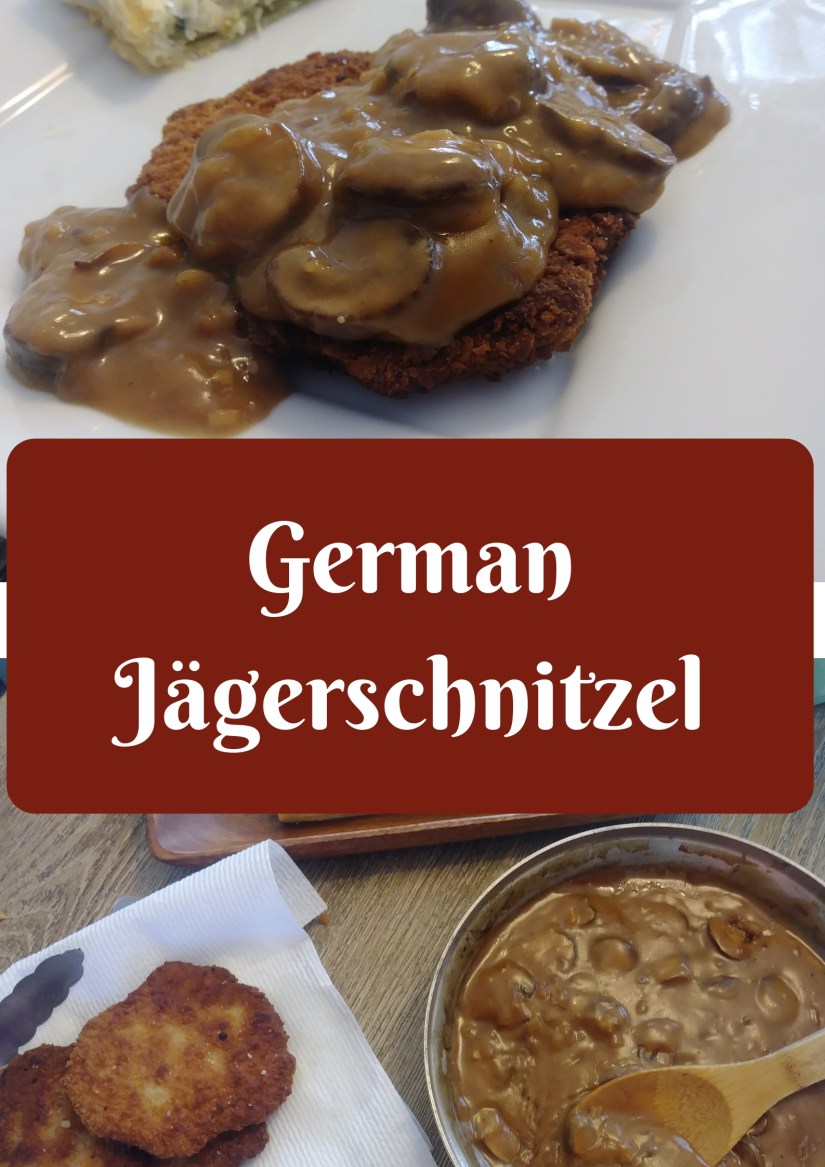
Earlier this year, I was fortunate enough to visit a German restaurant here in Knoxville. Linderhof Restaurant was my first real exposure to German food. I was advised by a friend about what to get beforehand. I did end up trying the jägerschnitzel with fried potatoes, and had a variety of different “salad” type options which mainly consisted of cabbage & vinegar. All of this is perfect for me because I LOVE vinegar! Before going, I didn’t even know what jägerschnitzel was. If you’re unsure, let me give you the low down. Schnitzel is the main dish. It is a type of meat (usually pork), that is pounded thin, breaded, and fried. The type of “sauce” that is served with it, describes the type of schnitzel. In this case, “jäger” sauce, is a brown mushroom gravy. Jäger actually means “hunter” in German. It is supposed to be a sauce made with ingredients that a hunter might have at his disposal. Also, don’t let me fool you into thinking that I knew any of this. My friend educated me during dinner.

Dinner at Linderhof was amazing and I highly recommend it! It also has a pretty cool atmosphere! I’ve heard from more than one person that occasionally the owner will even come out an play accordion music while people eat. You can check out their website here. It has been under construction for a while, so following them on facebook may be a better option.

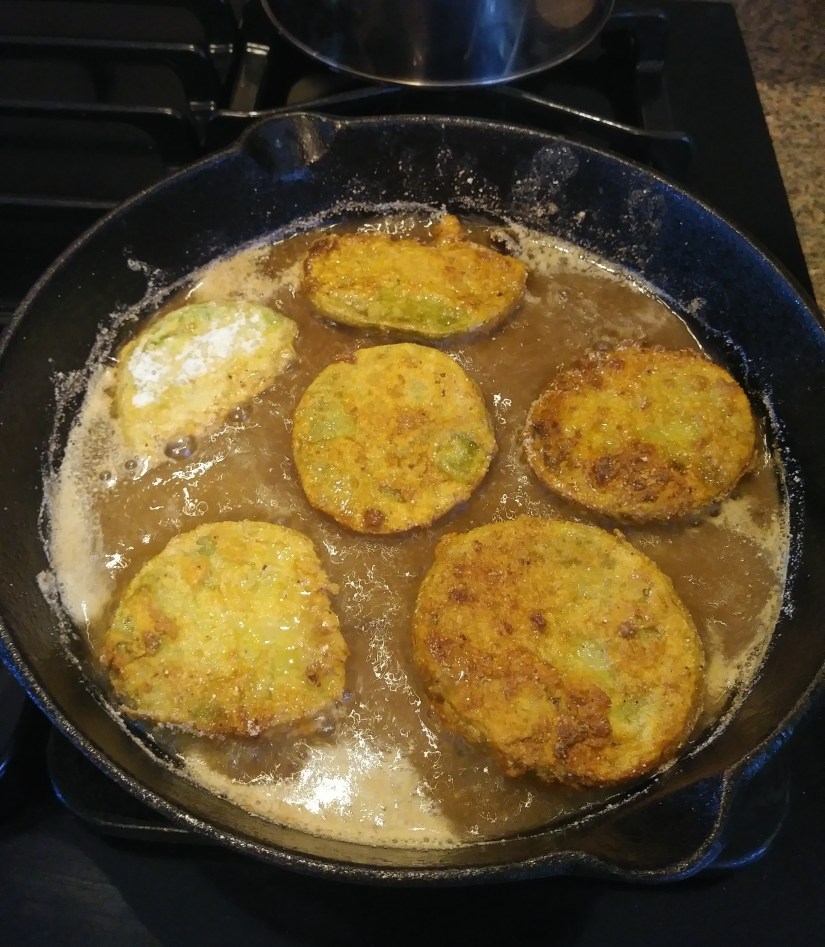
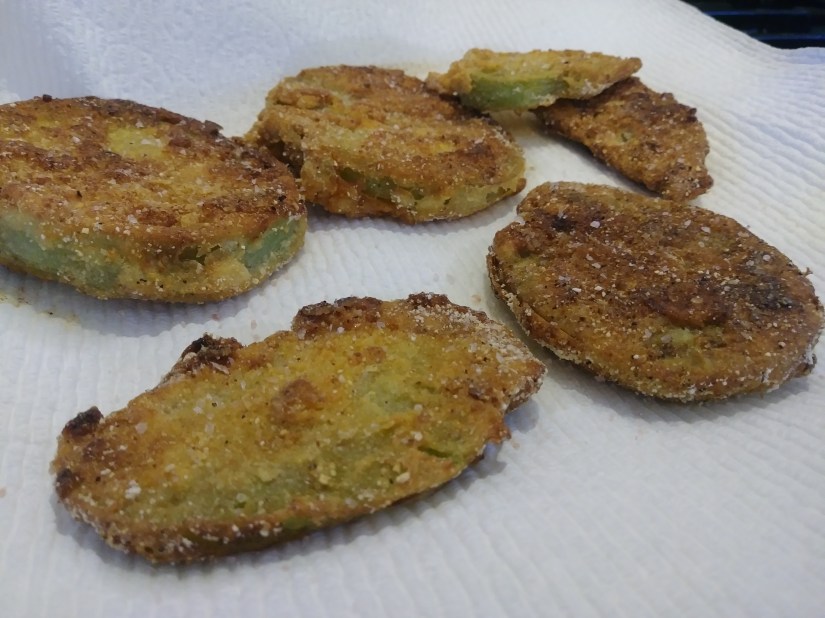
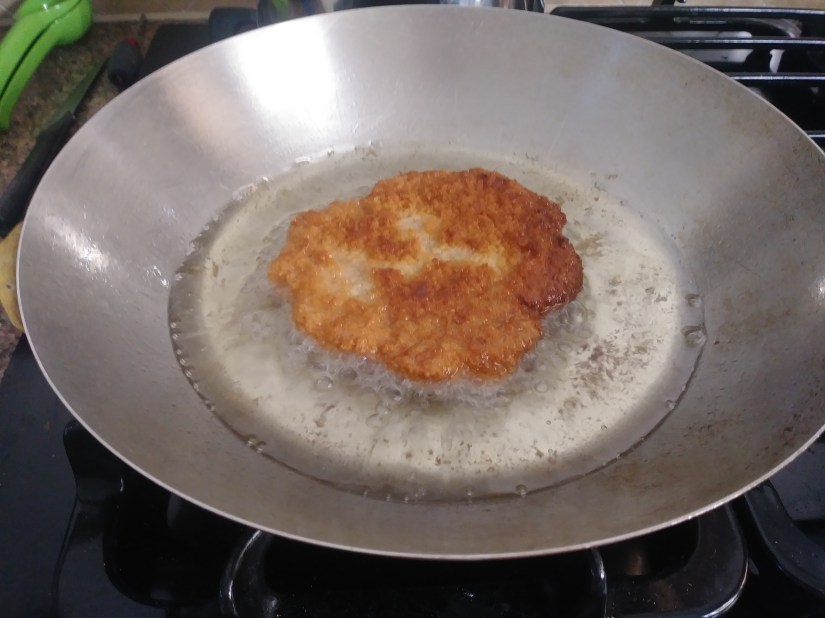
So that was my first and only dabble into German cuisine….until I hit the jackpot at Aldi last week. If you were unaware, Aldi is actually a German chain, so you can find a lot of cool German food there from time to time. Last week, their freezer section had a ton of options that I had seen on the menu at Linderhof. I decided to get a box of schnitzel and a spinach & feta strudel, and plan a German dinner for myself and the little one. Later in the week, it hit me that I had failed to consider the sauce for the schnitzel. Thankfully, the box includes a simple recipe for jäger sauce if you’re in a pinch. I wanted something a bit more authentic, so I held off until I could get back to the store. During a quick trip yesterday, I acquired a lovely carton of mushrooms and I quickly decided that Jägerschnitzel was in my immediate future! For the schnitzel, I just followed the directions on the box, and fried it to a lovely golden brown. The jäger sauce I made from scratch and it turned out AMAZING! (I’ll share the recipe below) The strudel, was just an easy “pop in the oven” type side, but it was quite good too! I don’t think it would be difficult to make your own schnitzel, and I’ll probably try that next time. This was an easy “first time” experience.

0918181745.jpg
Yum! Schnitzel!

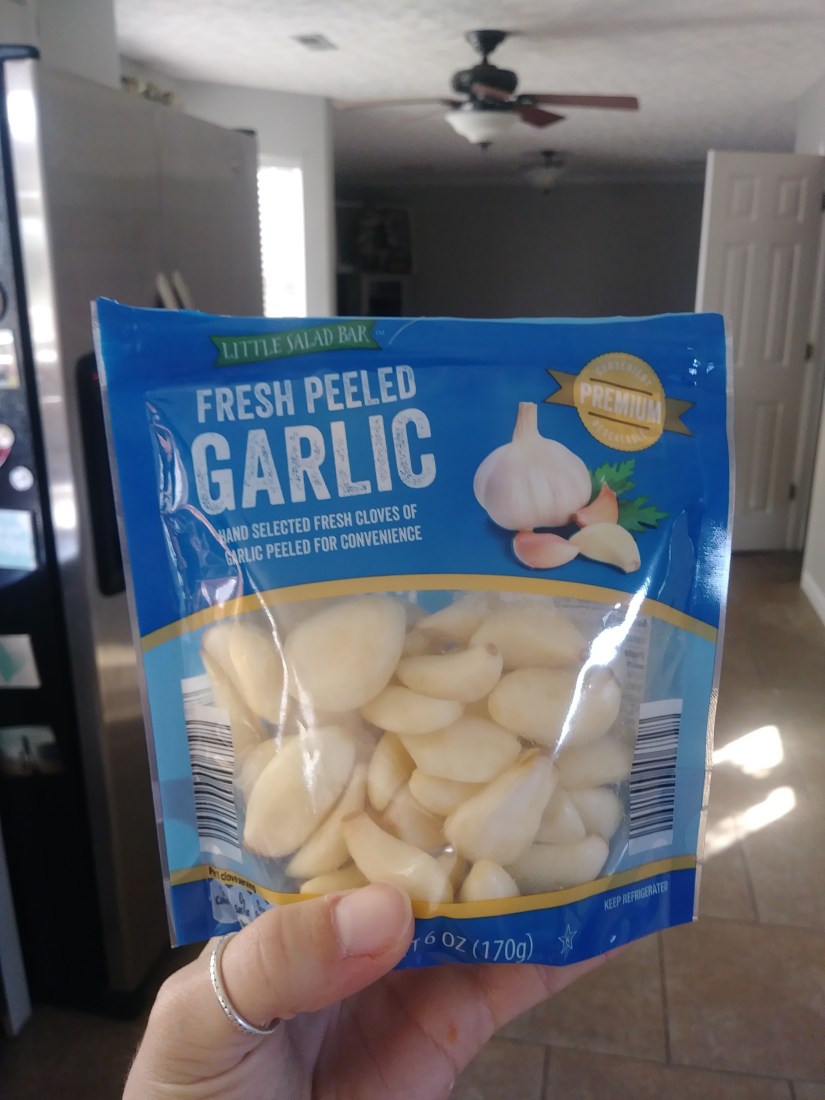
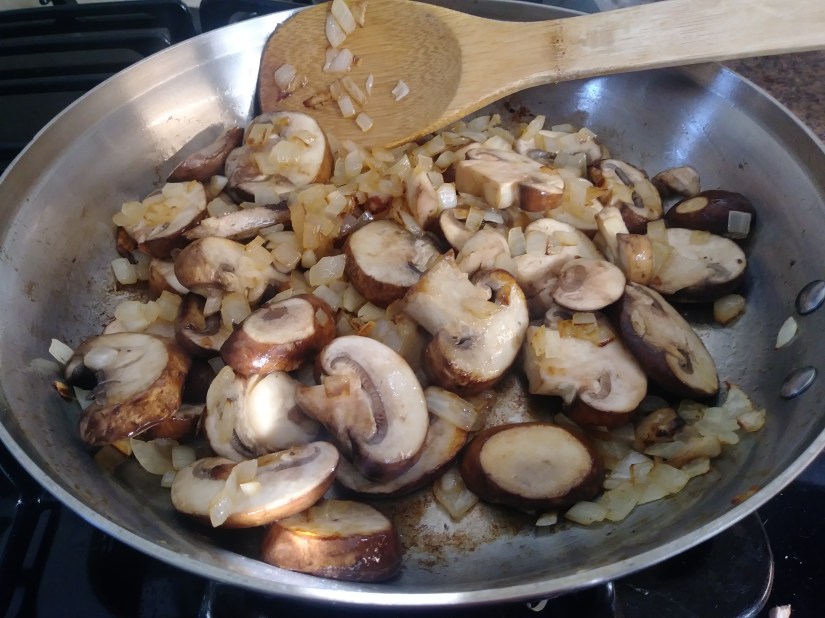
Start your sauce first: It takes the longest, and allowing it to simmer a bit while you fry your schnitzel will only make it better! Start off with butter and onions. Cook until they start to brown. Then add garlic.

0918181710.jpg

0918181710a.jpg
Speaking of awesome Aldi finds: This bagged garlic is amazing! I HATE peeling garlic!

Add in those mushrooms and cook until the liquid from the mushrooms is gone! It smells SO GOOD!

0918181718.jpg

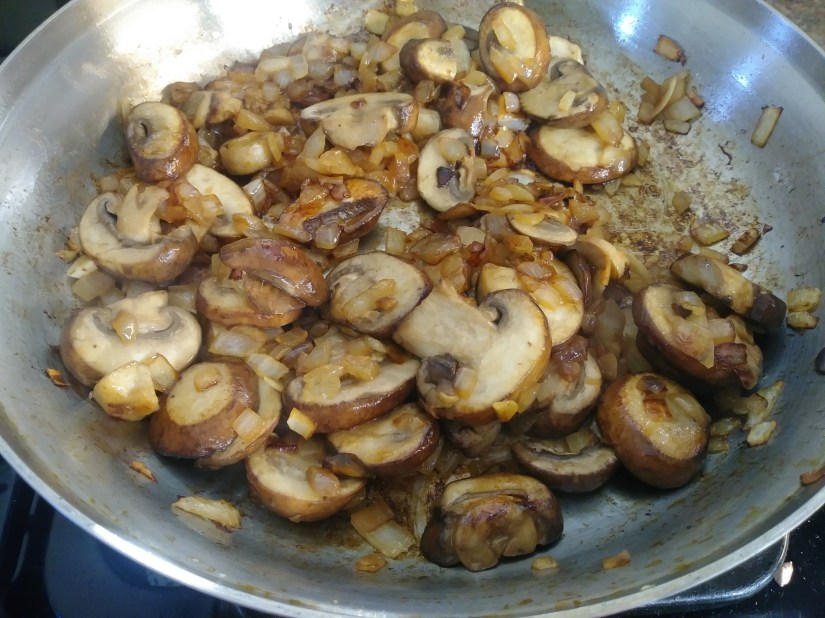
This is what you’re looking for. Next add in your flour. We are basically making a gravy. When you add this, it will get kind of sticky- that’s normal. Let it cook for a couple minutes before adding in your beef broth, vinegar, and spices. Be sure to scrape up all those yummy brown bits on the bottom of the pan! When you add in the liquids, you’ll begin to whisk until the mixture thickens, then allow it to simmer (covered) on low.

0918181722.jpg

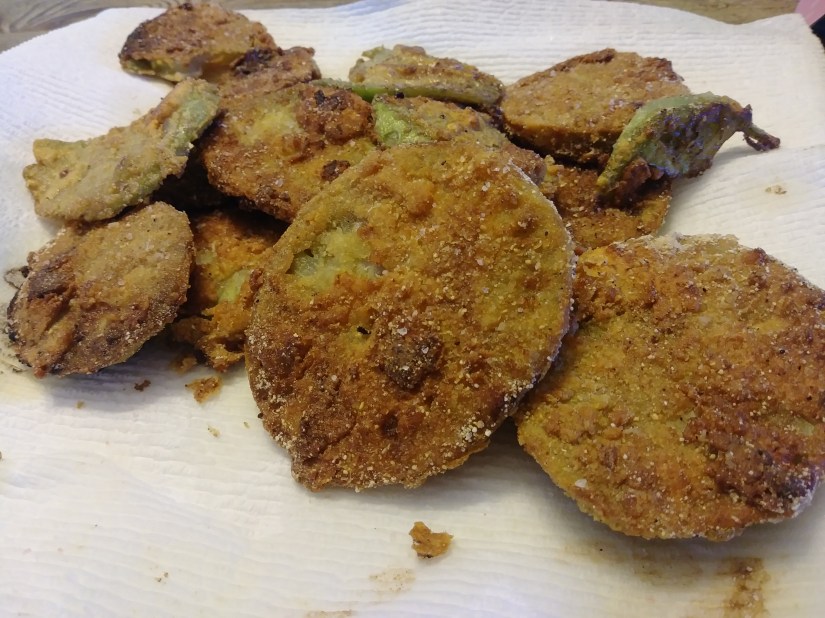
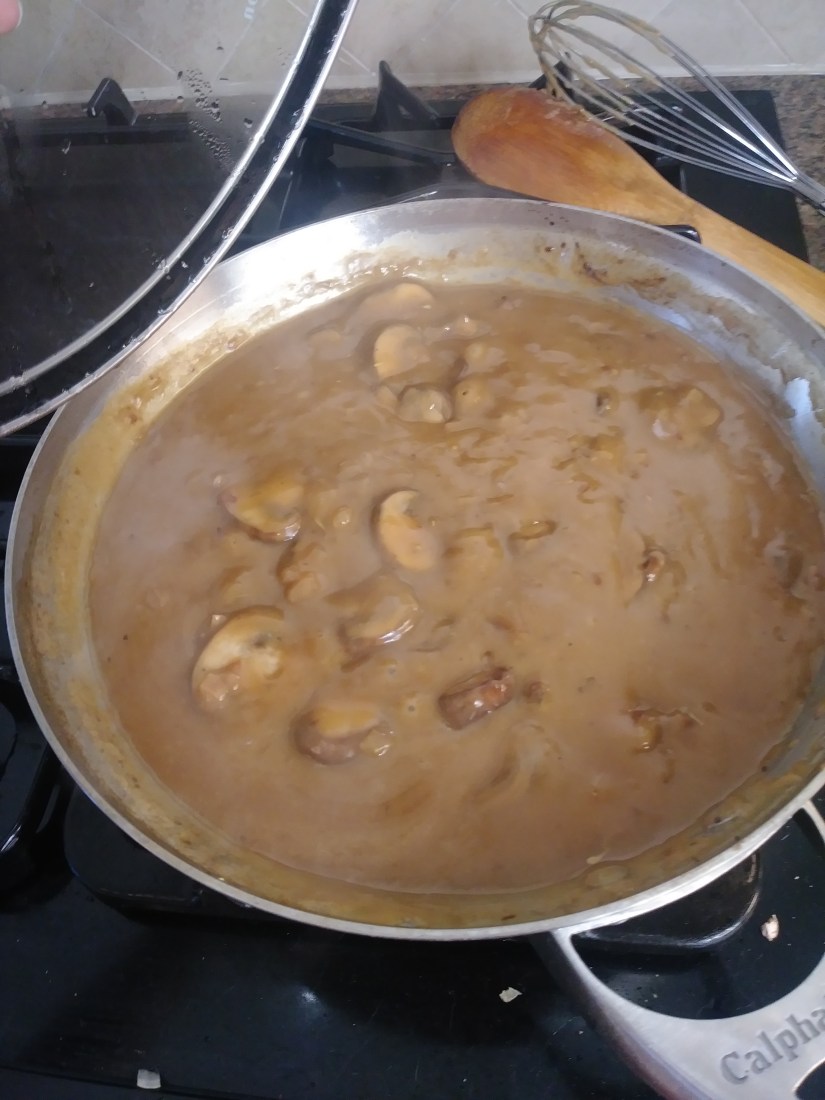
The finished product should look something like this.

0918181735.jpg

0918181814.jpg

0918181817.jpg

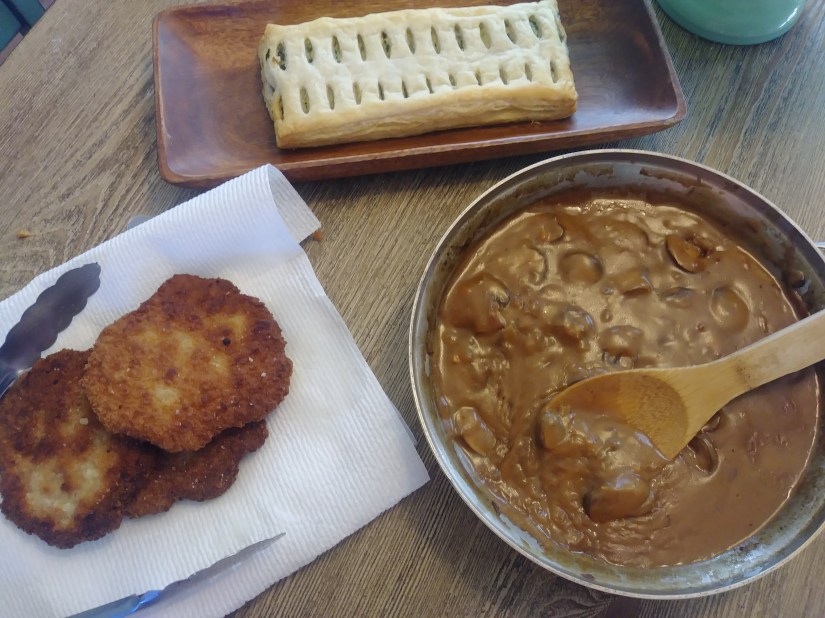
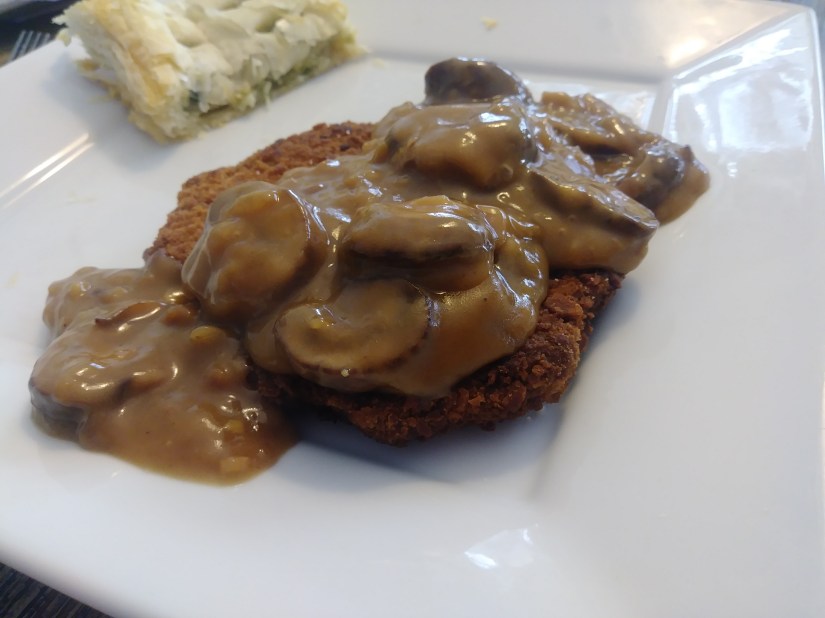
Even the tiny human was impressed! She requested the leftovers for her lunch at school tomorrow!

Jägerschnitzel

Ingredients

  • Cooked schnitzel (See post)
  • 2 Tbsp butter
  • 1 yellow onion, finely chopped
  • 1 clove garlic, minced
  • 16 oz. fresh mushrooms, cleaned and sliced (I used baby bellas)
  • 4 Tbsp unsalted butter
  • 4 Tbsp all purpose flour
  • 2 cups beef broth
  • 2 tsp balsamic vinegar
  • 1/2 tsp sea salt
  • 1/2 tsp sugar
  • 1/4 tsp dried thyme
  • 1/4 tsp black pepper
  • +/- 1-2 Tbsp of heavy cream


Instructions

  1. Melt the butter (or bacon grease this will yield the most flavor) in a pan over medium-high heat and fry the onions until beginning to brown.  Add the garlic and cook another minute.

  2. Add the mushrooms and cook 5-7 minutes or until golden and the liquid from the mushrooms has evaporated.

  3. Add the butter and melt.  Add the flour, stir to combine and cook for about 2 minutes, stirring continually.

  4. Add the beef broth, vinegar, thyme, sugar, salt and pepper.  Whisk continually until the gravy is thickened.  Cover and simmer on low, stirring occasionally, for 5-10 minutes.  Add salt and pepper to taste.  If you prefer the gravy thinner add a little more water (or heavy cream if using)

    Serve the schnitzel hot and covered in the jäger sauce! Enjoy!


featured, Food, Parenting

Spaghetti Ice Cream

Spaghetti Ice Cream

Months ago, a picture scrolled across my newsfeed of what appeared to be spaghetti….upon examining the post closer, I was surprised to learn that it was actually ice cream! I thought it was such a cute idea, and I made a mental note that I wanted to try it sometime. Fast forward to this past weekend, when another image of alluring spaghetti ice cream scrolls across my phone screen. I decided to do some research about this dish, and try to make my own!

Cool things I learned: This ice cream dish is actually German! I wouldn’t have guessed that, but it worked out well for me since I decided to try it out on a friend who spent several years in Germany! If it isn’t obvious, this is a GREAT dessert option for kids! They are pretty stoked about ice cream that looks like spaghetti! Let’s get down to the details about how to pull this off in your own home so that you too can impress German friends and children alike!

Items You’ll Need:

0911181827.jpg

This crazy looking tool is a “potato ricer.” I got this bad boy from my Grandmother many years ago. I pushed it to the back of a drawer with no intentions of ever using it. I could not foresee a recipe that I would ever make that would require such a tool. I’m thankful for once, for my inability to part with things. I will say that it is preferred for this recipe, to have a ricer that has holes only on the bottom, but I was able to place a layer of packing tape around the sides to prevent leakage. It worked well, and got the job done. If you don’t have an ancient potato ricer that your Grandmother left to you, these guys are also available on Amazon. There are a lot of options out there, but HERE is a fairly cheap one.

0911181826_Burst01.jpg

The “meatballs” in this recipe are optional. There are also a variety of options that you can use to make them. I baked a batch of brownies the night before. Once they were cooled completely, I shaped them into small balls with my hands. I’ve also seen people use Ferrero Rocher candies, and even small scoops of chocolate ice cream.

0911181828.jpg

You’ll also need some frozen whipped topping. Use a small to medium sized scoop in the middle of your plate FIRST. This creates height & some extra flavor. I have been advised that an unsweetened cream version is the most authentic.

A bar of white chocolate can be grated using a standard cheese grater to give the appearance of “Parmesan cheese.”

0911181833.jpg

This was our finished product. It doesn’t take much, but adds a great visual detail to the dish.

0911181826.jpg

You’ll also want to have a strawberry sauce to use as the “marinara” for the spaghetti. I made a homemade sauce that was super easy and really good. I’ll include the recipe below. If you don’t want to make your own, you can purchase a pre-made version, or even warm up strawberry jam if you’re in a pinch!

Strawberry Sauce

  • 1 lb fresh strawberries (De-stemmed and chopped)
  • 1/3 cup Sugar
  • Fresh lemon juice (juice from 1/2 a lemon)

Combine all ingredients in a medium sauce pan over medium heat. Allow it to come to a boil. Reduce heat and allow to simmer for ~20-30 minutes. Let it cool in the refrigerator for a few hours or overnight. It will continue to thicken as it cools.

*I also used my immersion blender briefly to make it less chunky.*

0911181835.jpg

Finally, you’ll need some delicious vanilla ice cream or gelato. The most important things here are to get an ice cream free from chunky additives. Chocolate chips aren’t going to squeeze through that ricer. Additives also take away from the visual that we are going for here. The other important thing is to allow your ice cream to sit at room temperature to soften a bit. If it is fully frozen, it does not squeeze through the ricer well. The soft ice cream actually holds it’s shape better


0911181837.jpg

Now that we have everything we need, let’s discuss putting it together!

Directions

  • The number one tip I have is to freeze the plate that you will be making your spaghetti on. I placed my plate in a few hours before so it would be nice and cold.
  • After your plate is cold, scoop a small to medium size scoop of frozen whipped topping onto the frozen plate.
  • Next (using a separate plate) place the ricer on this plate so you can scoop the softened ice cream into it. You will certainly get some leaking and melting (hence the extra plate to catch the mess.) You’ll want to put a pretty large amount of ice cream in there.
  • Now that the ricer is full, pick it up and squeeze it out over top of your frozen whipped topping on the frozen plate.
  • Use a knife or spoon to scrape the bottom of the ricer and release the end of the “noodles.”
  • Next, cover the “noodles” in your strawberry sauce
  • If you are using “meatballs,” place them now
  • Finally, sprinkle the white chocolate “Parmesan cheese” over the top to complete your dish!
  • Get some pics and enjoy immediately!

0911181849b.jpg

I still plan to visit the restaurant that was featured in the original post!

You can check out their menu HERE.

I hope you and your kiddos enjoy this as much as we did!

Food

Birthday Breakfast

IMG_20180816_141758_493.jpg

If it hasn’t become extremely obvious by now, I thoroughly enjoy celebrating birthdays & holidays. I’m always looking for some reason to decorate or make someone feel special. I’m quite certain that I came by this trait honestly. My Grandmother is without a doubt the kindest most loving person you will ever know. She goes above and beyond even in small ways to make people feel special and loved. Ever since I was a little girl, (and even before my time I’m sure) she has had a tradition that has been passed down through the family. Enter: THE BIRTHDAY PLATE.

0816180932.jpg

That’s right. A big red birthday plate, gold silverware, & a special napkin. It makes an appearance for everyone’s birthday and makes you feel super special. I’m really thankful that my Aunt got me a set a few years back, and now I can carry on the same tradition!

You may be wondering why “The plate” was out today…. In less than 1 week I will be celebrating the death of my twenties. o_0  Everyone says your thirties are better, and I’m ready to find out! Since Thursdays are spent with my Grandma, I got the birthday plate today along with a DELICIOUS breakfast! My Grandma’s #1 favorite past time is to spoil those she loves with food. I’m sure glad to be one of those lucky people! The recipe she made today is one of my favorites. My Aunt discovered it a few years back at a restaurant in California.

Lemon pancakes are seriously the perfect pancake. I used to be anti-lemon when it came to baked goods & sweets, but my tastes have changed considerably. These things are absolutely amazing. The tart lemon cuts through the sweetness of the pancake and just makes this breakfast so refreshing. I have never encountered a pancake that goes so well with so many topping options. These guys don’t even need syrup. They are fantastic by themselves with a little sprinkle of powdered sugar! You can cover them with a variety of fruit. My Grandma had fresh peaches, strawberries, and raspberries as options today. All were absolutely fantastic. I’m sure they would be great with blueberries and blackberries. We discussed making fresh lemon whipped cream for them….the possibilities are endless.

If you’re tired of the same old pancakes, give these guys a try. You WON’T be disappointed!

0816181004.jpg

Lemon Pancakes

Ingredients

  • 1 cup all-purpose white wheat flour
  • 1/3 cup sugar
  • 1.5 tsp baking powder
  • 1/2 tsp baking soda
  • 1/4 tsp sea salt
  • 3/4 cup sour cream
  • 1/3 cup milk
  • zest of 2 lemons
  • 1/4 cup fresh lemon juice
  • 3 Tbsp butter, melted
  • 1 egg
  • 1.5 tsp vanilla extract

Directions

Mix together flour, sugar, baking powder, baking soda, and salt. In another bowl, mix together the remaining ingredients. Pour the wet mixture into the dry mixture and stir quickly. The batter will be thick and bubbly. Use 1/4 cup batter for each pancake, and pour onto hot skillet. Cook until each side is golden brown. Serve with honey, syrup, powdered sugar, etc.

featured, Food

Why Korean food is everything missing from your life

0806181900a.jpg

Whew! The last two weeks have been busy ones! Unfortunately, my little one has been away for the past week, so I made it a point to keep myself very busy. I am lucky enough to have many fantastic friends who were kind enough to occupy my free time. One such friend, who shall be known on my blog as “Raul,” is my general cooking buddy and partner for all things food related. Raul has greatly broadened my horizons since we became friends. I really have to give him major props in the cooking department. He busts out recipes that most people wouldn’t even attempt.

Some time back in the fall, he made me aware of a “life changing” Korean chicken recipe that he had recently made. Raul was kind enough to make a batch for me, AND share the recipe with me! I have made this chicken a few times since then, and it does NOT disappoint. I will go ahead and warn you that it is a bit spicy. If you don’t like heat, this may not be for you. It has spice, sweetness, some tang, everything a good sauce needs in my humble opinion. This is a great sauce to make and add to store bought fried chicken. In fact, every time we’ve made it, we’ve added it to Bojangles fried chicken. I will say that the surface area to sauce ratio is VITAL. I would definitely recommend smaller pieces of chicken/ dark meat to make sure you get adequate sauce in each bite. Legs & thighs are my favorites for this recipe. If you want to be super fancy and make your own fried chicken, that would work well too! Just make sure to get adequate breading for the sauce to stick on. I love this chicken recipe SO much, that I now affectionately refer to it as PDC. No explanations on that name, but bonus points if you figure it out!

0806181858b.jpg

0806181900a.jpg

image000000.jpg

Spicy Korean Chicken

Ingredients

  • Appoximately 8 pieces of fried chicken
  • 1 Tbsp Canola oil
  • 4 cloves minced garlic
  • 1/3 cup tomato ketchup
  • 1/3 cup Karo syrup
  • 1/4 cup hot pepper paste (Gochujang)
  • 1 Tbsp apple cider vinegar
  • Sesame seeds

Put the oil & garlic in a small sauce pan on low and allow it to heat up a bit. Add the remaining ingredients and whisk lightly to mix them all together. Allow the sauce to heat on low for 7-8 minutes. Make sure to keep the heat low, so it doesn’t burn. Turn off the heat. Place the fried chicken in a bowl and pour the sauce over it. Toss the chicken gently until covered. Sprinkle with sesame seeds and enjoy!


The other Korean treat we enjoyed with our chicken was a Kimchi Pancake. Would you believe that before last year, I had never had kimchi? I didn’t even know what it was! As I mentioned, Raul has been a culinary gold mine! If you are in the same sad boat I was once in, and you have no clue what I’m talking about, allow me to enlighten you. Kimchi is a delicious spicy fermented cabbage. You can find it in most markets in the refrigerated vegetarian/vegan section. Because it is fermented, it contains bacteria that can be beneficial to your gut health. Delicious AND health benefits??? SIGN. ME. UP. I use kimchi all the time now. It is super tasty, and kicks up any number of dishes.

0809182220a.jpg

Enter the Kimchi Pancake. I love when foods take a turn from the way we traditionally consume them. When you think of a pancake, you likely get images of fluffy syrup covered breakfast items. This is a crispy and savory 180 degree change from the pancakes you know and love. In many Eastern cultures, pancakes include any number of ingredients that are pan fried and served as a side dish. You may never look at pancakes the same way again. Before embarking on your new pancake adventure, I would recommend making a dipping sauce. Raul was a bit reluctant to fully disclose the exact ratios of dipping sauce ingredients, but this should be fairly close.

Dipping Sauce

  • 1/4 cup good soy sauce
  • 1/4 cup Mirin
  • 1-2 cloves garlic, minced
  • 1-3 scallions, minced
  • Splash of sesame oil
  • A few shakes of sesame seeds
  • A squirt of Sri racha

Mix well and set aside.

Kimchi Pancake

Ingredients

  • 1 cup chopped Kimchi
  • 3 Tbsp kimchi juice
  • 2 Tbsp chopped Onion
  • 1/2 tsp Salt
  • 1/2 tsp Sugar
  • 1/2 cup Flour (all purpose flour)
  • 1/4 cup water
  • Vegetable Oil

Directions

In a bowl, place chopped Kimchi, kimchi juice, chopped onion, salt, sugar, flour, and water. Mix well with a wooden spoon.

Heat up a 12 inch non stick pan over medium/high heat. Drizzle in about 2 Tbsp vegetable oil. Spread the kimchi batter out evenly in the bottom of the pan with a spoon. Cook it for 1 to 1.5 minutes. Until the bottom gets golden brown and crispy. Turn it over with a spatula or flip it. (Raul did this, and it looked pretty cool.) Lower the heat to medium, and cook for an additional 1.5 minutes. Turn it once more, and cook for ~30 seconds, before transferring to a plate for serving. Cut into bite sized pieces. Use chopsticks to pull apart pieces and dip. Serve hot.


Recipe cred to Maangchi (Be sure to check out more of her awesome recipes!)

Well, there you have it! All the tools you need for an awesome evening of Korean deliciousness! These recipes are packed with flavor, and will fill a culinary void you never knew you had! I hope you enjoy them as much as I did!

If you try these recipes, let me know what you think!


Activities, featured, Food, Parenting

Princess Dinners

Tuesdays are generally “Mommy + Daughter Days” at our house. We only have one routine commitment, and the rest of the day we spend together. I generally use this time to catch up on housework that I can keep going while playing with my little one. I also do my best to keep a basic routine that she can look forward to. Each Tuesday she can look forward to Science Experiment Tuesday and it is also a night that we try to make dinner together. I want Neyland to enjoy cooking as much as I do, and to be independent and able to cook for herself in the future. She certainly already has the independence part down. She is constantly wanting to help me do the parts of the cooking that still aren’t safe for kiddos her age. To try and help bridge the gap between what she can and can’t help with, I got her some fun kitchen items for her birthday!

First, I purchased her a set of kid safe plastic kitchen knives. I was kind of skeptical about how much they would actually cut, and if they would really be useful. The price was pretty low, so I figured we would give them a try.

You can check out the set I got here.

Before I gave them to her, I ran them back and forth across my hand to see if they were, in fact, skin safe. No issues there at all. Neyland proceeded to try them on several different foods, and they worked great! I even used them a few times tonight, and I was pleasantly surprised. I guess my only gripe is that the 5 colored knives are exactly the same thing, just different colors. I thought perhaps they would have slight differences, but they don’t. I guess I can use the different colors to help teach her food prep safety?

Needless to say, she felt like a pretty big deal getting to use a knife like a big girl. She cut up butter, ham, and some veggies.

0731181754a.jpg

I also purchased her a Princess Cook book. I loved the idea that the recipes were simple, and that each recipe is attached to one of the Disney princesses. She was STOKED to flip through the pages and pick  which recipes SHE wanted to make. I can tell that she will be more willing to try these recipes, simply because they are tied to a princess. If it gets her to branch out and try new things….I’m ALL FOR IT.

Check out the Cookbook here!

Tonight she chose to make Rapunzel’s Ham & Cheese Biscuit Braids. She helped me from start to finish. She did have a bit of trouble braiding the dough, but who wouldn’t? I found them to be a bit bland for my tastes. Solution: Cover in mustard. Yellow mustard works well for Rapunzel’s magic golden hair anyway, Right??? Lol.

0731181745b.jpg

0731181756.jpg

0731181803.jpg

0731181834.jpg

0731181900.jpg

We ate our Princess dinner, watched Tangled (obviously,) and even ended our night with a surprise visit from a prince disguised as a frog. 😉

God certainly has a sense of humor when he graces us with his creation.

A hysterical game of Twister before bed, was the end to another lovely Mommy + Daughter day. Check out the recipe below to make Rapunzel’s Ham & Cheese Biscuit Braids with your little ones!

0731181922_Burst01.jpg

0731181924a.jpg

Ham and Cheese Biscuit Braids: 

(From The Disney Princess Cookbook)
Ingredients:

  • 2 cups flour
  • 1/2 cup cornmeal
  • 3 tsp baking powder
  • 1 tsp salt
  • 5 tbsp cold butter, cut into several pieces
  • 1/2 cup diced ham
  • 1/2 cup shredded cheese
  • 1 cup milk


Directions:

Heat oven to 400 degrees.
Stir together flour, cornmeal, baking powder and salt in a bowl.
Use your fingertips to pinch the butter into the flour mixture until the bits are the size of peas.
Stir in ham and cheese.
Add milk and work the mixture with your hands until it starts to look like dough.
Sprinkle some flour on a cutting board or counter and place the dough on top. Sprinkle a little more flour on the dough to keep it from sticking. I also floured my rolling pin.
With your rolling pin, flatten the dough into a 12 inch square. The dough should be between a 1/4 and a 1/2 an inch thick.
Slice the squares into quarters, and then slice each quarter into 12 strips, each about 6 inches long.
Braid the dough like you would braid hair – gather 3 strips and pinch them together at the top. Take the right section and cross it over the center section so they switch places. Then, take the left section and cross it over the center section. Keep going until the whole strip is braided.
Pinch the strands together at the bottom.
Repeat until all the strips are braided.
Place each braid on a cookie sheet and bake for 8-10 minutes.
*They don’t really turn as golden brown as you’d expect, so check the bottom after about 10 minutes.


featured, Food, Uncategorized

Fried Green Tomatoes

0725181945.jpg

So last wednesday I got home from work a bit later than usual. I was somewhat at a loss about what to cook for dinner since the majority of my week had been spent cleaning up an recovering from Neyland’s Circus birthday party. I poked around in the fridge, but nothing seemed to jump out at me. Neyland had already informed me that she just wanted leftovers, but I was in the mood for something more exciting.

I walked out to toss some chlorine tablets into the pool and just happened to peek over the fence and glance into the garden to see if anything needed my attention. My tomato plant that was stunted by a late frost, had recently decided to “earn” his keep, and start producing. Upon closer examination I noted 4-5 medium sized tomatoes looking big and beautiful hanging from the vine. Only 1 problem- They were completely green. Then it hit me…..FRIED GREEN TOMATOES!

For the record, I have never made fried green tomatoes before, and it had been some time since I had eaten any. I shrugged off the uncertainty. After all, how hard could it be?

Neyland helped me harvest 4 of them and I got to work searching for a quick recipe. The one thing I KNOW about fried foods is a complete necessity to “double dredge” and get a good crust. I found a recipe that included this vital step, it was pretty highly rated, and seemed relatively simple. Hmmm…maybe too simple? It seemed like perhaps I could kick it up a bit in the flavor department. I quickly gathered the ingredients, with the exception of buttermilk (which I didn’t have on hand.) Thankfully if you ever find yourself in a pinch (which this certainly was) there is a handy way to make “cheater buttermilk” using regular milk with a splash of vinegar.

I prepared my dry dredging ingredients that I kicked up with extra flavor along with my “buttermilk” + egg mixture and got my pan/oil preheated while I sliced the tomatoes and coated them. Always make sure and let your pan/oil get up to temp before attempting to fry anything. If it isn’t hot enough, it will just cook the food slowly and make it mushy rather than crispy.

Fried Geen Tomatoes 7/25/18

When the oil is hot enough, you quickly get a nice golden brown crust that forms. It helps keep the inside from getting too soft, while creating a magnificent crunchy shell on the outside.

I fried them in batches to prevent overcrowding and slowed cooking. After they were all done, I drained them on a paper towel to absorb excess oil and simply sprinkled them with some Himalayan pink salt. Most FGT that I’ve had in the past needed some type of dipping sauce, but these were simply fantastic straight from the pan. I was astonished when Neyland agreed to try one and she LOVED IT!

For a great southern recipe, give this one a try!

0725181929b.jpg

Fried Green Tomatoes

Ingredients

  • 1 large egg, lightly beaten
  • 1/2 cup buttermilk (or “cheater buttermilk”- see post above)
  • 1/4 cup All purpose Flour
  • 1/2 cup cornmeal
  • 1 tsp kosher salt
  • 1/2 tsp black pepper
  • 1/2 tsp garlic powder
  • 1/4 tsp Smoked paprika
  • 1/8 – 1/4 tsp ground cayenne pepper (depending on if you like heat)
  • 3-4 medium sized green tomatoes, sliced in 1/4-1/3 inch slices
  • Vegetable oil- for frying
  • Salt to taste

Directions

Combine the egg & buttermilk in a shallow bowl and set aside.

Combine the flour, cornmeal, salt, pepper, garlic powder, paprika, and cayenne pepper in a shallow bowl and set aside.

Dredge the tomato slices first in the dry mixture, then dip into the egg mixture, and follow again into the dry mixture.

Pour oil into pan (preferably cast iron skillet) to a depth of 1/4 inch. Heat on medium heat until hot. Approximately 375 degrees. Drop the slices in batches into the hot oil and cook 1-2 minutes per side, or until a crispy golden brown crust is formed. Remove and drain on a paper towel. Sprinkle with salt and enjoy while hot.

*For an extra “southern” experience, eat these guys while watching Fried Green Tomatoes the movie!