Activities, featured, Parenting, Uncategorized

101 Dalmatians

It may be time to let you guys in on a secret weapon of mine that is also very useful in helping me plan our Disney meals…Aldi. Yes, this amazing little store is a FANTASTIC resource for cool seasonal food items. They have different food items from around the world at various times throughout the year. I’ve been a customer long enough to know approximately when and what to expect during each season. Whenever I see something interesting or unique, I pick it up and see if I can work it into a cool dinner. They also have a great selection of tried and true year round items that I can always count on. One of their routine items was instrumental in creating our yummy dinner from the United Kingdom for 101 Dalmatians night!

When I think of the U.K. one of the first dishes that comes to my mind is…..FISH AND CHIPS! I’d say that’s probably the number one answer you would get from most people. It’s also easy to make, and kid approved! This dinner was another one of my quick and low maintenance dinners. I like to do a mixture of both so that our Disney dinners are always special but not overwhelming. I scored big on my trip to Aldi with some aged English cheddar. Cheese is one of the best things ever, so I couldn’t pass it up. This is for sure one of those odd ball seasonal items. When I happened upon it, I grabbed it and built dinner around the idea of visiting the UK. *Pro tip: when you find one item from a particular country, look around because there are often others from the same area.* Thankfully Aldi always carries a great selection of beer battered fish and french fries (aka chips,) so the rest of the meal was super easy to put together.

I’m not one to generally fry much of our food, but since this meal consisted of both fried fish and chips, I did it up right. I didn’t have any newspaper to put our food in, but I did have some food baskets from a birthday party a few years back that helped complete the “pub food” look I was going for. We served them with fresh lemon wedges and malt vinegar. For the adults, we also nabbed some Fuller’s London porter to complete the meal.

For dessert, we enjoyed an apple crumble! (Again, store bought since this was a low maintenance dinner.) When I revisit this again, I hope to shoot for black and white iced cookies as a play on Cruella’s hair. There are a ton of possibilities!

This is probably also a great time to mention that Cruella is my all time favorite Disney villain! She has got all the sass, fashionable (excluding the puppy coat idea), she’s a wild driver, AND she has her very own theme song! Who is your favorite villain and why?

Activities, DIY, featured, Food, Parenting, Uncategorized

Toy Story

Being a single Mom can make it hard to plan and execute intricate dinners. Spare time is a hot commodity around here, so I like to have “backup plan” style Disney dinners that are a bit easier and require less from me. Thankfully, you can adjust movies and dinners to fit your time and budget. Be as fancy or low key as you want to be! I made it a personal rule that when I started doing these dinners, they were not going to be a source of stress. I was going to have as much fun preparing as we do watching and enjoying. If I am short on time, or just not that into it one week, I reach for an easy movie that allows me to sit back and relax more. As moms we ALL need those kind of dinner nights! That brings us to….TOY STORY!

One of our FAVORITE places in the Disney parks is Toy Story Land in Hollywood Studios! The first time that I visited Disney was in high school. Way back then, Toy Story Land didn’t exist! When I got to go with my daughter, it was my first experience and I literally felt like a big kid!

There are giant toy blocks, tinker toys, and parades of green army men. There is so much to do and look at! You literally feel like a toy! Our favorites from Toy Story Land were:

1- Slinky Dog Dash!!!!!

2- Toy Story Mania

3- I’m sure WOULD have been Woody’s Lunchbox (but it was closed due to COVID) Those pop tarts are high on my list for next trip!!!

Slinky Dog was SUCH a fun coaster and it really gives you the sensation that you’re really on a slinky! We rode it multiple times that day. My Mom (who is NOT a coaster fan) really liked it! No flips or crazy turns makes it great for kids and the less adventurous.

Toy Story Mania is another fun shooting game a lot like Buzz Lightyear’s Space Ranger Spin in Magic Kingdom. I like Toy Story Mania a lot more. I find it easier to shoot and less overwhelming than the Buzz ride, but both are certainly fun! (Plus the ride line for both of these rides is mostly indoors and in the AC!)

So how did we bring the magic of Toy Story home for Disney Dinner Night???

Repeat after me: Free printables from other awesome Mom bloggers

Visit http://www.thesuburbanmom.com for this Pizza Planet Printable! (And others!)

That’s right. I ordered pizza, and slapped a “Pizza Planet” printable on the box. BAM! Instant dinner. We also had other kid options like juice boxes and soda for the adults.

The day before, I had made time to bake some green cupcakes in blue foil wrappers. They had plenty of time to cool, and then the day of, I only had to frost and decorate them! To complete the alien cupcakes I just used food coloring to color store bought buttercream frosting, and piped it into big goopy alien piles. Add 3 little candy eyeballs and you’ve got alien cupcakes! AND the perfect setting for a Tiktok that was just asking to happen….

A year or two ago, Neyland had a dance show that used a costume loosely based off of “Jessie” from the later movies. We used that as Neyland’s outfit, and I dressed in lime green shorts and a purple tank top with purple eye shadow to be the Mom version of Buzz Lightyear!

We decorated with wooden blocks, plastic army men, and tinker toys that we already had around the house and also elected to go out in the yard and make exploding soda with Mentos and Diet coke because that seemed like a fun “kid” activity. It was pretty entertaining seeing everyone run from the jet of soda shooting everywhere!

Overall this was a fun and relaxing dinner theme that really let me step back and enjoy. With all the pizza, toys, and cupcakes I felt like a kid again too!

Uncategorized

Tangled

110336303_292940598607035_6518792964209181705_n

Tangled has got to be one of our favorite Disney movies of recent years. *Personal Confession*- I think it’s way better than Frozen! (shhhh don’t tell)

We actually ended up using this particular movie TWICE for two separate Disney dinner nights. Our first Tangled theme was during a recent trip back home to New York! I still have 3 aunts that live in NewYork and it’s great to be able to get the family together. My family is originally from Germany, and I wanted to pay homage to our roots during our family gathering. We’ve done several German based dinners, as there are several German based Disney movies. German food is Neyland’s #1 favorite, so she’s all for any and all German themes. Tangled is actually set in the fictional kingdom of Corona (yet another reason we doubled down on this movie during this worldwide pandemic.) I have no clue what they might eat as traditional food items in a fictitious land, so we elected to go with the traditional origin of “Rapunzel” which is Germany!


During our NY Tangled night, we elected to do an “Oktoberfest” type theme. We took a trip to my FAVORITE store ever- ALDI! It is always an awesome place to find cool foods from different countries (especially German food since it is a German company!) You can generally find a good selection of bratwurst and knockwurst, which is what I chose to get. I have a friend who lived in Germany as a child, and he routinely throws some awesome Oktoberfest celebrations. Because of this, I am well versed in such festivities. I decided to make some curry wurst for our celebration, complete with homemade mayonnaise (making homemade mayo is another life skill I picked up from this same friend- DO IT…you’ll seriously never go back.) We also added in some delicious sauerkraut and fries for good measure. Since Rapunzel is also pictured making homemade pie while locked in her tower, I figured we could end the night with that.

During our visit to Disney, I got Neyland a Cinderella dress at the Bibbity Bobbity Boutique. But I also fell completely in love with Rapunzel’s dress and ended up ordering it for her for Christmas. She wore her gorgeous dress and let me braid her hair and then we picked wildflowers to decorate her braid! I didn’t have a fun princess dress, but I do have a fun outfit for Oktoberfest, so I brought that along. I connected my Mom’s new bluetooth speaker and popped on some fun Oktoberfest tunes and the mood was set! We even played games like she does when she’s trapped in her tower!

I gently pan grilled/steamed the brats and knockwursts and used my Mom’s new air fryer for the fries. Once done, I sliced up the sausages and served with fries and the homemade mayo (check out the recipe below)  with a generous sprinkling of curry powder. We also had some grainy German mustard available for dipping.

After dinner and some dancing, we watched Tangled and had our delicious homemade pie! We ended up making a mixed berry rhubarb pie. It was tangy and tart and absolutely perfect. I was able to call my Grandma in TN to obtain her OH SO PERFECT pie crust recipe.

82825897_577136079604677_2715595318887448576_n

New York Recipes

Homemade Mayonnaise

  • 1 whole egg, plus one extra yolk
  • 1 tsp granulated garlic
  • 1 tsp dijon mustard
  • juice of half a lemon
  • 2 cups extra light olive oil or avocado oil
  • kosher salt to taste

Step 1- Add eggs(room temp is best), garlic, dijon, and lemon juice to a food processor 

Step 2- Turn on the processor and slowly drizzle in the oil, or add it in small batches to ensure it emulsifies. Don’t add it too quickly. The mixture should appear nice and creamy.

Step 3- Test the flavor and add salt as desired.

Store in the fridge. This mayo can last 2-3 weeks.

Grandma’s Perfect Pie Crust

Sorry kids! This one is a family secret!


When we got back home, a few months passed before Neyland’s birthday. Seriously- HOW IS THIS CHILD 6?!?!?


I generally throw a big birthday bash for her, but in 2020 with all the COVID-19 craziness, we decided to just do something small and go on a private trip instead. Instead, we decided to revisit Tangled since her birthday fell on Disney dinner Tuesday. As previously mentioned, German cuisine is her absolute favorite, so I knew it would be a hit. I was able to procure some pork schnitzel for the event. Her favorite way to eat it is pan fried with a squeeze of lemon with a side of pickled red cabbage. We also had some more German sausages. I also recycled some decor she had from a previous princess party. In this case, a super cheap and easy decoration consisting of long yellow plastic table cloths (they’re like $0.99 at Walmart.) I bought several and cut them into thirds lengthwise. After cutting, I braided them into a SUPER long golden braid and draped it ALL OVER the house. We ate our yummy dinner, watched our movie, dressed up, opened gifts, built Legos, and ended the night with real fire lanterns! I wanted to do something super special since it was her actual birthday. Since Rapunzel’s parents release floating lanterns every year on her birthday, I thought this would be a perfect opportunity to do the same! I purchased a pack of 5 from Amazon. If you’re interested, you can find them here. The ones we got were tethered to a kite line, and the materials used to make the lanterns is supposed to be flame resistant. They come pre-assembled, and were relatively easy to get going. I’d highly recommend you tether these guys. We set these guys up in our side yard, and if they weren’t connected they would have been long gone. I was really worried that they would land on a neighbor’s house or something, but with the nifty string, we were able to control them easily.


110336303_292940598607035_6518792964209181705_n

This was seriously magical. We had so many neighbors and random cars stop just to watch these beautiful lanterns float through the night sky.

Our Tennessee Tangled Dinner

If you decide to get “tangled” up in the Disney dinner life, drop me a comment and let me know what you did!

Food, Uncategorized

La Michoacana

Maybe its due to summer officially being upon us, but I’ve been on a serious frozen treat kick as of late. This place has been on my radar for a while now. I think I first saw images of some of their delicious treats scroll across my social media feed a few months ago. I knew then and there that I had to visit. I really love any kind of local small business presenting authentic cuisine, and make a point to go support such places whenever possible! La Michoacana certainly fits that description.

After attending an awesome event that my church hosts called “Worship Nights,” where worship leaders from churches all over the area come together for a night of amazing music and worship, some of my dear friends and I visited this place for a late night treat. They had already been here several times and had nothing but great things to say. I had seen a picture of a “Mangonada” (pictured above) and was convinced that I had to give it a try. I didn’t really know WHAT it was….but it looked great and that was all that mattered! One of my friends did try to talk me out of it and informed me that it was frozen mango ice cream with spicy pepper sauce and spicy pepper gummies sprinkled with Tajin. I was skeptical, but wanted to give it a try. Her husband absolutely LOVES their mangonadas and assured me that he would finish it if I didn’t like it.

After ordering and engaging in a full photo shoot (because let’s face it, this thing is truly photogenic) I timidly took a bite. I have to say it’s like nothing else I’ve ever had. The mango was sweet and tangy, but the salty and spicy peppers make it a bit sour. If you haven’t tried it, you should at least once. I’m not sure that I would get it again, but it was certainly worth trying.

My second go around I tried the other treat that was recommended by my friends. Fresas con Crema! It was absolutely amazing. I’m a big berry lover and this delivered. There was a giant scoop of frozen strawberries covered in cream, chocolate, and wafer cookies!

My daughter joined me during this trip and tried one of their many cream based Popsicles. She loved it….but made a GIANT mess eating it. I think it’s pretty obvious what flavor she indulged in.

This place offers more than just frozen treats too! They have street corn and a whole host of nacho bag options! If you go, leave me a comment with what you got and if you would recommend it! They have so many options I want to try them all!

Food, Uncategorized

Kombucha – Home brew life

Kombucha Home Brew

After a decent absence from the blogging world, I have decided to jump back in and discuss a few projects that I have been working on!

If you have been to a grocery store any time in the past year, I’m sure you are well aware of the current Kombucha craze that is sweeping the US. I was pretty hesitant to jump on this band wagon, but decided to at least give it a try. If you haven’t heard of kombucha, it is basically a fermented tea that people have been drinking for years in the Eastern world. The fermentation process leaves this beverage low in sugar, full of probiotics, and a pleasing amount of carbonation. I’ve never been a huge soda drinker, but i do enjoy a soda on occasion mainly for the carbonation, particularly when my stomach is a bit upset. When I heard about kombucha, I thought it might be a nice healthier option to replace my occasional soda. It also had a possibility of doing more to help an upset stomach than soda did…so why not?

The first brand/flavor that I tried has remained my favorite store bought variety. GT’s Synergy contains a variety of different berry flavors along with ginger and is quite refreshing. Personally, I love the tart flavor and zip that the ginger provides. If you aren’t fond of  ginger or vinegar, this may not be the beverage for you! If you would like to give a store brand a try, I would highly recommend this one. They have a wide variety of flavors, and all the ones that I’ve tried have been really good. The only downside is the relatively expensive cost. One single bottle of kombucha generally runs around $3.00 or more. The best prices I’ve found are at ALDI. You can consistently get bottles there for around $2.75. If you grow to enjoy kombucha, it can become a rather expensive part of your diet.

As my interest in kombucha grew, so did my desire to try and brew some for myself! I’m always down for trying something new and challenging!

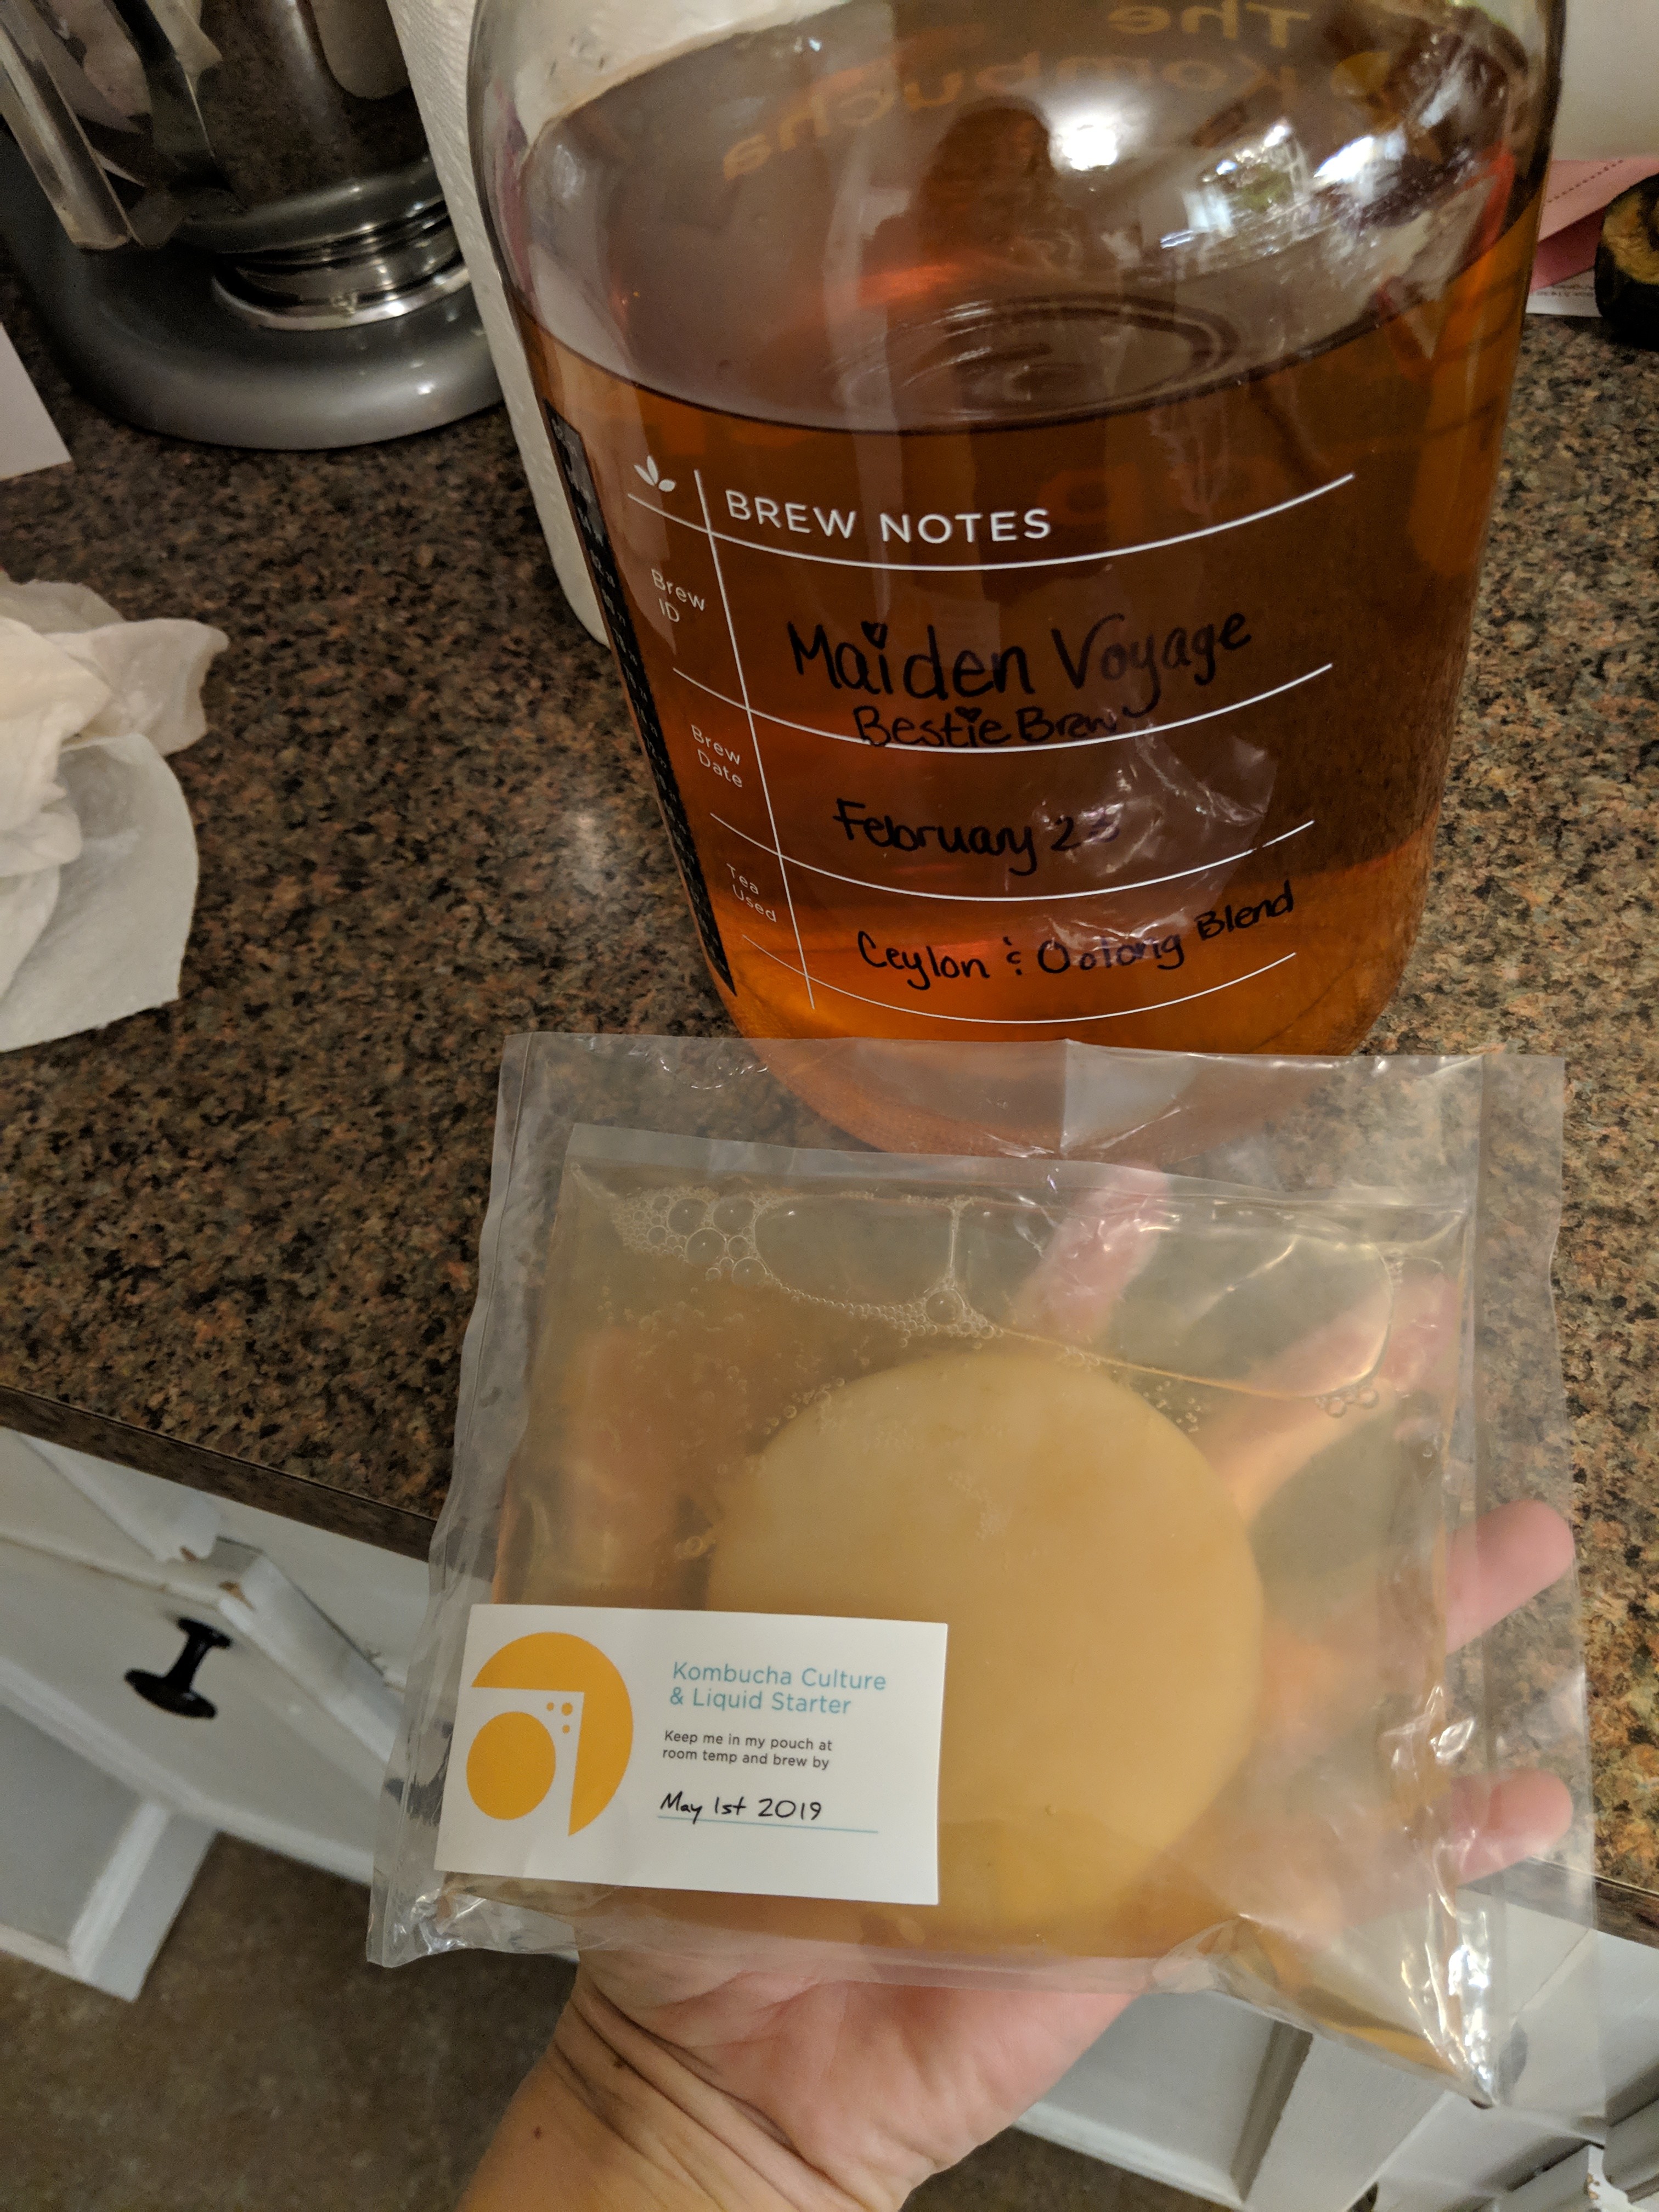
After reading and doing some research on the fermentation process, I ran into my first obstacle….I needed a SCOBY. I’m sure you’re probably wondering what in the world a SCOBY is. Allow me to enlighten you! SCOBY is an acronym that stands for Symbiotic Culture Of Bacteria and Yeast. To a normal person, it looks like a big slimy pancake shaped blob. This amazing “blob” is what causes all the magic to take place during fermentation. But where does one go to find said blob? A girl doesn’t want to procure a SCOBY from just anyone. I found myself asking around to some of my friends as though I was trying to find some rare black market item. Everyone just looked at me like I was nuts. A few people were interested, but didn’t really know where to find one. Thankfully my friend that gave me the hardest time about my endeavor, actually ended up jumping on the kombucha bandwagon and got me a home brew kit that included a SCOBY!

A Similar Starter Kit can be purchased here

I was officially set to begin my brewing adventure! It just so happened that I received my kit right before a long rainy weekend. It was the perfect time to read up and get brewing! The first thing I learned was that I needed some distilled water. Water free of additives is really what you’re looking for. Chlorine will inhibit the growth of your culture. Other filtered and spring water usually has a variety of additives that help with taste when drinking plain water, but don’t really help when brewing kombucha.

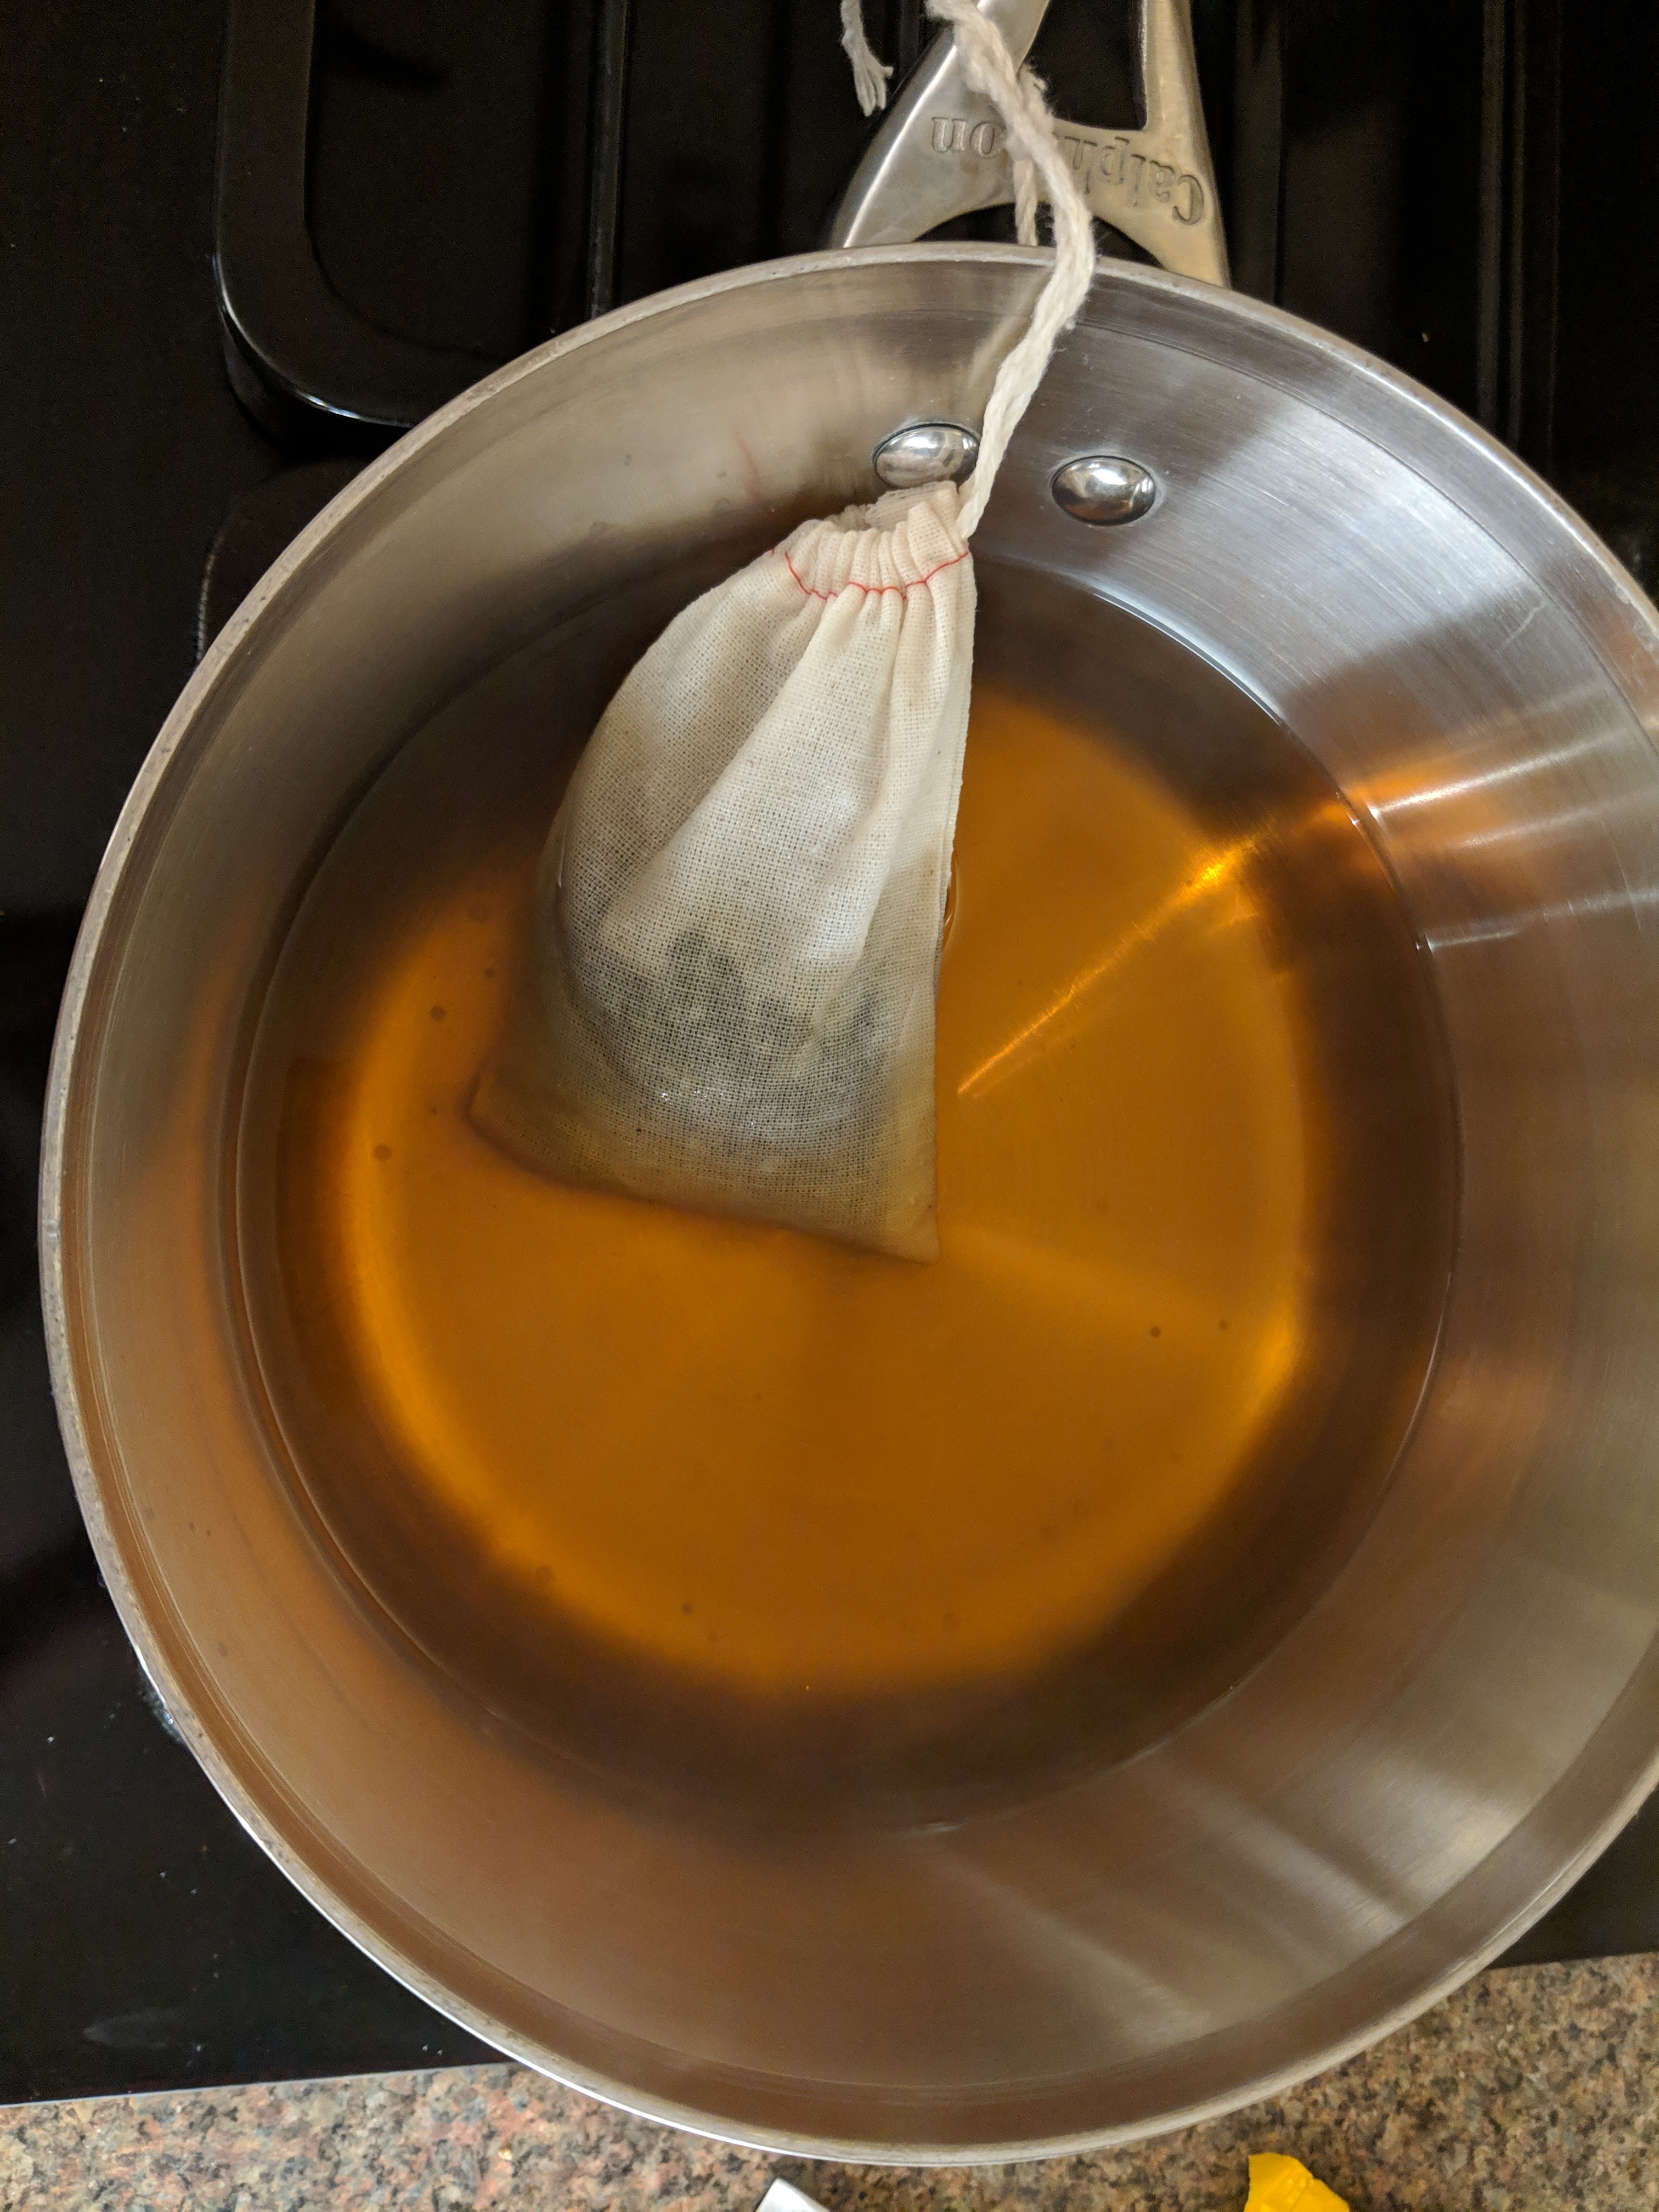
You start the process by brewing a batch of good strong tea. You can use all kinds of different teas and even blends of teas. It is fun to try a variety. You get all the healthy benefits of whatever tea you use. After bringing the distilled water to a boil, turn it off and allow your tea bag to steep for an appropriate length of time. Approximately 5 minutes is a good general rule. While the tea is still hot, add in a rather large amount of sugar. This exact amount will be different, depending on the quantity you’re making. It’s important to use regular processed cane sugar. Raw sugar and honey aren’t broken down the same way by the yeast, and don’t yield good kombucha.

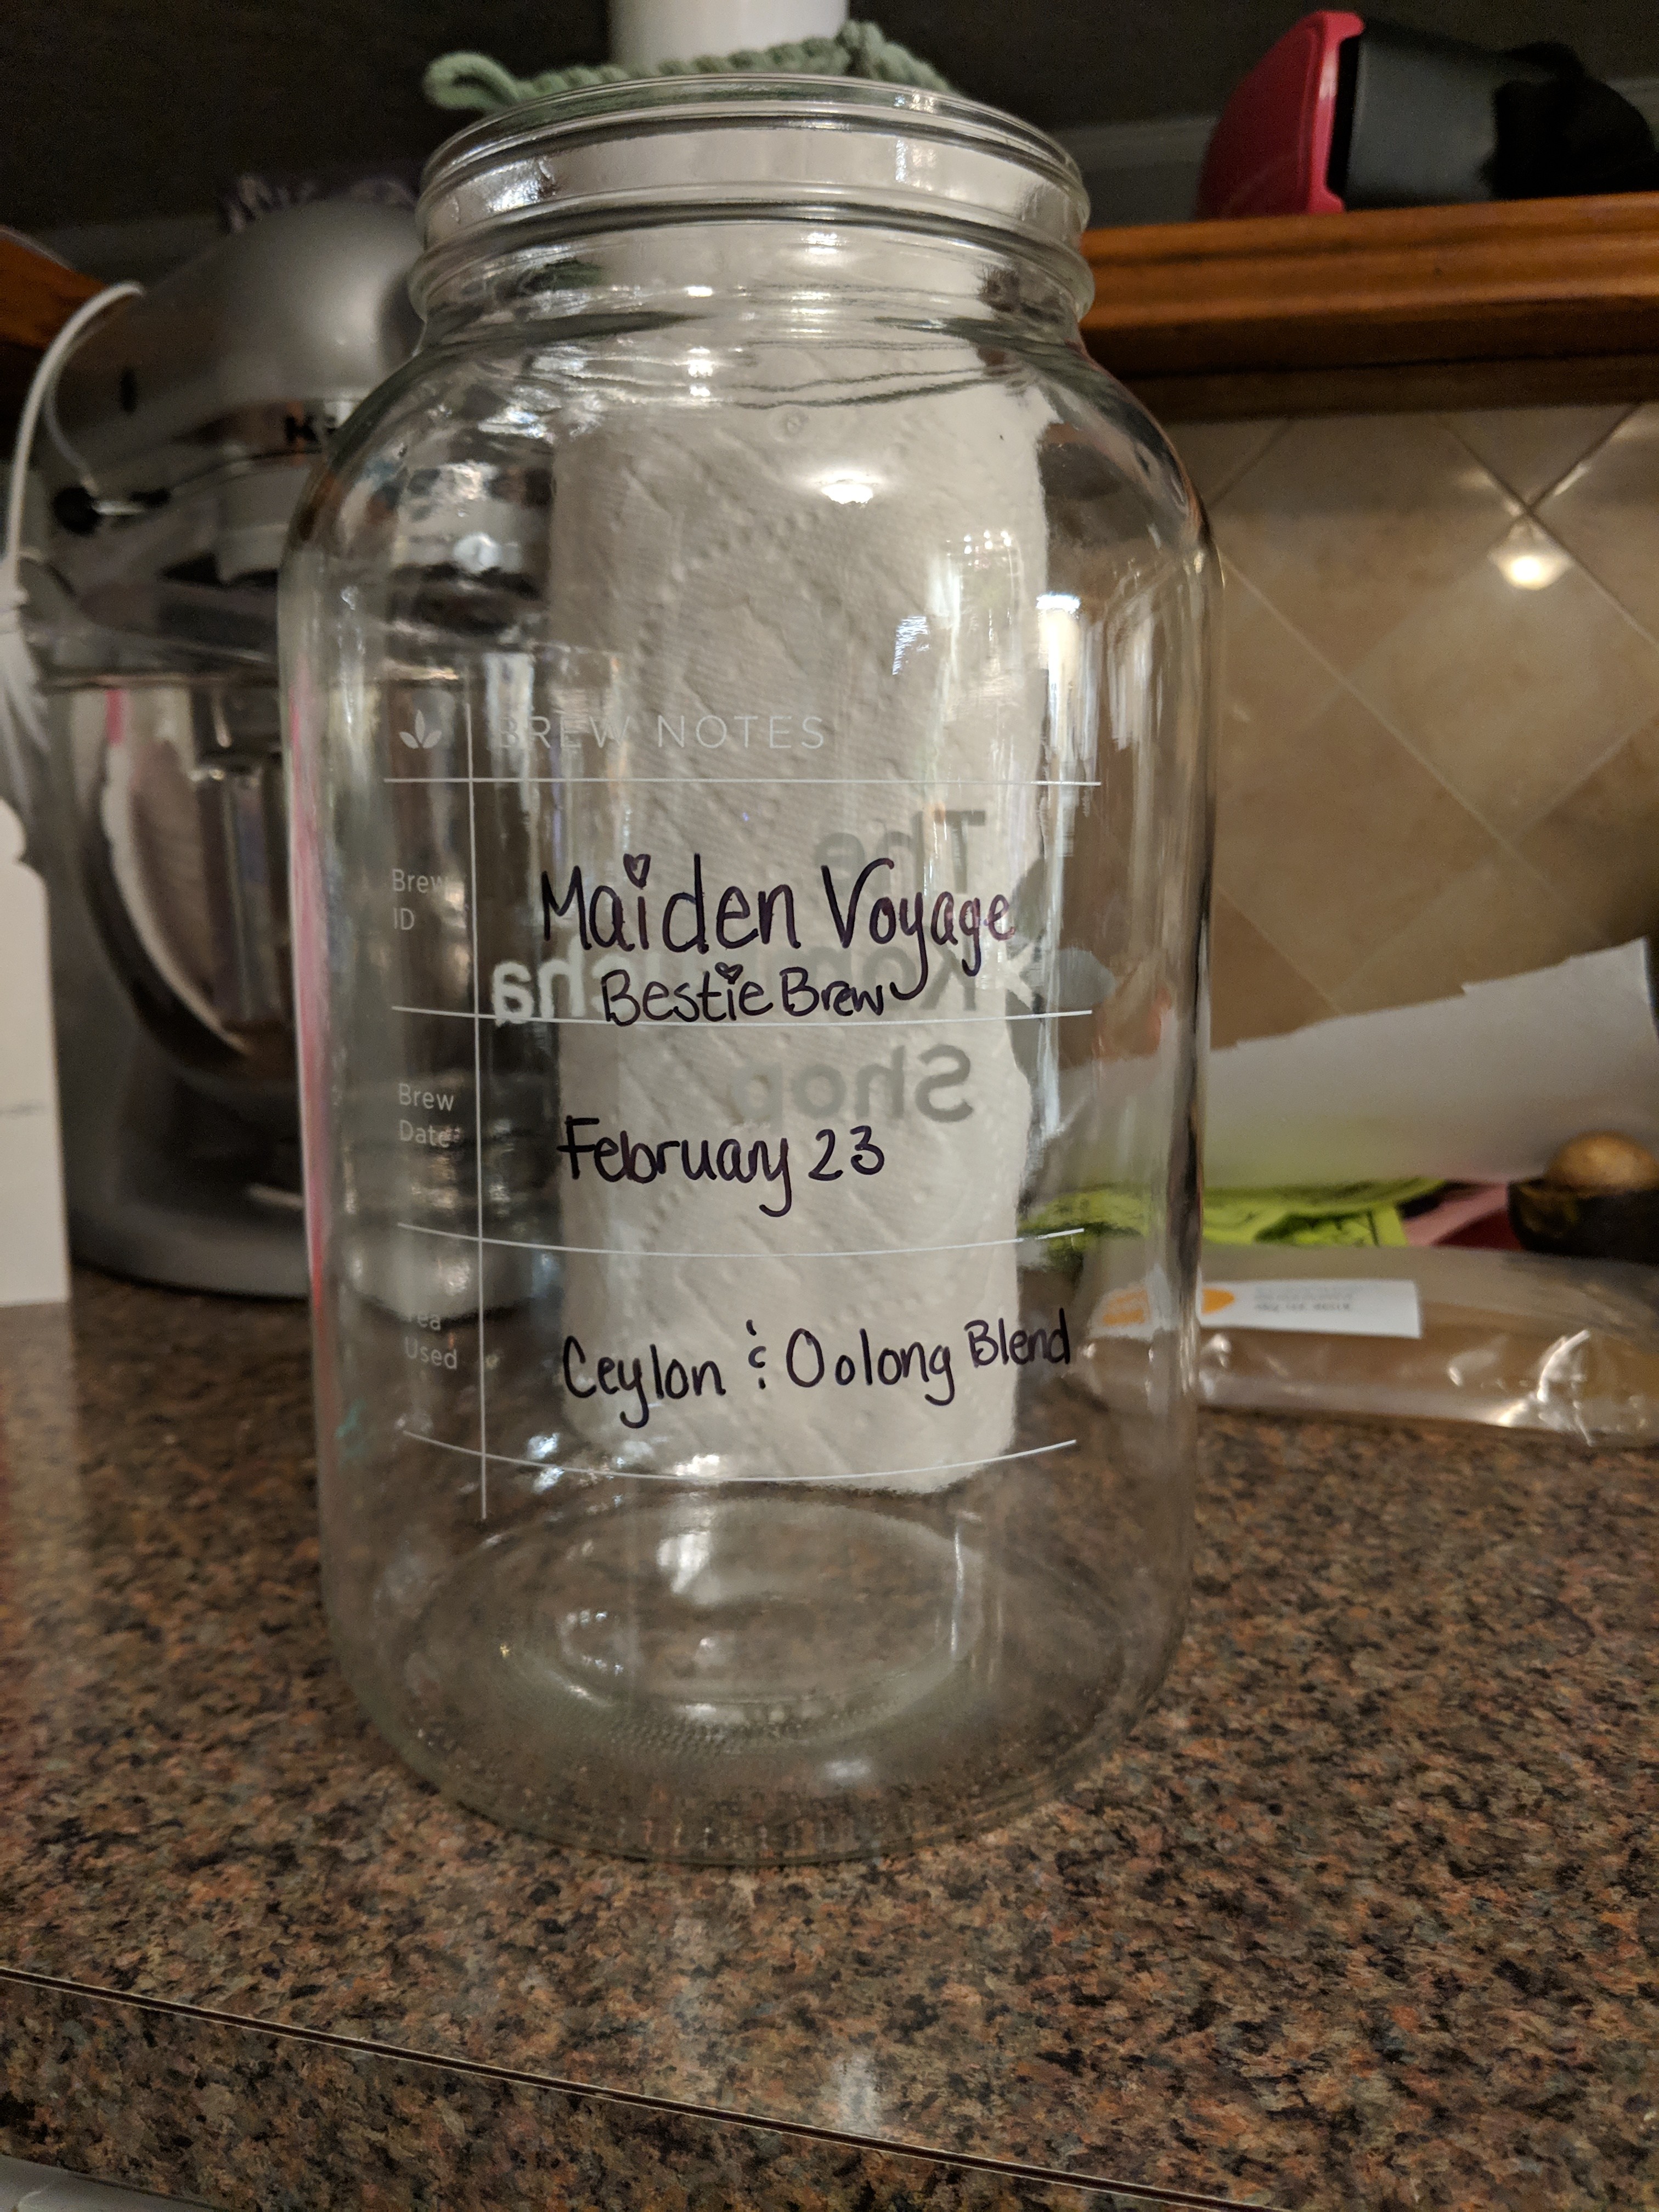
My kit came with a large gallon glass jar. It’s important to clean all of your brewing items well with a mild detergent. DO NOT use antibacterial soap! It will harm your SCOBY! After cleaning, I wipe down all my brewing equipment and even my hands with distilled white vinegar. After my jar was clean and wiped down, I attached an adhesive thermometer to the outside of the jar. Temperature is very important to monitor. I highly recommend placing these on all of your brewing jars.

I then poured my freshly brewed tea into the jar and filled the remaining part of the jar with cool distilled water. You want the jar to be about 3/4 full. The cool water will help bring the tea down to the temperature you want it. If you place the SCOBY in the brew when it’s too hot, it will harm the culture. When your tea reaches the target range of 72-84 degrees, you can gently pick up your SCOBY with clean hands, and place it into the brew. It’s also a great idea to add a small amount (a cup or so) of a previous brew to get things moving. After adding in your culture and previous brew, you simply place a piece of cotton cloth over the top and WAIT. The culture needs to be able to get air, hence the cotton cloth. DO NOT put a lid on your jar. The temperature ranges I mentioned, are ideal for the fermentation process. If it’s on the higher end of that range, fermentation will happen a bit faster, on the lower end, it will be slower. Generally you are looking at about 3 weeks before your first brew will be ready to enjoy.

img_20190223_201600

img_20190223_202132

img_20190223_210408

I placed my brew up on a high shelf in my kitchen, but quickly noticed that it wasn’t warm enough in that spot. The temperature of the brew was hovering just below the ideal range. I moved my brew upstairs to a shelf that was near a heat register, and was able to easily maintain the desired range after that.

After a few days to a week, you will notice a new layer beginning to form on the top of your brew. This is your brand new culture! A SCOBY forms in layers. The newest grow on the top. It’s important not to move the jar around much or jostle it so that you don’t interfere with the growth. At around a week you can begin tasting your brew and checking the pH. A good kombucha should have a low pH of around 3.2. This helps keep harmful bacteria from growing. My kit came with a big pack of pH strips, and I would highly recommend you keep some on hand. I gently use a pipette to draw out a sample without disturbing the growing culture. When the brew reaches your desired level of tartness, you can choose to either bottle it and drink it as is, or proceed to second fermentation.

Second fermentation is really just the addition of any flavoring items to your brew. I’m a big fan of fruit, so that is what I chose to add. It’s also important to get some good glass bottles for individual serving portions. You can see the “pop top” version that I used. They are available on amazon. Just as you needed to clean all the brewing materials initially, you will want to do the same with the bottles and materials you use for the second brew.

img_20190312_182229

I gathered a few different fruits and just tried a variety of flavor combinations. Place the clean cut fruit into the bottles and then just add kombucha until they’re mostly full. You  want to leave some air in for the second fermentation so it will be nice and fizzy. You then leave the bottles out to ferment a few more days. I generally do 3 days in the same location/temp as my big brew jar, before moving the bottles to the fridge. Once the bottled kombucha is chilled, it’s ready to drink!

The flavor combinations I tried first (pictured above) were:

  • Blackberry
  • Blackberry peach
  • Peach
  • Strawberry
  • Strawberry peach
  • Strawberry lemon

They were all FANTASTIC! I must say that the amount of satisfaction I get from hearing a great big POP when I open one of my home brewed bottles of kombucha is pretty serious. I also rather enjoy finding new flavor combos and naming them when I find a winner. As soon as I bottle a gallon, I start another brew. I now have a continual brew going at my house at all times! You can also store your SCOBY if you don’t want to brew again right away. Just brew some tea with extra sugar so it can survive while it isn’t being used. I also find it comical that while I was once barren in the SCOBY department, I now produce baby SCOBYs regularly. If I change my blogging name to Mother of SCOBYs don’t be surprised.

Have you guys brewed kombucha at home? Drop and tips, recipes, or tricks that you’ve learned!


Activities, attractions, Food

GreekFest 2018

0928181910

So a few weeks ago, we got to take part in one of my favorite yearly activities- GREEKFEST! If you’ve never been, add this to your yearly calendar! It is a good time for all ages!

I am always down for some delicious Greek food and dancing! This year, we tried a few new food items. Pastichio is a pasta dish that was somewhat similar to lasagna, and quite tasty. We also enjoyed some stuffed grape leaves (Dolmades) and Saganaki! The saganaki ended up being my new favorite. It is basically cheese that has been fried in Brandy so that it has a golden crispy exterior, while the inside remains gooey and delicious. They then slide this on a piece of crusty bread, and hit it with a little squeeze of lemon juice. YUM!

0928181955

If it looks like I was sitting in a random patch of grass close to the dumpsters, it’s only because I was. It was so crowded, there was NO PLACE to sit. We enjoyed our delicious food picnic style.

After eating, we watched all the dancing shows. I seriously don’t know how all those kids do that all day long. What a work out!

As soon as the shows were done, Neyland had to get in on the action and hit the dance floor.

Last year, I purchased Neyland one of the “jingle skirt” wraps that all the dancers wear. She was stoked to wear it to the festival this year, and has even worn it to dance class quite a few times. She felt quite “authentic” on the dance floor.

After trying out our Greek dancing skills, we hit up my personal favorite area- “The Wall-o- Baklava.” Ok, it’s really more than just baklava. It’s an entire wall of delicious Greek baked goodies. We got a lovely assorted box for the road.

0928182117

If you’ve never been to Greekfest, I highly recommend that you visit next year!

Check out their website HERE

You can thank me later! 😀

Food, Uncategorized

Busy Busy

It feels like the past week or so has been one giant whirlwind! We have had so many things going on, I feel that I can’t keep it all straight! We have had some company, an adorable little orphan to care for, some great food experiences, and made a lot of memories! Here are a few of the highlights…

A few short months ago, a friend introduced me to Indian cuisine. I had this crazy notion that I hated curry, and therefore I would hate all Indian food. HAVE I EVER BEEN MISSING OUT!!! It turns out that I actually love Indian food, and even curry dishes! The first thing that I tried was a pretty “safe” chicken dish called Tikka Masala. It was fabulous! Pair that with some garlic naan….I’m not sure that it gets much better than that!

Last weekend, I was able to go back to Sitar for their lunch buffet. I would HIGHLY recommend it. I was able to try a wide variety of dishes, all of which were fantastic. As an added bonus, the cost of the lunch buffet is cheaper than ordering a single dish off the menu. Even Neyland was thrilled with her lunch! Check out the pics below.

Check out their website HERE

*Only downside- they don’t have a menu that offers kid meals or kid portions.*


0916181357

0916181358c

That same afternoon, I received an urgent text during church from a co-worker who’s friend had found an orphaned chipmunk. It needed immediate care, so after lunch we were off to go pick up an new orphaned baby to care for.

img9508091

Neyland LOVES that we occasionally are tasked with the care of injured or orphaned animals. She has such a big heart for these guys just like her Mama. I am so pleased to be able to show her how hard work and compassion can help even the smallest of God’s creatures.

She quickly got down to the important business of “naming” our little friend. For whatever reason, she was determined to name her “Coconut Honey.” I’ve just been referring to her as “coco” for short. I am happy to report that with some nursing care and bottle feeding, Coco is doing GREAT! She should be ready to release in a week or so! Check out this recent image of her munching on a grape…

0921182135

Some other highlights this week included one of Neyland’s all time favorite activities:

MAKING SLIME.

0916181946

0916181946a

This “Rainbow unicorn slime” came from a kit that she got for her birthday. I personally think that the DIY slime has a better texture than this stuff did, but it was still fun for both of us!

0916181947

We ended the week with another rainbow colored treat! French Macaroons!

Would you believe that I had never tried a French macaroon before? I see really delicious looking recipe videos for these things all the time, and I’ve really been wanting to try some! We stopped by the French Market & Creperie, and got a little baggie of imported authentic macaroons. They were deeeeeelicious! I would also like to give them a big shout-out for their amazing strawberry & creme Crepes. (We didn’t get crepes during this visit, but I included an image from the last time we got them.)

Check out their menu & locations HERE

0925181513
The lemon & the raspberry were our favorites!

0313181458


featured, Food

German Night

GermanJagerschnitzel (1)

I don’t know if any of you guys have done much digging into your family name & origins, but it is something that is a HUGE interest to me. I’ve traced my family tree back REALLY far. I’m fortunate that my family kept a LOT of papers and diaries. I’ve been able to research using sites like Ancestry to corroborate a lot of my family history that has been passed down, and fill in any gaps. One thing that I always knew growing up, was that our family was originally from Germany. My family immigrated to New York very early on, and many of my relatives remain there today! This simple connection has always left me eager to learn more about my German roots.

Earlier this year, I was fortunate enough to visit a German restaurant here in Knoxville. Linderhof Restaurant was my first real exposure to German food. I was advised by a friend about what to get beforehand. I did end up trying the jägerschnitzel with fried potatoes, and had a variety of different “salad” type options which mainly consisted of cabbage & vinegar. All of this is perfect for me because I LOVE vinegar! Before going, I didn’t even know what jägerschnitzel was. If you’re unsure, let me give you the low down. Schnitzel is the main dish. It is a type of meat (usually pork), that is pounded thin, breaded, and fried. The type of “sauce” that is served with it, describes the type of schnitzel. In this case, “jäger” sauce, is a brown mushroom gravy. Jäger actually means “hunter” in German. It is supposed to be a sauce made with ingredients that a hunter might have at his disposal. Also, don’t let me fool you into thinking that I knew any of this. My friend educated me during dinner.

Dinner at Linderhof was amazing and I highly recommend it! It also has a pretty cool atmosphere! I’ve heard from more than one person that occasionally the owner will even come out an play accordion music while people eat. You can check out their website here. It has been under construction for a while, so following them on facebook may be a better option.

So that was my first and only dabble into German cuisine….until I hit the jackpot at Aldi last week. If you were unaware, Aldi is actually a German chain, so you can find a lot of cool German food there from time to time. Last week, their freezer section had a ton of options that I had seen on the menu at Linderhof. I decided to get a box of schnitzel and a spinach & feta strudel, and plan a German dinner for myself and the little one. Later in the week, it hit me that I had failed to consider the sauce for the schnitzel. Thankfully, the box includes a simple recipe for jäger sauce if you’re in a pinch. I wanted something a bit more authentic, so I held off until I could get back to the store. During a quick trip yesterday, I acquired a lovely carton of mushrooms and I quickly decided that Jägerschnitzel was in my immediate future! For the schnitzel, I just followed the directions on the box, and fried it to a lovely golden brown. The jäger sauce I made from scratch and it turned out AMAZING! (I’ll share the recipe below) The strudel, was just an easy “pop in the oven” type side, but it was quite good too! I don’t think it would be difficult to make your own schnitzel, and I’ll probably try that next time. This was an easy “first time” experience.

0918181745.jpg
Yum! Schnitzel!

Start your sauce first: It takes the longest, and allowing it to simmer a bit while you fry your schnitzel will only make it better! Start off with butter and onions. Cook until they start to brown. Then add garlic.

0918181710.jpg

0918181710a.jpg
Speaking of awesome Aldi finds: This bagged garlic is amazing! I HATE peeling garlic!

Add in those mushrooms and cook until the liquid from the mushrooms is gone! It smells SO GOOD!

0918181718.jpg

This is what you’re looking for. Next add in your flour. We are basically making a gravy. When you add this, it will get kind of sticky- that’s normal. Let it cook for a couple minutes before adding in your beef broth, vinegar, and spices. Be sure to scrape up all those yummy brown bits on the bottom of the pan! When you add in the liquids, you’ll begin to whisk until the mixture thickens, then allow it to simmer (covered) on low.

0918181722.jpg

The finished product should look something like this.

0918181735.jpg

0918181814.jpg

0918181817.jpg

Even the tiny human was impressed! She requested the leftovers for her lunch at school tomorrow!

Jägerschnitzel

Ingredients

  • Cooked schnitzel (See post)
  • 2 Tbsp butter
  • 1 yellow onion, finely chopped
  • 1 clove garlic, minced
  • 16 oz. fresh mushrooms, cleaned and sliced (I used baby bellas)
  • 4 Tbsp unsalted butter
  • 4 Tbsp all purpose flour
  • 2 cups beef broth
  • 2 tsp balsamic vinegar
  • 1/2 tsp sea salt
  • 1/2 tsp sugar
  • 1/4 tsp dried thyme
  • 1/4 tsp black pepper
  • +/- 1-2 Tbsp of heavy cream


Instructions

  1. Melt the butter (or bacon grease this will yield the most flavor) in a pan over medium-high heat and fry the onions until beginning to brown.  Add the garlic and cook another minute.

  2. Add the mushrooms and cook 5-7 minutes or until golden and the liquid from the mushrooms has evaporated.

  3. Add the butter and melt.  Add the flour, stir to combine and cook for about 2 minutes, stirring continually.

  4. Add the beef broth, vinegar, thyme, sugar, salt and pepper.  Whisk continually until the gravy is thickened.  Cover and simmer on low, stirring occasionally, for 5-10 minutes.  Add salt and pepper to taste.  If you prefer the gravy thinner add a little more water (or heavy cream if using)

    Serve the schnitzel hot and covered in the jäger sauce! Enjoy!


featured, Food, Parenting

Spaghetti Ice Cream

Spaghetti Ice Cream

Months ago, a picture scrolled across my newsfeed of what appeared to be spaghetti….upon examining the post closer, I was surprised to learn that it was actually ice cream! I thought it was such a cute idea, and I made a mental note that I wanted to try it sometime. Fast forward to this past weekend, when another image of alluring spaghetti ice cream scrolls across my phone screen. I decided to do some research about this dish, and try to make my own!

Cool things I learned: This ice cream dish is actually German! I wouldn’t have guessed that, but it worked out well for me since I decided to try it out on a friend who spent several years in Germany! If it isn’t obvious, this is a GREAT dessert option for kids! They are pretty stoked about ice cream that looks like spaghetti! Let’s get down to the details about how to pull this off in your own home so that you too can impress German friends and children alike!

Items You’ll Need:

0911181827.jpg

This crazy looking tool is a “potato ricer.” I got this bad boy from my Grandmother many years ago. I pushed it to the back of a drawer with no intentions of ever using it. I could not foresee a recipe that I would ever make that would require such a tool. I’m thankful for once, for my inability to part with things. I will say that it is preferred for this recipe, to have a ricer that has holes only on the bottom, but I was able to place a layer of packing tape around the sides to prevent leakage. It worked well, and got the job done. If you don’t have an ancient potato ricer that your Grandmother left to you, these guys are also available on Amazon. There are a lot of options out there, but HERE is a fairly cheap one.

0911181826_Burst01.jpg

The “meatballs” in this recipe are optional. There are also a variety of options that you can use to make them. I baked a batch of brownies the night before. Once they were cooled completely, I shaped them into small balls with my hands. I’ve also seen people use Ferrero Rocher candies, and even small scoops of chocolate ice cream.

0911181828.jpg

You’ll also need some frozen whipped topping. Use a small to medium sized scoop in the middle of your plate FIRST. This creates height & some extra flavor. I have been advised that an unsweetened cream version is the most authentic.

A bar of white chocolate can be grated using a standard cheese grater to give the appearance of “Parmesan cheese.”

0911181833.jpg

This was our finished product. It doesn’t take much, but adds a great visual detail to the dish.

0911181826.jpg

You’ll also want to have a strawberry sauce to use as the “marinara” for the spaghetti. I made a homemade sauce that was super easy and really good. I’ll include the recipe below. If you don’t want to make your own, you can purchase a pre-made version, or even warm up strawberry jam if you’re in a pinch!

Strawberry Sauce

  • 1 lb fresh strawberries (De-stemmed and chopped)
  • 1/3 cup Sugar
  • Fresh lemon juice (juice from 1/2 a lemon)

Combine all ingredients in a medium sauce pan over medium heat. Allow it to come to a boil. Reduce heat and allow to simmer for ~20-30 minutes. Let it cool in the refrigerator for a few hours or overnight. It will continue to thicken as it cools.

*I also used my immersion blender briefly to make it less chunky.*

0911181835.jpg

Finally, you’ll need some delicious vanilla ice cream or gelato. The most important things here are to get an ice cream free from chunky additives. Chocolate chips aren’t going to squeeze through that ricer. Additives also take away from the visual that we are going for here. The other important thing is to allow your ice cream to sit at room temperature to soften a bit. If it is fully frozen, it does not squeeze through the ricer well. The soft ice cream actually holds it’s shape better


0911181837.jpg

Now that we have everything we need, let’s discuss putting it together!

Directions

  • The number one tip I have is to freeze the plate that you will be making your spaghetti on. I placed my plate in a few hours before so it would be nice and cold.
  • After your plate is cold, scoop a small to medium size scoop of frozen whipped topping onto the frozen plate.
  • Next (using a separate plate) place the ricer on this plate so you can scoop the softened ice cream into it. You will certainly get some leaking and melting (hence the extra plate to catch the mess.) You’ll want to put a pretty large amount of ice cream in there.
  • Now that the ricer is full, pick it up and squeeze it out over top of your frozen whipped topping on the frozen plate.
  • Use a knife or spoon to scrape the bottom of the ricer and release the end of the “noodles.”
  • Next, cover the “noodles” in your strawberry sauce
  • If you are using “meatballs,” place them now
  • Finally, sprinkle the white chocolate “Parmesan cheese” over the top to complete your dish!
  • Get some pics and enjoy immediately!

0911181849b.jpg

I still plan to visit the restaurant that was featured in the original post!

You can check out their menu HERE.

I hope you and your kiddos enjoy this as much as we did!

Activities, featured, Parenting

Candy Cooking

Candy Cooking

Backup plans. They are important things to have. You probably never thought you would need them as a parent, but they are ever so helpful. We all know that parenting doesn’t always go as planned. You can plan events and activities with the utmost precision, but things happen & inevitably something will go awry. I like to keep a “mental list” of contingency plans for such situations. If I’ve specifically promised my daughter an exciting activity and the weather doesn’t cooperate, I can quickly pull out an appropriate substitute plan. One gadget that I keep around for tons of fun at the drop of a hat is the Poppin’ cookin’ Japanese candy cooking sets. These little kits don’t take up much space, they have a crazy long shelf life, and only require water to get started!

IMG_20180816_142339_778.jpg
Neyland mixing the “dough” for the dumplings and spring rolls

Each set comes with a little plastic tray with a variety of different sections for mixing and shaping the different parts of the dish you’re making. It also comes with a bunch of packets of different colored powder. The directions are pretty simple- Add water to the different packets. The amount and location you should mix them are all found on the directions. Depending on your kit, you may then take the resulting “dough” or liquid and place it in a separate area to shape it. The “ramen” kit we were making here, also had accompanying “spring rolls” and “dumplings.” The packaging even doubles as an area to roll out dough and place the “food” for cool photo ops.

IMG_20180816_142339_773.jpg
Our “dumplings and spring rolls” are complete!

One of our previous kits involved making candy “sushi.” We had fruit roll up “seaweed” and even had to make salmon roe! As different as all the dough and liquids looked (at least in that previous kit) I was amazed that all the elements tasted the exact same! This time, the “broth” in the ramen did have a different flavor.

IMG_20180816_142339_774.jpg
Dropping in our “ramen noodles”

I’m always transfixed at the chemical reactions that obviously take place when you make these kits. I will be the first to say that I don’t understand how they work, but they’re pretty cool to watch!

IMG_20180816_142339_776.jpg
Victory!

IMG_20180816_142339_771.jpg
Trying out the noodles

IMG_20180816_142339_780.jpg

IMG_20180816_142339_765.jpg

The first time I saw these kits, I believe it was on youtube. I happened across them in a local Asian market here in Knoxville, and decided to give one a try. I’ve even ordered them off Amazon. They are generally pretty reasonable at around $3-4 per kit. Here is the link to the Sushi Kit on Amazon. So far, we have made the sushi kit, an ice cream kit, a doughnut kit, and this ramen kit. The Sushi and Ramen kits were our favorites by far. They were more intricate and took longer to make. I will say that some of the parts are small and therefore not for tiny kids. As always, watch your kiddos closely while they do this. I read the instructions and let Neyland mix the water and powder. We form the shapes together, but I’m sure that an older kid would have no problems with doing that part alone.

*Disclaimer* I am SURE the nutritional value in these kits is zero. Keep in mind that they are candy, and should be used as an occasional treat.

Have you made a Poppin’ Cookin’ set before? Which is your favorite?