Activities, featured, Parenting, Uncategorized

101 Dalmatians

It may be time to let you guys in on a secret weapon of mine that is also very useful in helping me plan our Disney meals…Aldi. Yes, this amazing little store is a FANTASTIC resource for cool seasonal food items. They have different food items from around the world at various times throughout the year. I’ve been a customer long enough to know approximately when and what to expect during each season. Whenever I see something interesting or unique, I pick it up and see if I can work it into a cool dinner. They also have a great selection of tried and true year round items that I can always count on. One of their routine items was instrumental in creating our yummy dinner from the United Kingdom for 101 Dalmatians night!

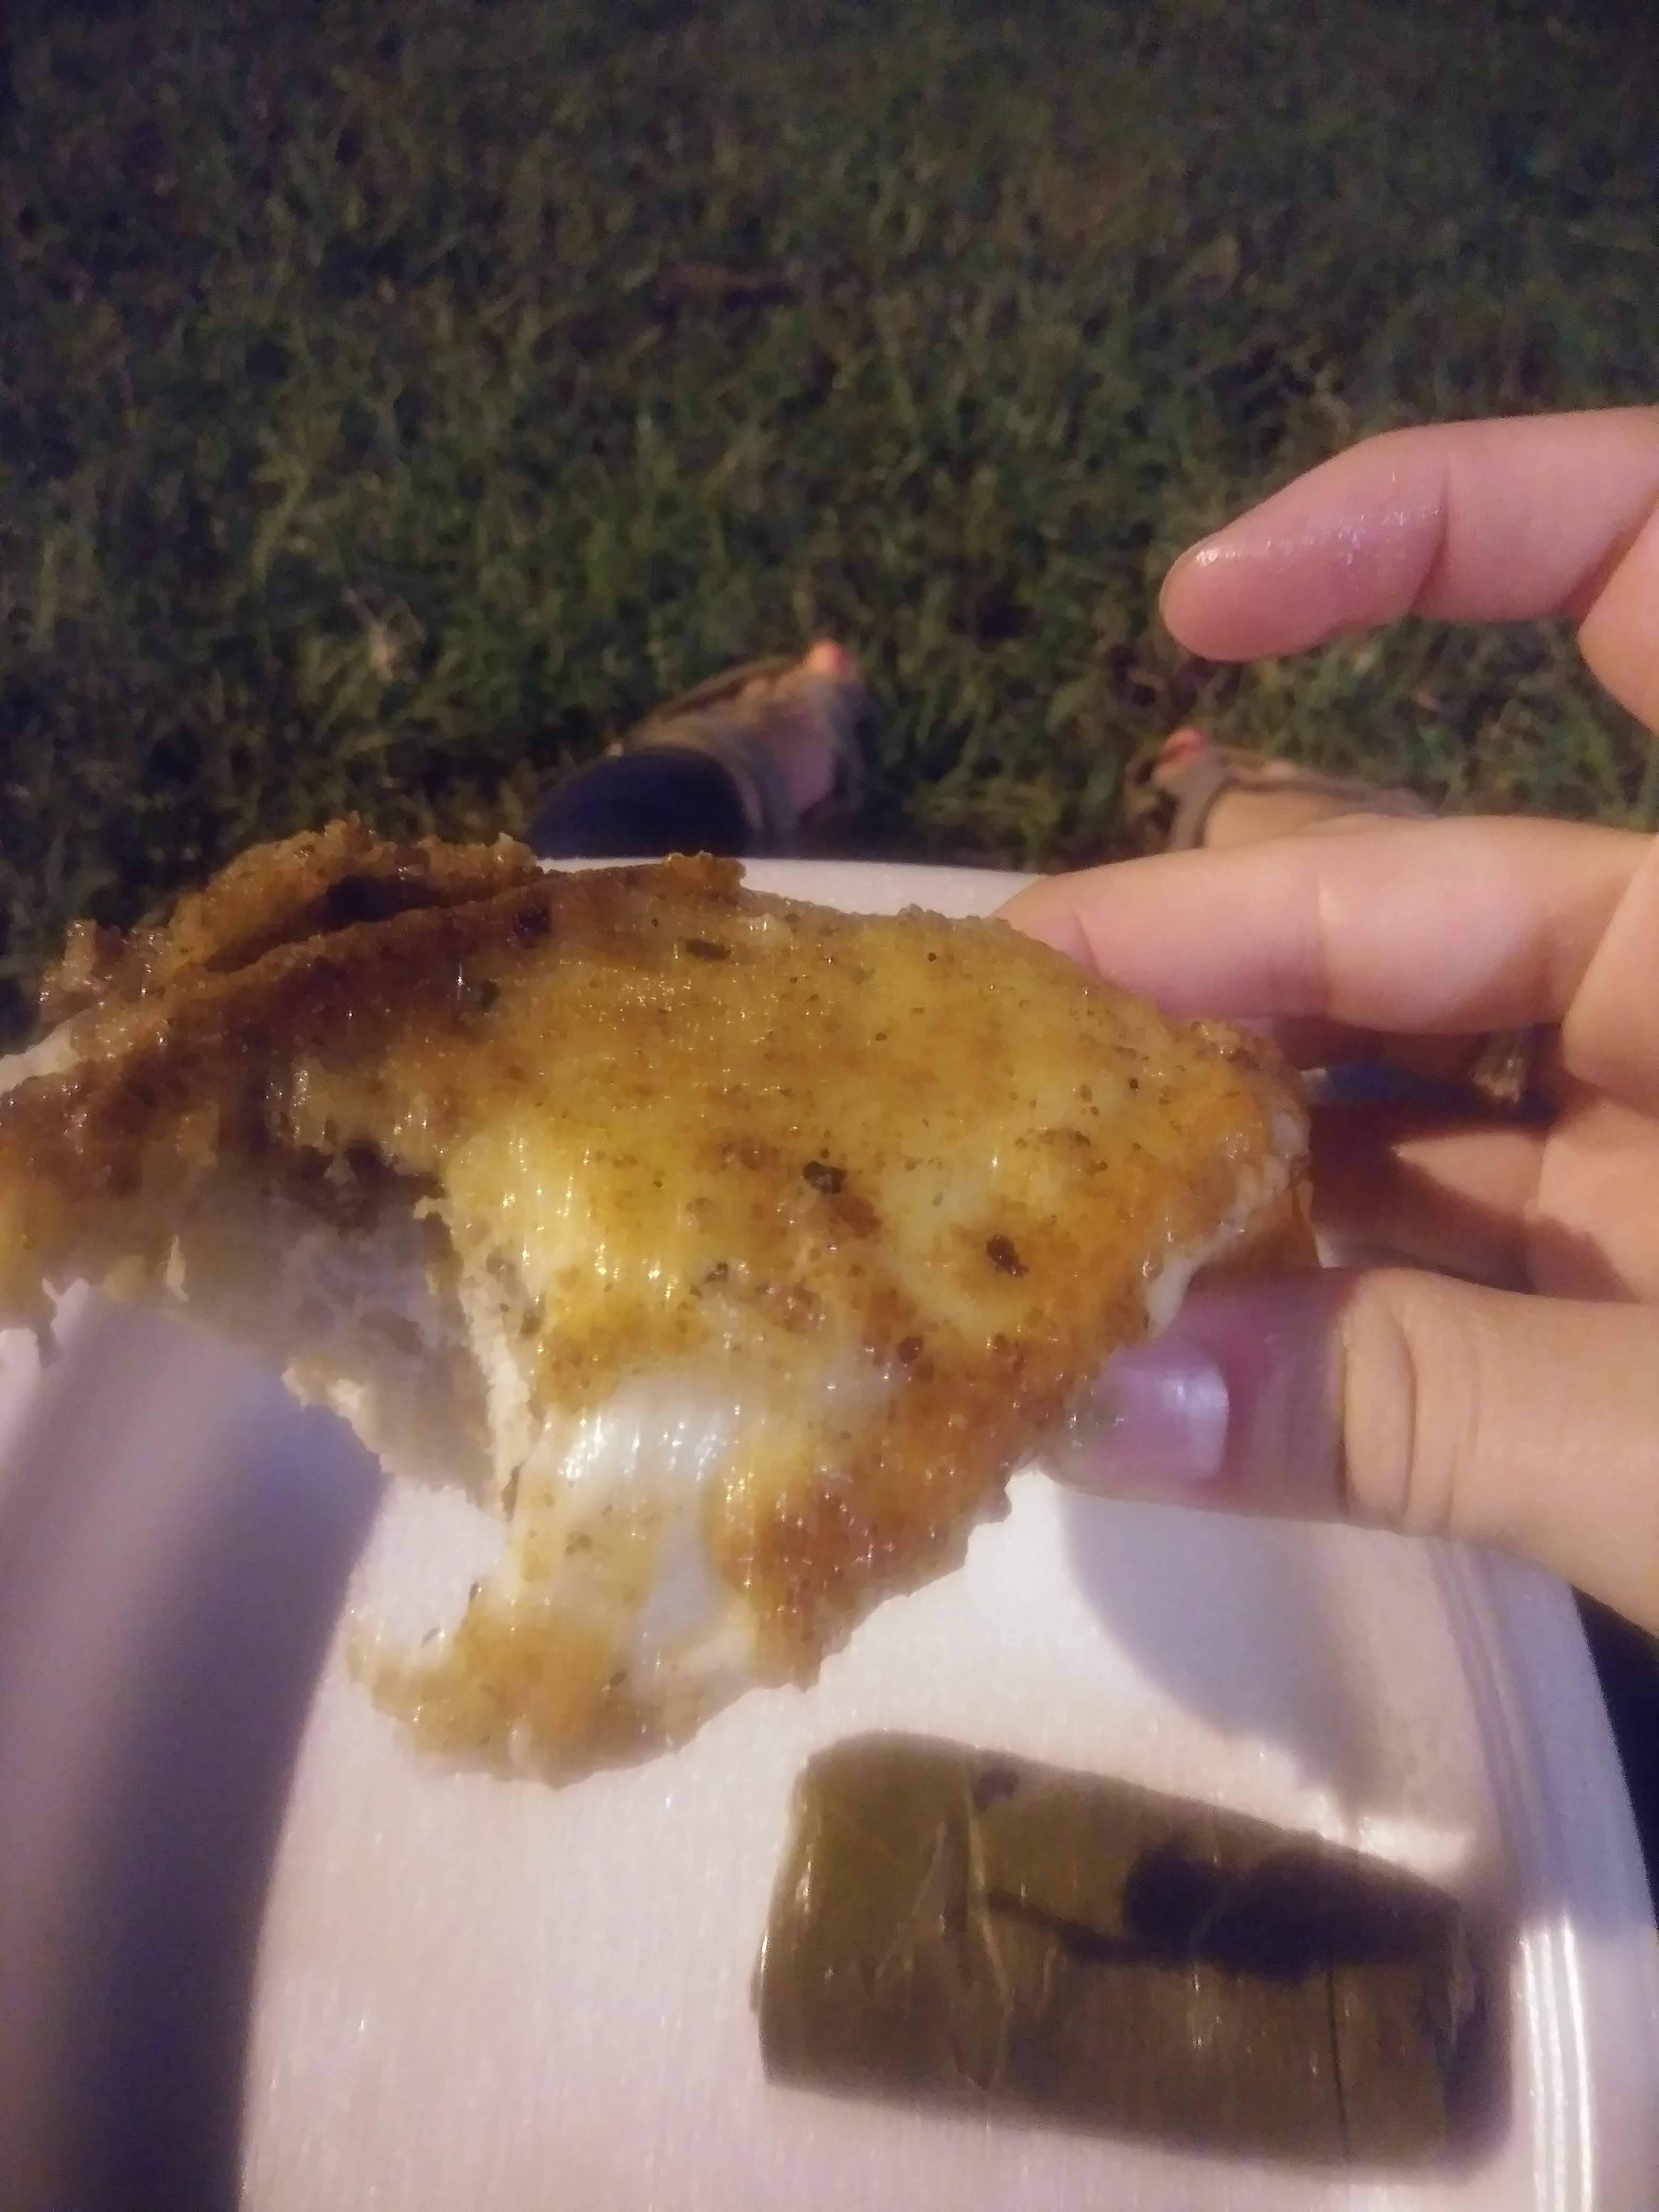
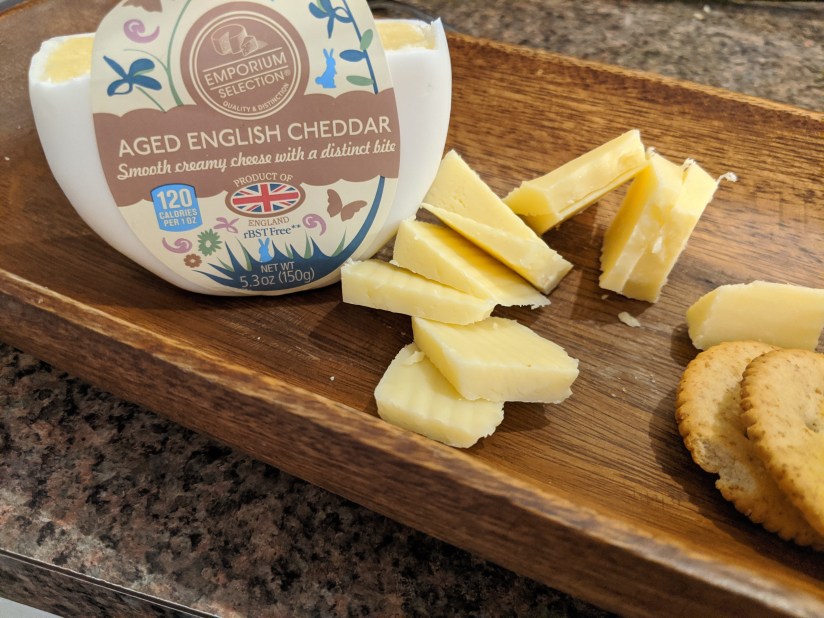
When I think of the U.K. one of the first dishes that comes to my mind is…..FISH AND CHIPS! I’d say that’s probably the number one answer you would get from most people. It’s also easy to make, and kid approved! This dinner was another one of my quick and low maintenance dinners. I like to do a mixture of both so that our Disney dinners are always special but not overwhelming. I scored big on my trip to Aldi with some aged English cheddar. Cheese is one of the best things ever, so I couldn’t pass it up. This is for sure one of those odd ball seasonal items. When I happened upon it, I grabbed it and built dinner around the idea of visiting the UK. *Pro tip: when you find one item from a particular country, look around because there are often others from the same area.* Thankfully Aldi always carries a great selection of beer battered fish and french fries (aka chips,) so the rest of the meal was super easy to put together.

I’m not one to generally fry much of our food, but since this meal consisted of both fried fish and chips, I did it up right. I didn’t have any newspaper to put our food in, but I did have some food baskets from a birthday party a few years back that helped complete the “pub food” look I was going for. We served them with fresh lemon wedges and malt vinegar. For the adults, we also nabbed some Fuller’s London porter to complete the meal.

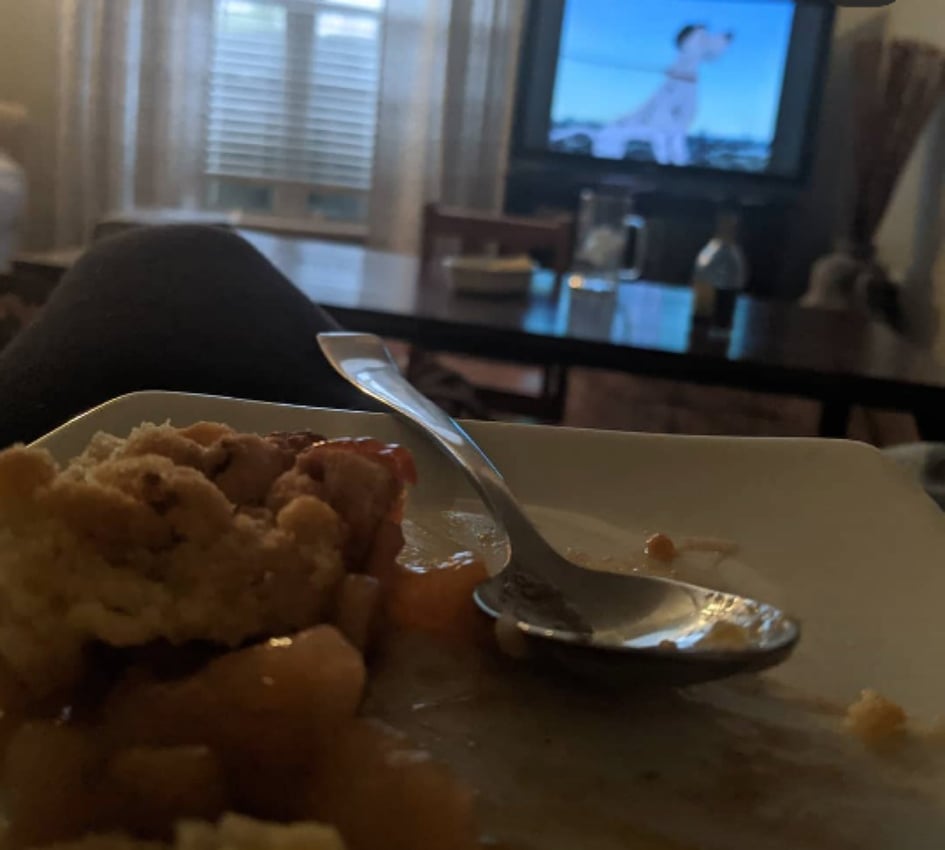
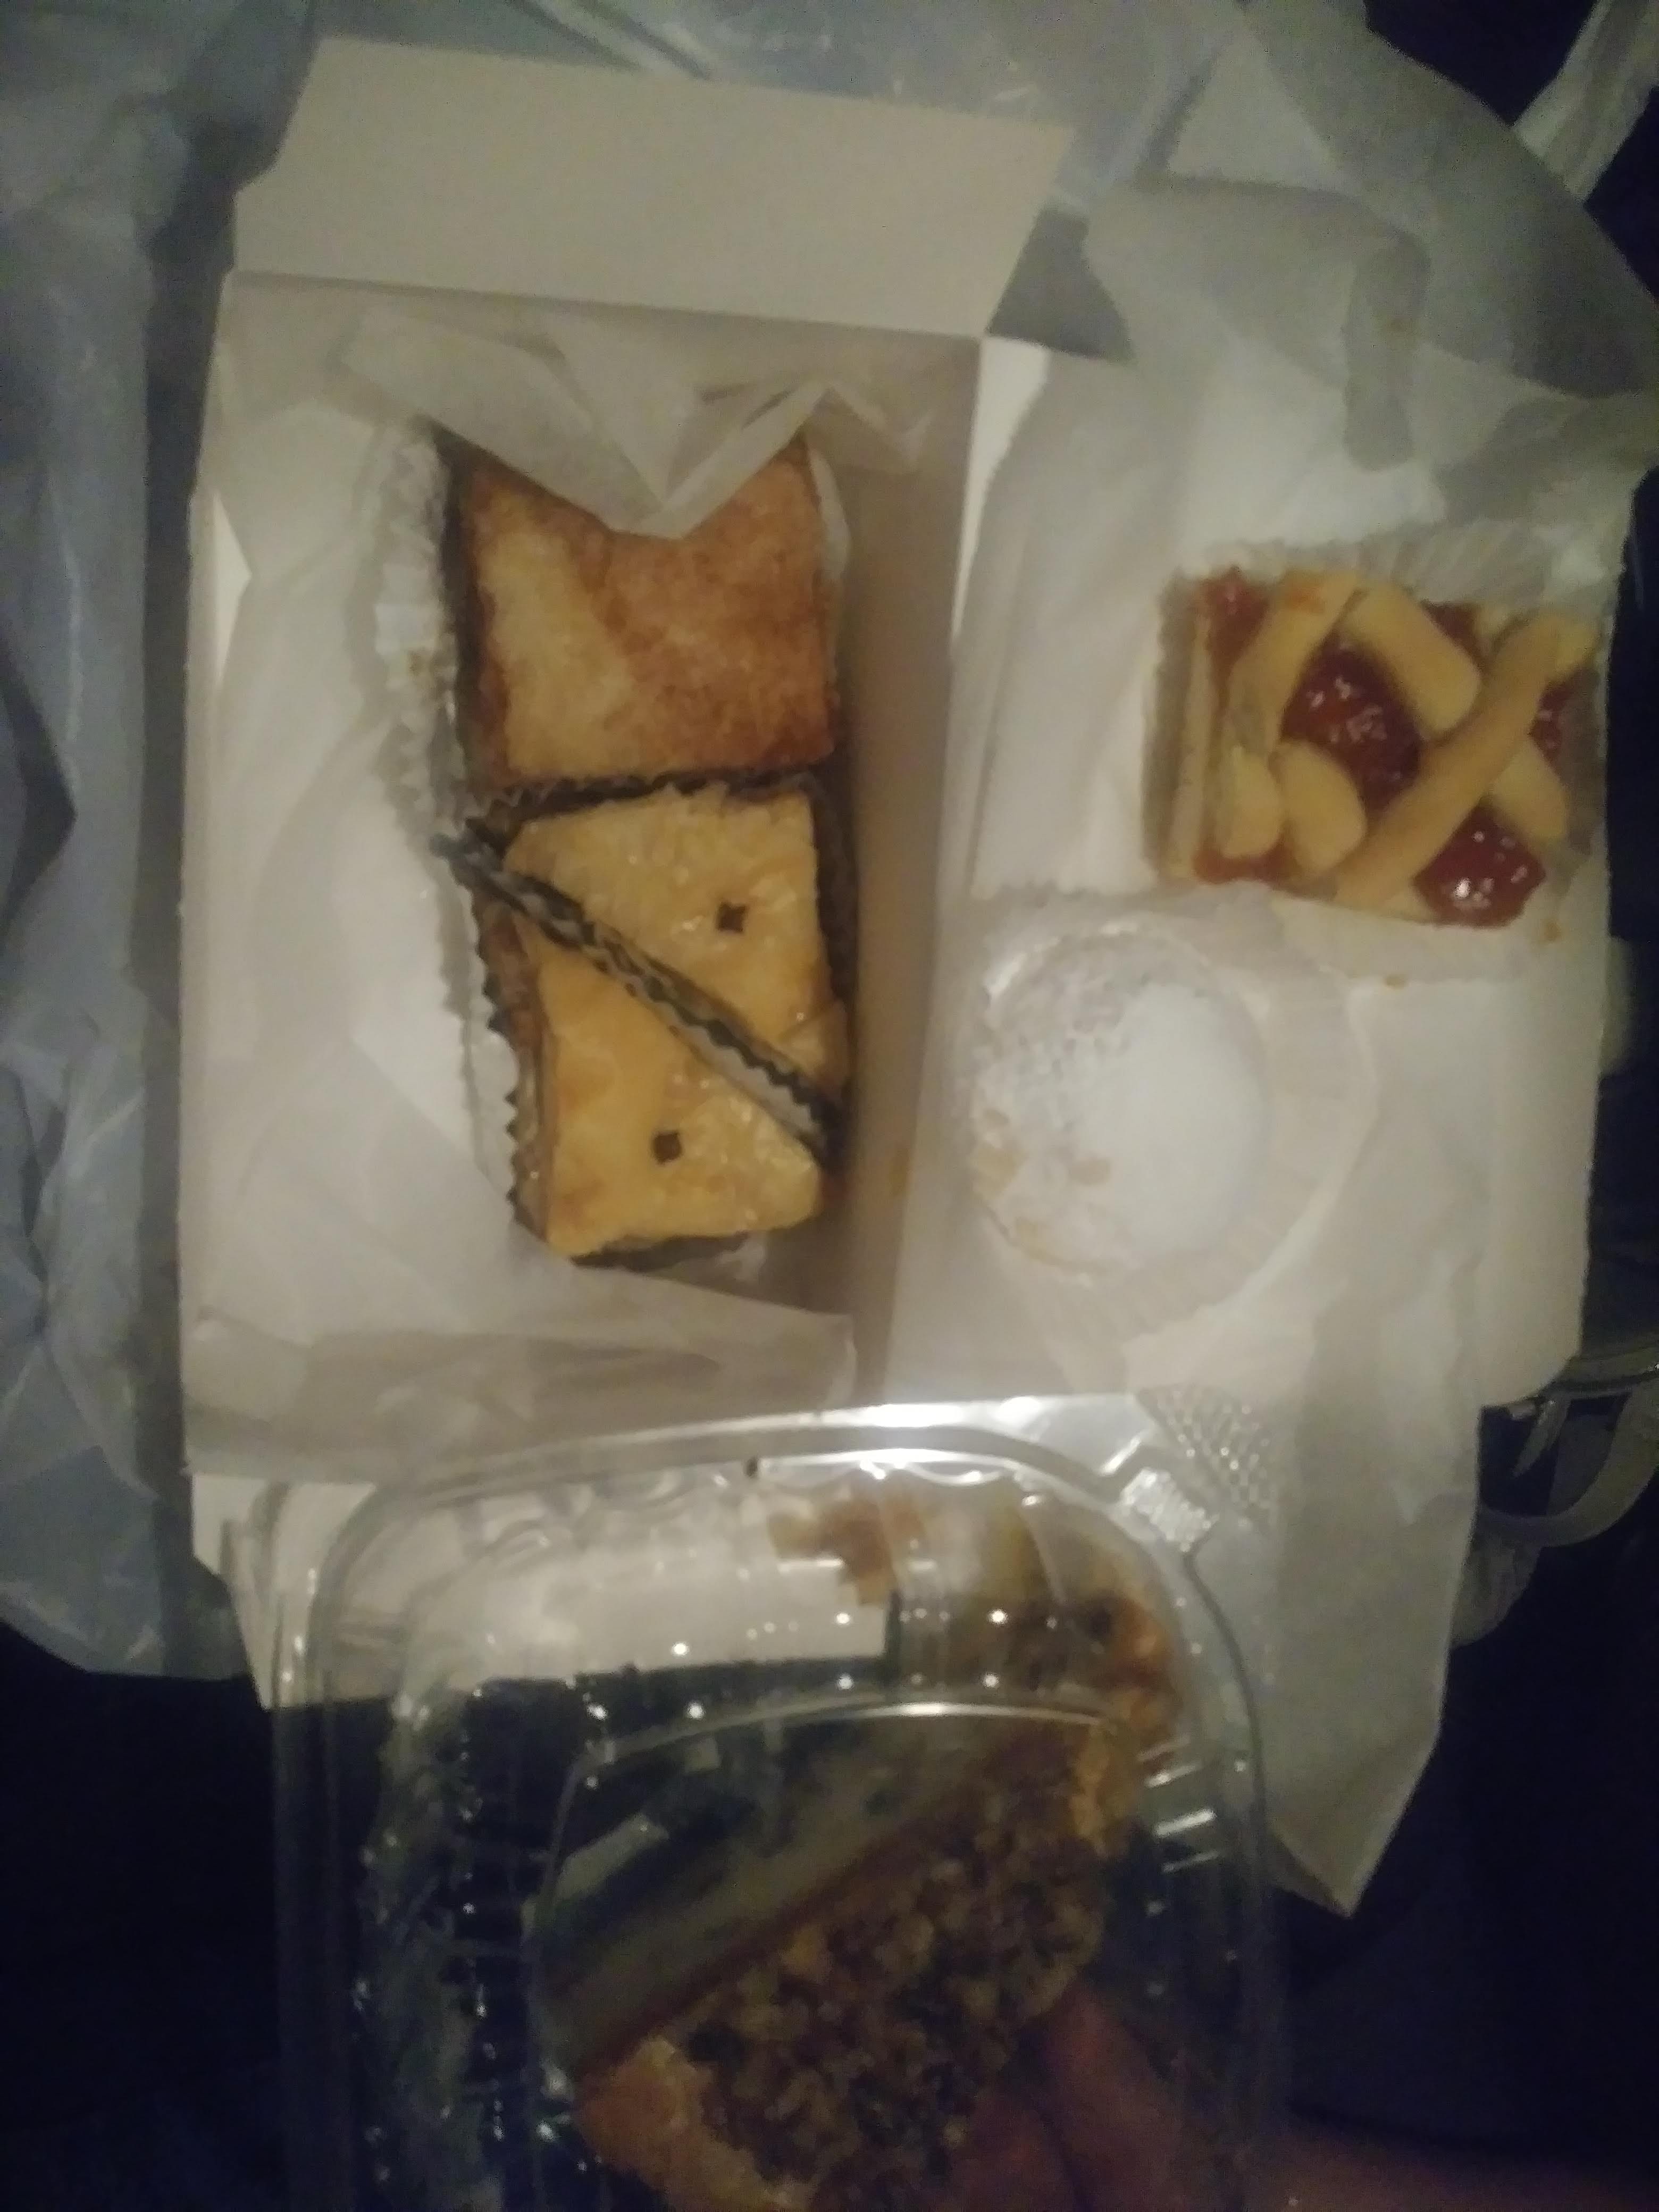
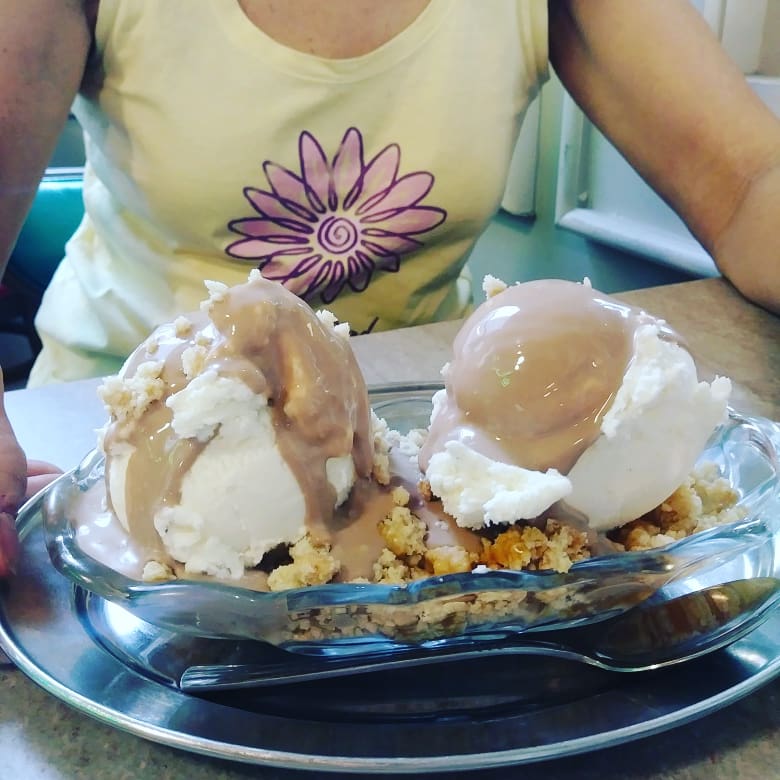
For dessert, we enjoyed an apple crumble! (Again, store bought since this was a low maintenance dinner.) When I revisit this again, I hope to shoot for black and white iced cookies as a play on Cruella’s hair. There are a ton of possibilities!

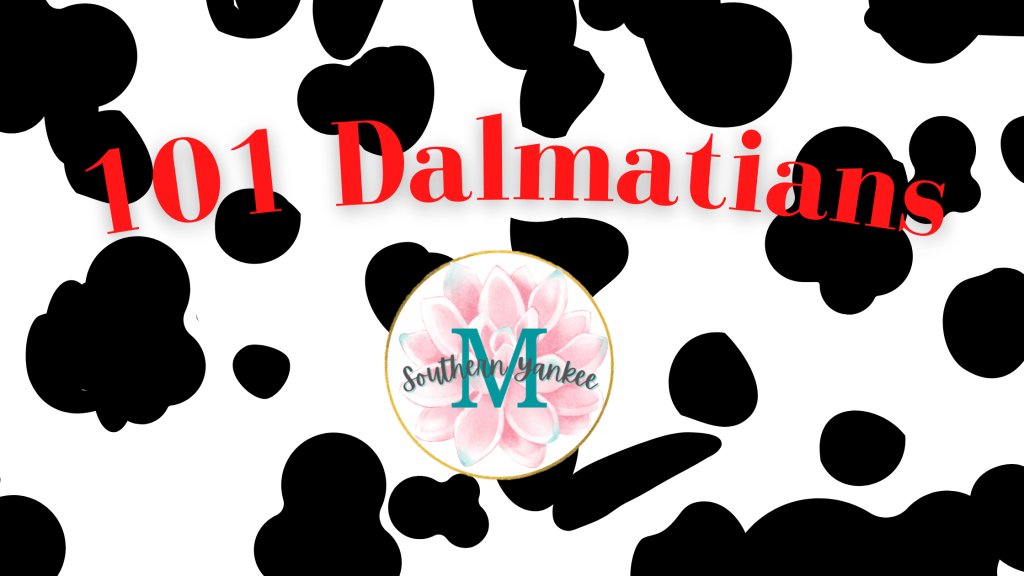
This is probably also a great time to mention that Cruella is my all time favorite Disney villain! She has got all the sass, fashionable (excluding the puppy coat idea), she’s a wild driver, AND she has her very own theme song! Who is your favorite villain and why?

Activities, DIY, featured, Food, Parenting, Uncategorized

Toy Story

Being a single Mom can make it hard to plan and execute intricate dinners. Spare time is a hot commodity around here, so I like to have “backup plan” style Disney dinners that are a bit easier and require less from me. Thankfully, you can adjust movies and dinners to fit your time and budget. Be as fancy or low key as you want to be! I made it a personal rule that when I started doing these dinners, they were not going to be a source of stress. I was going to have as much fun preparing as we do watching and enjoying. If I am short on time, or just not that into it one week, I reach for an easy movie that allows me to sit back and relax more. As moms we ALL need those kind of dinner nights! That brings us to….TOY STORY!

One of our FAVORITE places in the Disney parks is Toy Story Land in Hollywood Studios! The first time that I visited Disney was in high school. Way back then, Toy Story Land didn’t exist! When I got to go with my daughter, it was my first experience and I literally felt like a big kid!

There are giant toy blocks, tinker toys, and parades of green army men. There is so much to do and look at! You literally feel like a toy! Our favorites from Toy Story Land were:

1- Slinky Dog Dash!!!!!

2- Toy Story Mania

3- I’m sure WOULD have been Woody’s Lunchbox (but it was closed due to COVID) Those pop tarts are high on my list for next trip!!!

Slinky Dog was SUCH a fun coaster and it really gives you the sensation that you’re really on a slinky! We rode it multiple times that day. My Mom (who is NOT a coaster fan) really liked it! No flips or crazy turns makes it great for kids and the less adventurous.

Toy Story Mania is another fun shooting game a lot like Buzz Lightyear’s Space Ranger Spin in Magic Kingdom. I like Toy Story Mania a lot more. I find it easier to shoot and less overwhelming than the Buzz ride, but both are certainly fun! (Plus the ride line for both of these rides is mostly indoors and in the AC!)

So how did we bring the magic of Toy Story home for Disney Dinner Night???

Repeat after me: Free printables from other awesome Mom bloggers

Visit http://www.thesuburbanmom.com for this Pizza Planet Printable! (And others!)

That’s right. I ordered pizza, and slapped a “Pizza Planet” printable on the box. BAM! Instant dinner. We also had other kid options like juice boxes and soda for the adults.

The day before, I had made time to bake some green cupcakes in blue foil wrappers. They had plenty of time to cool, and then the day of, I only had to frost and decorate them! To complete the alien cupcakes I just used food coloring to color store bought buttercream frosting, and piped it into big goopy alien piles. Add 3 little candy eyeballs and you’ve got alien cupcakes! AND the perfect setting for a Tiktok that was just asking to happen….

A year or two ago, Neyland had a dance show that used a costume loosely based off of “Jessie” from the later movies. We used that as Neyland’s outfit, and I dressed in lime green shorts and a purple tank top with purple eye shadow to be the Mom version of Buzz Lightyear!

We decorated with wooden blocks, plastic army men, and tinker toys that we already had around the house and also elected to go out in the yard and make exploding soda with Mentos and Diet coke because that seemed like a fun “kid” activity. It was pretty entertaining seeing everyone run from the jet of soda shooting everywhere!

Overall this was a fun and relaxing dinner theme that really let me step back and enjoy. With all the pizza, toys, and cupcakes I felt like a kid again too!

Activities, featured, Parenting

Pumpkin Potion

Pumpkin (2)

1018181204b

It’s no secret that I’m OBSESSED with the holidays. This time of year, I look for any excuse to merge my every day life with the upcoming holidays. I also find myself being insanely busy! I try to squeeze in so many fun fall activities (because it IS my favorite time of year) that I literally would fall apart without my google calendar to keep me straight!

This week, for our “science experiment Tuesday,” I merged Science with fall for this super fun pumpkin potion experiment. This is a classic experiment with a fun fall twist that is entertaining for all age groups. I did this activity with a few kiddos of different ages this week, and all were pretty thrilled with it.

The good news? You probably have most of this stuff hanging around your house already. Simplicity is definitely a plus for busy Mamas! So what do you need?

Supplies (1).jpg

Step 1

You’re going to channel all of your inner fall energy and carve your adorable baby pumpkin! You can carve any design that you like. I chose to put a traditional face on our pumpkin, but I would say that any design that features many small shapes or holes would be super fun. We also used this time to play in pumpkin guts….because it just has to be done, and sort out all the pumpkin seeds for baking!

I used a cleaning pan to do this entire experiment in to contain the mess. I would HIGHLY recommend that you do the same!

1018181136

A happy little pumpkin face!

Step 2

Now that your pumpkin is carved, it’s time to get to work on the potion. The potion is a super simple science experiment that involves a bubbling reaction when you combine vinegar and baking soda. To make it more visually exciting for the kiddos, here is what I recommend.

Get a small/clear plastic cup that can be cut to fit into the pumpkin. This cup will hold the ingredients for the reaction….ya know, since our pumpkin has face holes.

1018181146

1018181146a

Make sure that it can fit inside without much extra space, but ensure that the lid of the pumpkin can still fit on as well.

Step 3

Fill the cup 3/4 way full with the vinegar and set it down inside the pumpkin.

Step 4

This is the time where you can really be creative with your potion. We want to add a good squirt of dish soap so that it will get REALLY bubbly. I also add some food coloring at this point. We generally run this experiment through a few times, so there will be an opportunity to do more than one color. I generally let each kiddo pick one color, or a combination of colors to add. You can also add glitter or confetti stars to make your potion super special. Once you have all your “add ins” in the cup, use one of the spoons (from this point forward, this will be your “wet spoon”) and gently stir the vinegar mixture.

1018181148

Step 5

This step is when all the magic happens. I let my little one take control of the “wet spoon” so that she can stir the potion as I add the “secret ingredient” aka baking soda. I use the “dry spoon” and add a heaping spoonful of baking soda to the vinegar mixture and allow Neyland to stir it up for a few seconds before putting the lid on the pumpkin and watching potion gush out of it’s mouth and eyes!

We hope you and your kiddos have as much fun as we did with this! Have any other fun fall activities or ideas?? Drop them in the comments!


Activities, attractions, Food

GreekFest 2018

0928181910

So a few weeks ago, we got to take part in one of my favorite yearly activities- GREEKFEST! If you’ve never been, add this to your yearly calendar! It is a good time for all ages!

I am always down for some delicious Greek food and dancing! This year, we tried a few new food items. Pastichio is a pasta dish that was somewhat similar to lasagna, and quite tasty. We also enjoyed some stuffed grape leaves (Dolmades) and Saganaki! The saganaki ended up being my new favorite. It is basically cheese that has been fried in Brandy so that it has a golden crispy exterior, while the inside remains gooey and delicious. They then slide this on a piece of crusty bread, and hit it with a little squeeze of lemon juice. YUM!

0928181955

If it looks like I was sitting in a random patch of grass close to the dumpsters, it’s only because I was. It was so crowded, there was NO PLACE to sit. We enjoyed our delicious food picnic style.

After eating, we watched all the dancing shows. I seriously don’t know how all those kids do that all day long. What a work out!

As soon as the shows were done, Neyland had to get in on the action and hit the dance floor.

Last year, I purchased Neyland one of the “jingle skirt” wraps that all the dancers wear. She was stoked to wear it to the festival this year, and has even worn it to dance class quite a few times. She felt quite “authentic” on the dance floor.

After trying out our Greek dancing skills, we hit up my personal favorite area- “The Wall-o- Baklava.” Ok, it’s really more than just baklava. It’s an entire wall of delicious Greek baked goodies. We got a lovely assorted box for the road.

0928182117

If you’ve never been to Greekfest, I highly recommend that you visit next year!

Check out their website HERE

You can thank me later! 😀

Activities, featured, Parenting

Leaf Rubbings

LeafRubbings

It’s officially September! What does that mean??? It means that I can now shamelessly put up all my fall and Halloween decor without feeling guilty or embarrassing my neighbors! It means that I am now in full fledged “fall mode” despite the fact that it is still sweltering outside! Check out this little sneak peak of our fall mantle this year…

0904181118.jpg

I think it’s interesting that as a child, fall was my least favorite season. I’m certain this had something to do with school starting, and summer being over. As an adult, I simply adore the chilly air, the beautiful colors, fun recipes, and tons of holiday activities. As an adult, fall is now my absolute favorite time of year. I LOVE any excuse to decorate, and fall marks the beginning of “decorating season.” A mantle is a blank slate just waiting to be transformed. I used to be a purist when it came to fall decor. I never decorated with anything “Halloween themed.”I stuck with pumpkins, corn stalks, and hay bales.  I’ve always been under the opinion that Halloween decor was fake looking and somewhat “trashy.”  In the past few years, I’ve grown to appreciate the addition of a few Halloween pieces to my own decor. I think i prefer simple and more classic looking Halloween decor for my own home, but I’m open to anything that’s done up right! Here I utilized dried birch branches offset at different heights on the left. I also purchased some cut out bats a few years ago from Big Lots. I always stick them to the walls and decor on the mantle to add some depth. They are also waterproof and I use them outside on my porch as well. I have a few old windows and pictures that I rotate on the mantle throughout the year. I generally pick the oldest & spookiest looking window for this time of year. The rest of the decor was picked up during yard sales, and post holiday sales. I always keep an eye out for things even out of season to score a great price!

After decorating, I let Neyland chose our project this week. She chose to do leaf rubbings! This is one of our favorite fall activities, although we actually do it several times throughout the year. It’s also a nice way to get some “fall artwork” up in your home!

We started out by venturing out in our yard to collect some cool looking leaves. You’ll want to take the time to pick ones that have super cool patterns and shapes. Here are the ones that we chose.

0904181245c.jpg

0904181245a.jpg

If you can’t tell from the picture, she was pretty excited about this!

After you get your leaves, you’ll need a few sheets of white paper, some crayons, and a smooth surface. Let your little one pick a few leaves and place them on a sheet of paper. Next, place another sheet on top of the leaves and use a crayon to “rub” the pattern of the leaf onto the paper.

0904181250.jpg

0904181250b.jpg

0904181251a.jpg

You may want to help your kiddos hold the paper nice and still. Mine has a tendency to move the top paper around and lose her place on her leaf.

0904181258b.jpg

Check out our finished products!

0904181306_Burst01.jpg

We also took the time to identify and label what types of leaves we had collected and colored. She enjoyed learning that maple syrup actually comes from maple trees! Now we have some nice fall themed artwork to hang up in our home! Yay fall!!!

Activities, attractions, Parenting, Trips

The Lost Sea


The_Lost_Sea1
Photo Cred: http://www.guideoftravels.com/the-lost-sea/

I don’t know if you guys have noticed, but it’s been pretty hot outside as of late. Whenever it gets like this, I have a hard time getting motivated to go outside and find fun activities for us to do. In these temps, a cool 58 degrees sounds heavenly to this gal. Thankfully, we have some AMAZING natural attractions right in our own backyard that offer these steady year round temps!

Recently, Neyland and I visited The Lost Sea. It has been years since I visited this cave, and it seemed like a great time to take Neyland! A big cave system offers a great place to “hike” in cool temps, and provides a ton of educational experiences for little ones. The Lost Sea has a great history that includes use by local Native Americans, soldiers during the civil war, and even a prehistoric lion! It is the largest underground body of water in the US, and the second largest in the world! The “sea” itself hasn’t even been fully explored! The tour includes a guided trip through the cave, lots of history and info about the cave, and a boat ride on the sea! If you live in the area, I highly recommend this little day trip! It’s a perfect activity when it’s really hot OR really cold!

Check their website for hours and prices here: The Lost Sea Adventure

0805181349a.jpg

The entrance to the cave looks daunting! The temperature drops pretty rapidly! (I would recommend a jacket.)

0805181305a.jpg

Some of the rock pools heading down toward the room where the sea is located in. It is really interesting that there is only ONE visible source of incoming water in the cave, though there must be many. The water in the sea empties out into multiple surrounding bodies of water, but those passages have never been located or explored!

0805181239.jpg

The “main room” of the cave is absolutely massive. Pictures don’t do it justice.

0805181345.jpg

This formation is known as “the bear’s paw.” If you hug it, you’re supposed to have good luck! Neyland didn’t care much about “good luck,” she just wanted to hug the paw!

Her favorite parts were:

-Hearing about the prehistoric lion

-The boat ride

-Feeling the water

-Seeing the HUGE trout in the lake

I thought I would also point out that the last time that I was at The Lost Sea, I did one of the wild cave tours. That is where they take you on a much longer “behind the scenes” tour through the cave. There are a BUNCH of cool areas within the cave to explore. Most notably, I remember “The Meat Grinder.” As it’s name suggests, it’s a tiny space you have to crawl through. I will advise you to wear old clothes and shoes as you will be COVERED in clay and mud, but it is absolutely worth it! I highly recommend this tour for older kids!

What cool attractions have you visited lately?

Activities, featured, Parenting

What Makes Leaves Green?

What Makes

Our Science Experiment Tuesday was postponed this week due to some pressing engagements. We were both pretty bummed about missing our weekly activity, so we held our first ever Science Experiment *Thursday* at my Grandmother’s house! This wasn’t an experiment that I planned on, so I didn’t bring any supplies…Thankfully Grandmas are ALWAYS prepared for any emergency, including scientific experimentation! (Seriously though- My Grandma could probably set a broken bone, mend some pants, lend you a toothbrush, and provide you a coupon to any restaurant, simply with the supplies in her purse!)

We’ve been focusing on plants a lot lately since summer is drawing to a close, and we’ll soon see the leaves beginning to change. I decided to focus this experiment on what exactly makes plants green. As adults, we know that this is chlorophyll. But how can we extract the chlorophyll from the leaf so that curious eyes can see it?

I remember doing this activity as a kid. If I’m not mistaken, I learned about it on a children’s science program on tv. It must have been pretty cool to stick with me all these years! It is fairly easy, and uses supplies that you probably already have at home! If you can’t already tell, it’s great for a quick unplanned activity.

Supplies(1)

0830181209.jpg

Step 1

Take your little one outside and collect your leaves. (Please don’t skip this step!) It is great to let them look at all the different shapes and textures of leaves in their very own yard! As you can see, Neyland chose a variety of shapes and sizes. We even found a “lamb’s ear” leaf (See title photo) that was fuzzy and super soft!

0830181211.jpg

Step 2

Use the scissors and cut a long thin strip of your napkin/toilet paper. It needs to be taller than the glass that you are using, and about twice the width of the pencil. The most important thing is that you are using a WHITE piece of toilet paper or napkin. We need it to be nice and white for the green chlorophyll to stand out.

0830181213.jpg

Step 3

Snip up the leaves into tiny pieces and place them into the clear glass. If your little one is old enough to use scissors, this is also a GREAT fine motor skill for them! We basically need to get to the inside of the leaf where the chlorophyll is contained. The more of the “inside of the leaf” you expose, the easier this will be. I chose to grind up the leaf bits with the flat handle of a screwdriver after Neyland cut them up, just to make sure we wouldn’t have any trouble.

0830181221a.jpg

0830181224.jpg

Step 4

Add enough finger nail polish remover to barely cover the leaves. We want enough to mix the leaves up into a little “leaf soup.”

*Remember that nail polish remover is highly flammable – do this in a safe location*

0830181224a.jpg

Step 5

Lay out your strip of napkin/TP. Place your pencil at the top of the strip. Use a tiny piece of tape to secure the strip to the middle of the pencil, and roll up the strip around the pencil a few times. The pencil will sit across the top of the glass allowing the paper to dangle down into the “leaf soup.” Use the pencil to shorten or lengthen the paper to the appropriate length for your glass. It should look like…..

0830181225.jpg

Step 6

The paper should be touching the “leaf soup.” The nail polish remover will draw the chlorophyll out of the smashed leaves and it will “wick” up the white paper. While you can see some movement & color change right away, it is far more dramatic if you let it sit for a few hours.

0830181521.jpg

The finished product is pictured above.

We discussed how the chlorophyll uses the sun to make energy for the plant. This is why a plant’s leaves are wide and stretched out toward the sun. We also discussed that the leaves will soon be changing and eventually fall off of the trees because the days will be shorter & there won’t be much sun for energy.

I can’t wait to take this line of learning full circle as we continue to watch what happens to the trees and plants this fall and winter!

Activities, featured, Parenting

Candy Cooking

Candy Cooking

Backup plans. They are important things to have. You probably never thought you would need them as a parent, but they are ever so helpful. We all know that parenting doesn’t always go as planned. You can plan events and activities with the utmost precision, but things happen & inevitably something will go awry. I like to keep a “mental list” of contingency plans for such situations. If I’ve specifically promised my daughter an exciting activity and the weather doesn’t cooperate, I can quickly pull out an appropriate substitute plan. One gadget that I keep around for tons of fun at the drop of a hat is the Poppin’ cookin’ Japanese candy cooking sets. These little kits don’t take up much space, they have a crazy long shelf life, and only require water to get started!

IMG_20180816_142339_778.jpg
Neyland mixing the “dough” for the dumplings and spring rolls

Each set comes with a little plastic tray with a variety of different sections for mixing and shaping the different parts of the dish you’re making. It also comes with a bunch of packets of different colored powder. The directions are pretty simple- Add water to the different packets. The amount and location you should mix them are all found on the directions. Depending on your kit, you may then take the resulting “dough” or liquid and place it in a separate area to shape it. The “ramen” kit we were making here, also had accompanying “spring rolls” and “dumplings.” The packaging even doubles as an area to roll out dough and place the “food” for cool photo ops.

IMG_20180816_142339_773.jpg
Our “dumplings and spring rolls” are complete!

One of our previous kits involved making candy “sushi.” We had fruit roll up “seaweed” and even had to make salmon roe! As different as all the dough and liquids looked (at least in that previous kit) I was amazed that all the elements tasted the exact same! This time, the “broth” in the ramen did have a different flavor.

IMG_20180816_142339_774.jpg
Dropping in our “ramen noodles”

I’m always transfixed at the chemical reactions that obviously take place when you make these kits. I will be the first to say that I don’t understand how they work, but they’re pretty cool to watch!

IMG_20180816_142339_776.jpg
Victory!

IMG_20180816_142339_771.jpg
Trying out the noodles

IMG_20180816_142339_780.jpg

IMG_20180816_142339_765.jpg

The first time I saw these kits, I believe it was on youtube. I happened across them in a local Asian market here in Knoxville, and decided to give one a try. I’ve even ordered them off Amazon. They are generally pretty reasonable at around $3-4 per kit. Here is the link to the Sushi Kit on Amazon. So far, we have made the sushi kit, an ice cream kit, a doughnut kit, and this ramen kit. The Sushi and Ramen kits were our favorites by far. They were more intricate and took longer to make. I will say that some of the parts are small and therefore not for tiny kids. As always, watch your kiddos closely while they do this. I read the instructions and let Neyland mix the water and powder. We form the shapes together, but I’m sure that an older kid would have no problems with doing that part alone.

*Disclaimer* I am SURE the nutritional value in these kits is zero. Keep in mind that they are candy, and should be used as an occasional treat.

Have you made a Poppin’ Cookin’ set before? Which is your favorite?


Activities, Parenting

Rainbow Flowers

RainbowFlowers

This week has been pretty busy. I had to finally embrace the whole “being thirty” thing, but it has been great thus far. Neyland and I did a lot of fun projects this week. She was a particularly good girl this week and worked really hard on all her homework, chores, and even memorized several scriptures from church. In return, we had a lot of fun outings and activities to reward her excellent work. For “Science Experiment Tuesday,” I pulled an old project out of my hat from when I was a kid. We decided to make rainbow flowers!

This experiment is one more geared toward preschoolers and older kids. The experiment isn’t instantaneous, and therefore won’t hold the attention of younger kiddos. Neyland is really into wanting to know how things work, so it was a great demonstration for her. We started off with a trip to Grandma’s flower shop to pick out the flowers for our experiment. The type of flower isn’t super important. We chose some daisy poms because they hold up well at room temp, and are overall, pretty resilient. Some of the more delicate flowers may wilt after a few hours. The big thing is to (obviously) get WHITE flowers so your little one can observe the color change.

0814181251a.jpg

We also got three different stems of daisy poms. Each stem has multiple flowers, so we would get to see more action.

Next, pull out your food coloring and a few glasses of water. I let Neyland choose what colors we would make in each glass. It was also a good way to review which colors can be mixed to form other colors. She chose to make: Purple, Blue, and Green.

0814181250.jpg

0814181254a.jpg

0814181255.jpg

0814181255a.jpg

We mixed up the colors, trimmed excess foliage off the stems, and then finally snipped the stems to freshen the ends. One trick to note is that the shorter you trim the stem, the faster the experiment will yield results. The colored water has a shorter distance to travel. Also, by getting rid of the excess foliage, you limit other areas for the colored water to be carried to. After cutting the stems and placing them in the water, we set them near the window.

0815181946a.jpg

Within an hour or two we were already getting visible results! We used this to discuss how plants draw up water and use sunlight to make energy and grow! It was an exciting thing that she got to check on for the next few days. Our “blue” flowers yielded the best color. The green was very subtle and not easily noticeable.  The purple was very interesting. It yielded some purple spots, some red, and some blue. For whatever reason, the colors separated back out somewhat.

This is a super easy and cheap experiment to recreate at home! Even if you have never done it before as a kid. You probably have food coloring in your pantry, and you might even have some white flowers growing out in your yard! Get out there and have a great time with what you have!

Rainbow Flowers

Supplies

  • White flowers (that remain sturdy at room temp) – Rec. carnations, daisies, poms
  • Variety of food coloring
  • Glasses
  • water

Directions

Fill the glasses 3/4 full of water. Color each glass of water with a different color using the food coloring. Trim excess foliage from the flowers and snip the end of the stem before placing it in the water. (Snip the stem IMMEDIATELY before placing it in the water) Set the glasses in a sunny spot and monitor them periodically for changes. You can keep this experiment going for a few days! Just remember to trim the stems on your flowers fresh each day to maximize the amount of water they take in!


Activities, featured, Food

Sunday Sundaes

How is the weekend already over??? We had such an awesome weekend, it just doesn’t seem fair that tomorrow is already Monday. Well, here’s to starting this week off right!

This weekend, my friends and family were kind enough to throw me a surprise birthday party for the big 3-0. Thankfully, someone decided it was a good idea to tell me about it since they planned it at MY HOUSE. Pretty sure full blown panic would have set in if 20-30 people had just randomly shown up at my place on Saturday. It was a great time full of food and lots of laughs! Thanks to everyone who came and celebrated! (Unfortunately we were all having such a blast, we totally failed to take any pictures!)

This morning we enjoyed an absolutely fantastic church service! I love when service just “happens” to be on things that I’ve been studying privately! Our service today was on worship. We discussed the different examples of worship in the bible and the specific kinds of worship God specifically asks for! There are many terms for types of worship in Hebrew. It was really interesting and eye opening!

After service, we enjoyed a nice relaxing day out by the pool, followed by homework for Neyland, and most importantly…..the post homework treat! ICE CREAM!

We discussed taking a trip downtown to try the new Cruze Farm location…but as with most new places, IT WAS PACKED. We elected to give it a few more weeks to let the “newness” die down. We decided instead to visit one of my favorite ice cream spots of all time. It is also conveniently, right across the street.

Phoenix Pharmacy & Fountain is everything you could possibly want with a super authentic “old time” feel. This place has a HUGE menu of sundaes, malts, floats, and seasonal specials. They make everything from scratch. All the toppings, whipped cream, you name it. All their ice cream is served in old fashioned glass dishes, and the staff even dresses in classic attire! The pharmacy is still in operation too! Bottom line: This place is the FULL experience. Amazing treats and a full authentic soda shop experience. Check out what we got this time!


Check out their website & menu HERE.

IMG_20180819_194010_624.jpg
Neyland’s Sidecar – Classic Sundae, only smaller for kids

IMG_20180819_194010_627.jpg
I had the “All American.” It was mixed berry cobbler with homemade vanilla ice cream!

IMG_20180819_194010_625.jpg
My brother had “The Great Smoky Mountains.” A fudge soaked vanilla cake  & a fudge brownie topped with vanilla ice cream, homemade brittle, and homemade caramel sauce!

IMG_20180819_194010_629.jpg
My Mom had the “Twixy.” Scoops of vanilla on top of homemade shortbread crumbles with milk chocolate & caramel drizzle.

IMG_20180819_214332_604.jpg
Neyland was happy to help finish off any leftovers.

We enjoyed a nice stroll through Market Square and Gay Street before calling it a night!

IMG_20180819_214332_590.jpg

If you’re into an authentic experience, don’t pass this place up! After all, Sundays are for Jesus and Sundaes!