Activities, featured, Parenting

Candy Cooking

Candy Cooking

Backup plans. They are important things to have. You probably never thought you would need them as a parent, but they are ever so helpful. We all know that parenting doesn’t always go as planned. You can plan events and activities with the utmost precision, but things happen & inevitably something will go awry. I like to keep a “mental list” of contingency plans for such situations. If I’ve specifically promised my daughter an exciting activity and the weather doesn’t cooperate, I can quickly pull out an appropriate substitute plan. One gadget that I keep around for tons of fun at the drop of a hat is the Poppin’ cookin’ Japanese candy cooking sets. These little kits don’t take up much space, they have a crazy long shelf life, and only require water to get started!

IMG_20180816_142339_778.jpg
Neyland mixing the “dough” for the dumplings and spring rolls

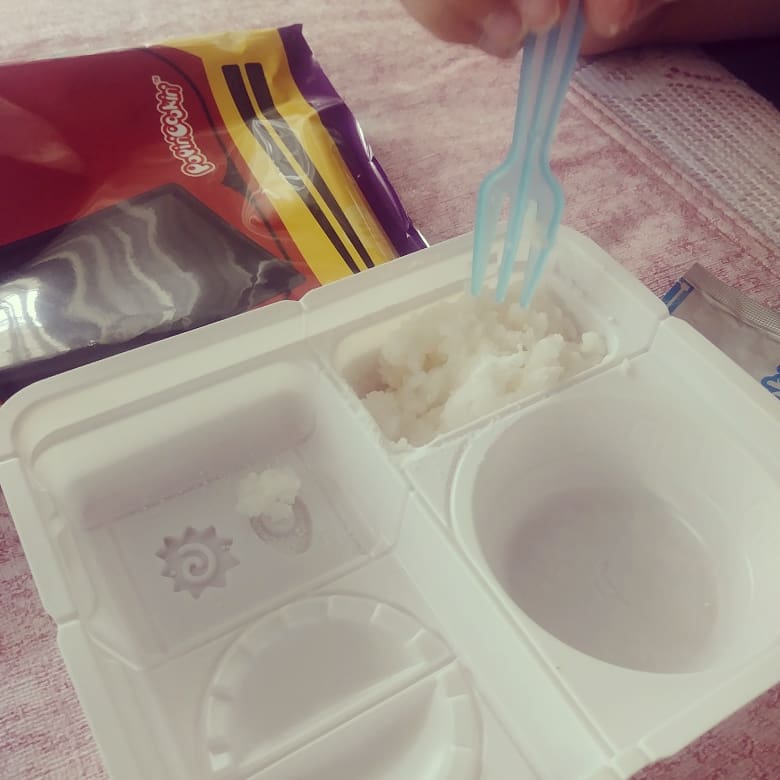
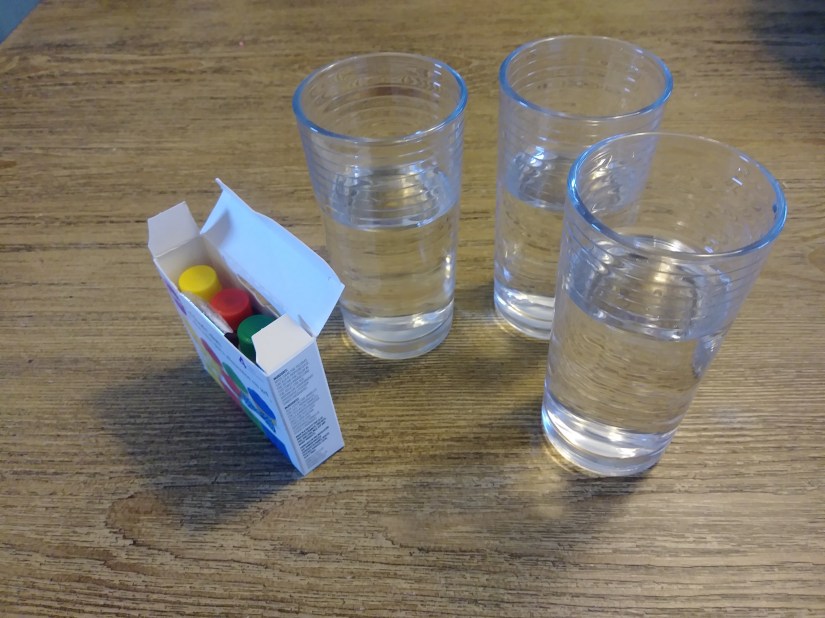
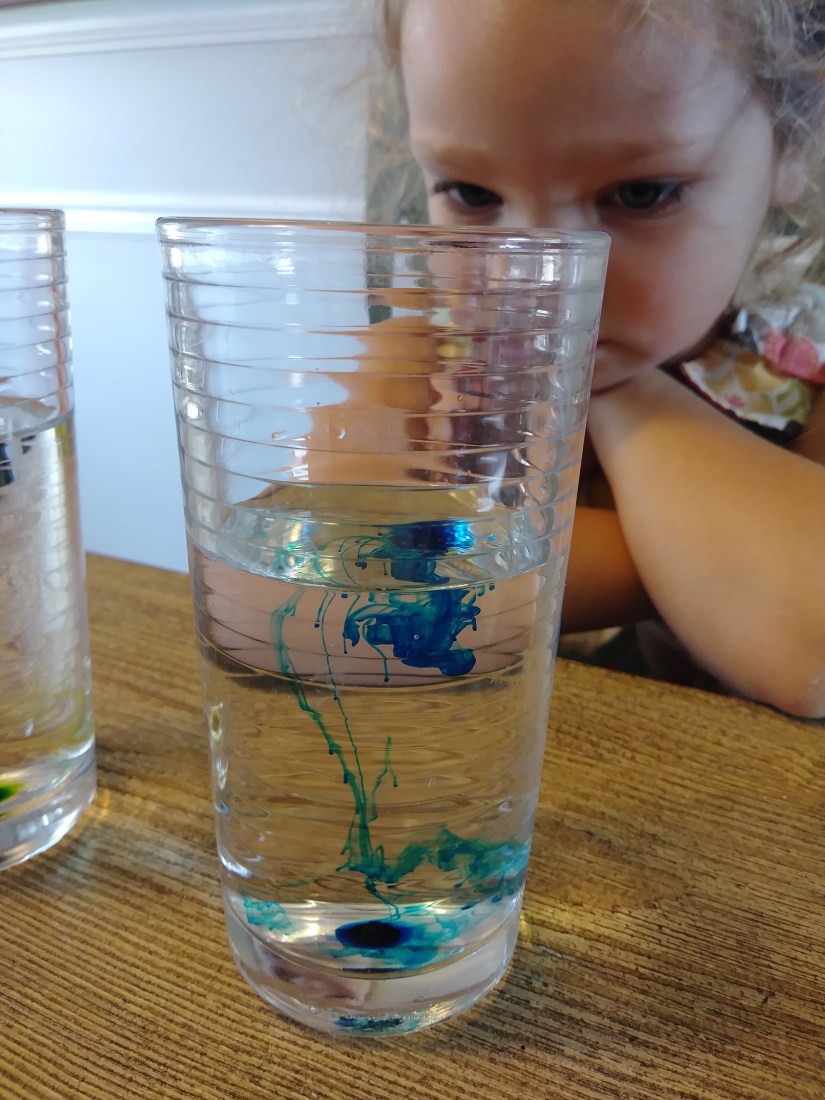
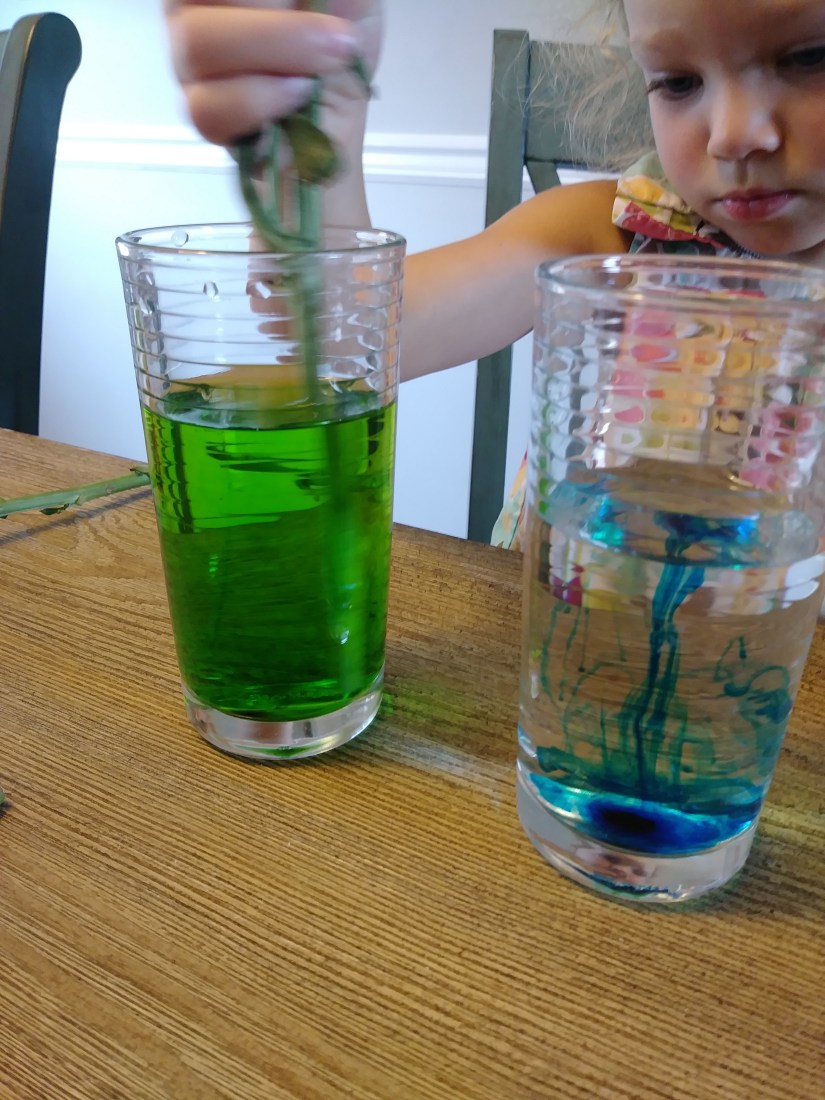
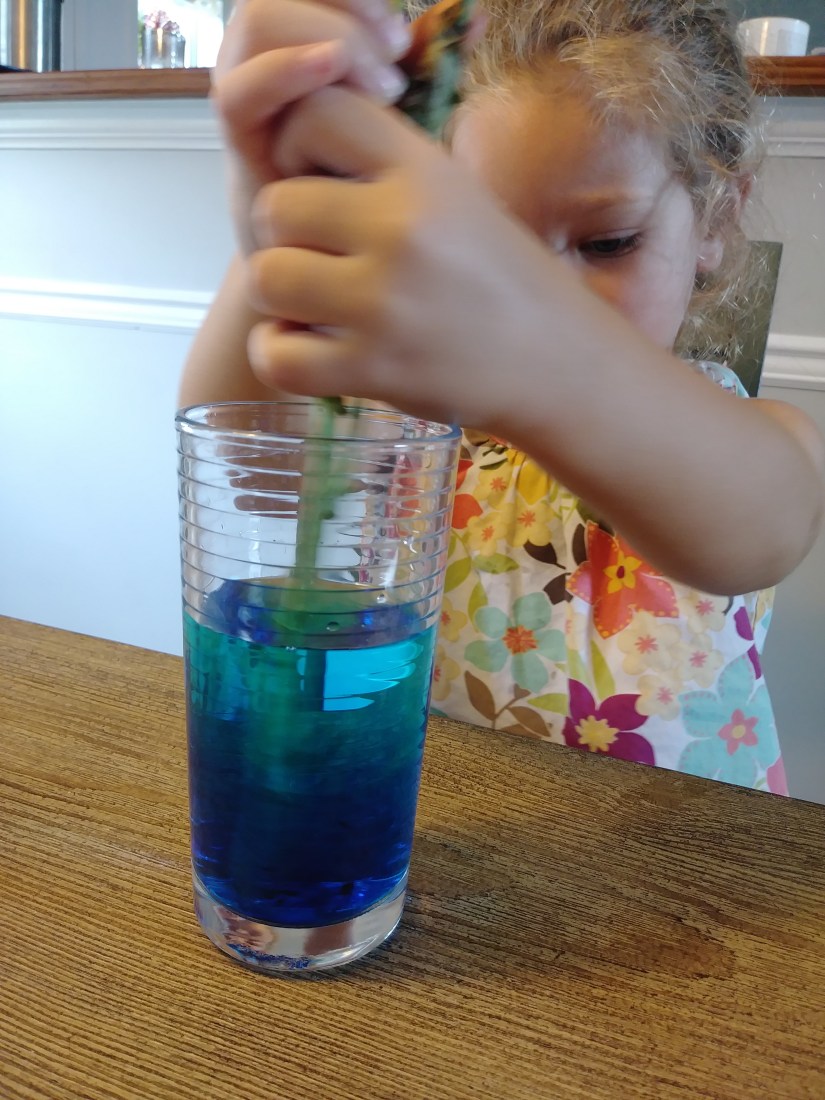
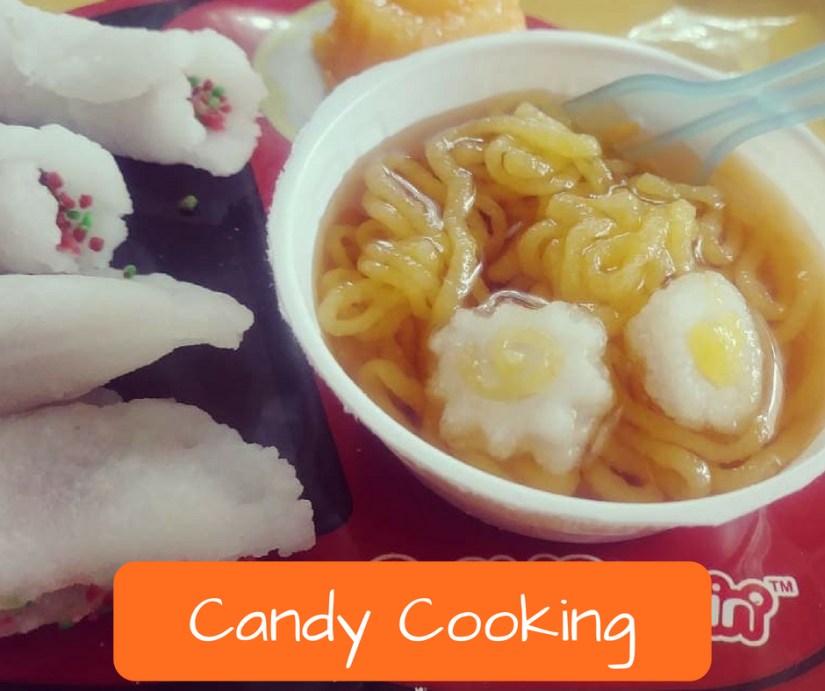
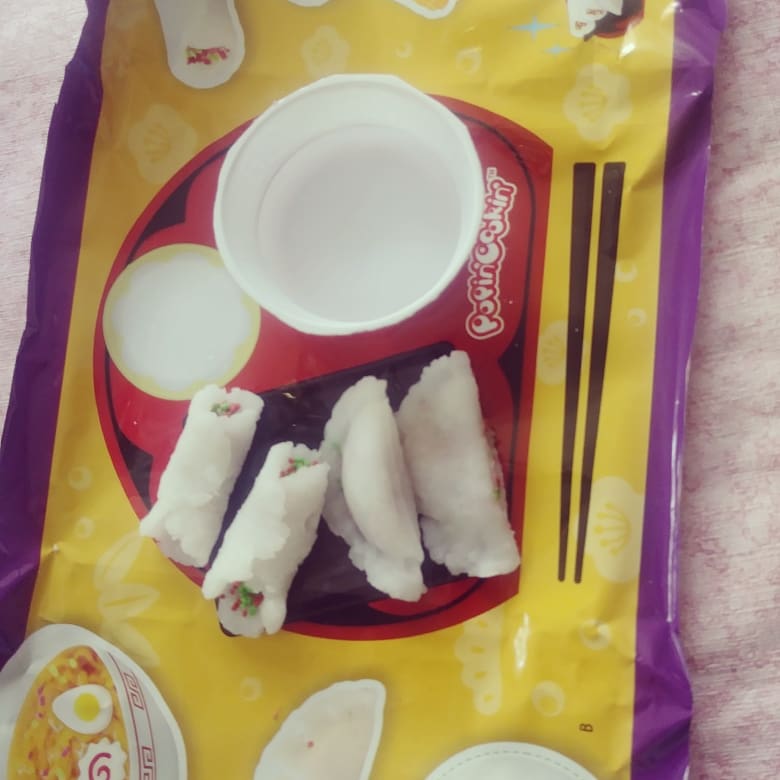
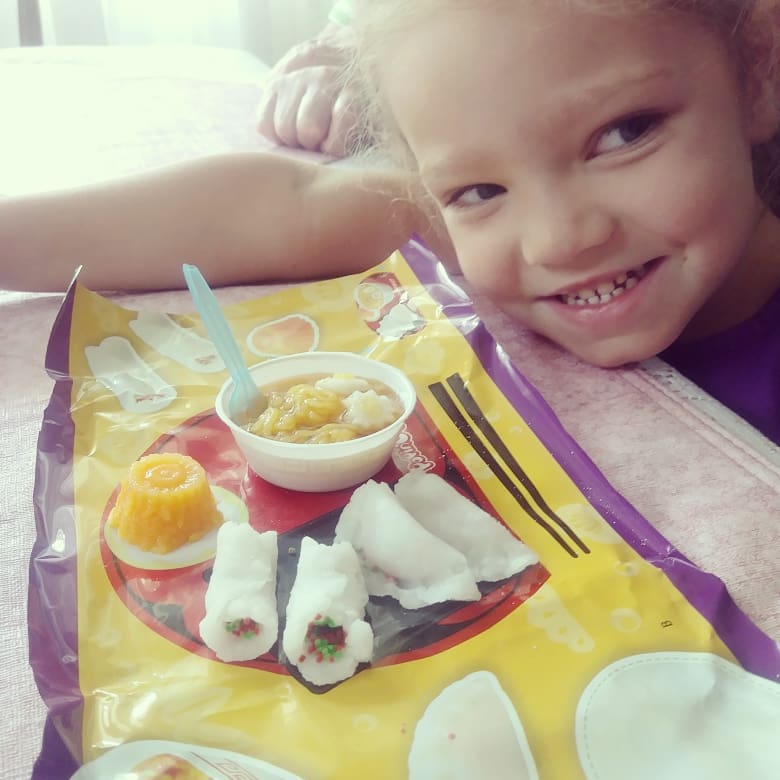
Each set comes with a little plastic tray with a variety of different sections for mixing and shaping the different parts of the dish you’re making. It also comes with a bunch of packets of different colored powder. The directions are pretty simple- Add water to the different packets. The amount and location you should mix them are all found on the directions. Depending on your kit, you may then take the resulting “dough” or liquid and place it in a separate area to shape it. The “ramen” kit we were making here, also had accompanying “spring rolls” and “dumplings.” The packaging even doubles as an area to roll out dough and place the “food” for cool photo ops.

IMG_20180816_142339_773.jpg
Our “dumplings and spring rolls” are complete!

One of our previous kits involved making candy “sushi.” We had fruit roll up “seaweed” and even had to make salmon roe! As different as all the dough and liquids looked (at least in that previous kit) I was amazed that all the elements tasted the exact same! This time, the “broth” in the ramen did have a different flavor.

IMG_20180816_142339_774.jpg
Dropping in our “ramen noodles”

I’m always transfixed at the chemical reactions that obviously take place when you make these kits. I will be the first to say that I don’t understand how they work, but they’re pretty cool to watch!

IMG_20180816_142339_776.jpg
Victory!
IMG_20180816_142339_771.jpg
Trying out the noodles

IMG_20180816_142339_780.jpg

IMG_20180816_142339_765.jpg

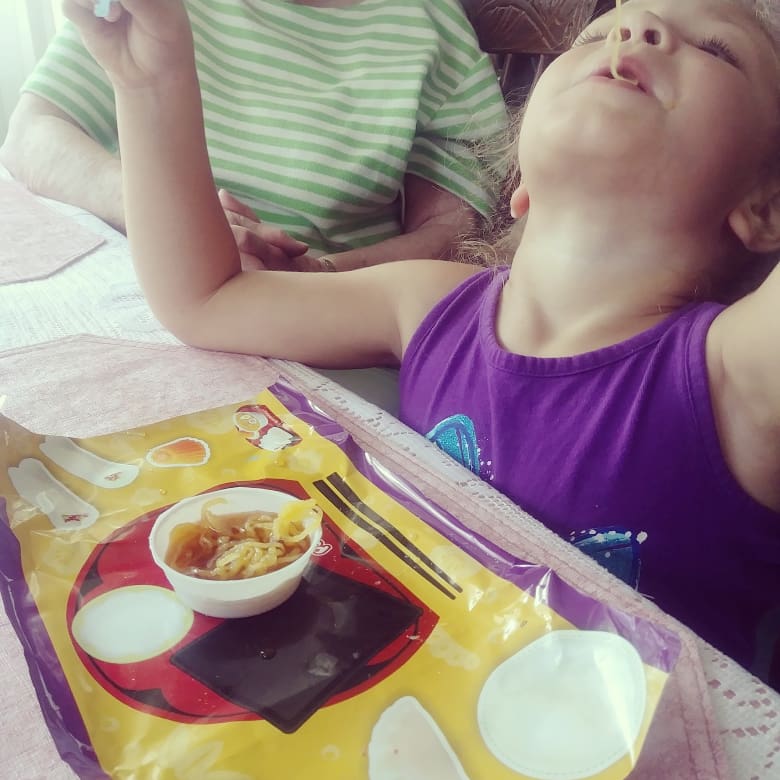
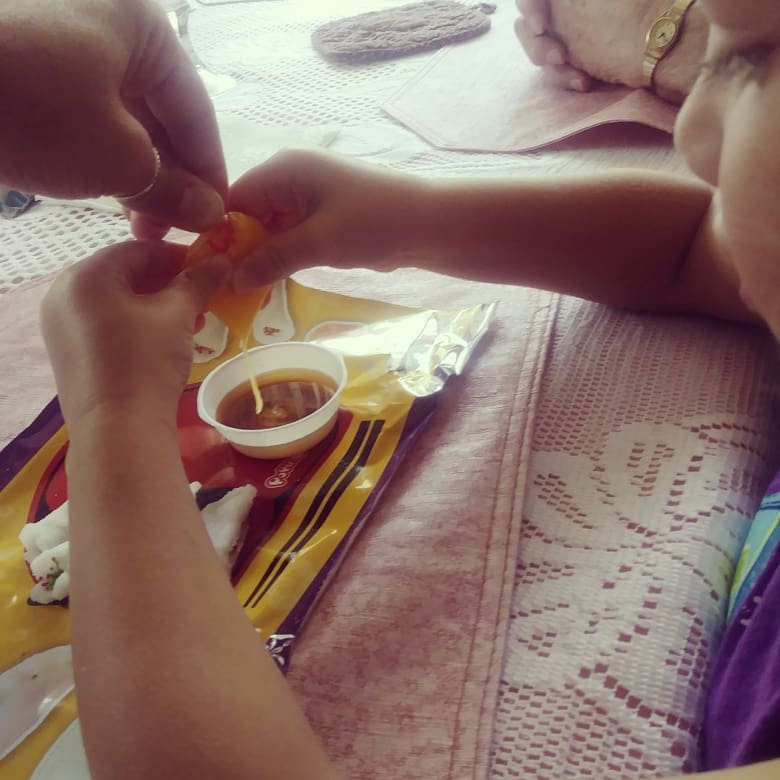
The first time I saw these kits, I believe it was on youtube. I happened across them in a local Asian market here in Knoxville, and decided to give one a try. I’ve even ordered them off Amazon. They are generally pretty reasonable at around $3-4 per kit. Here is the link to the Sushi Kit on Amazon. So far, we have made the sushi kit, an ice cream kit, a doughnut kit, and this ramen kit. The Sushi and Ramen kits were our favorites by far. They were more intricate and took longer to make. I will say that some of the parts are small and therefore not for tiny kids. As always, watch your kiddos closely while they do this. I read the instructions and let Neyland mix the water and powder. We form the shapes together, but I’m sure that an older kid would have no problems with doing that part alone.

*Disclaimer* I am SURE the nutritional value in these kits is zero. Keep in mind that they are candy, and should be used as an occasional treat.

Have you made a Poppin’ Cookin’ set before? Which is your favorite?


Activities, Parenting

Rainbow Flowers

RainbowFlowers

This week has been pretty busy. I had to finally embrace the whole “being thirty” thing, but it has been great thus far. Neyland and I did a lot of fun projects this week. She was a particularly good girl this week and worked really hard on all her homework, chores, and even memorized several scriptures from church. In return, we had a lot of fun outings and activities to reward her excellent work. For “Science Experiment Tuesday,” I pulled an old project out of my hat from when I was a kid. We decided to make rainbow flowers!

This experiment is one more geared toward preschoolers and older kids. The experiment isn’t instantaneous, and therefore won’t hold the attention of younger kiddos. Neyland is really into wanting to know how things work, so it was a great demonstration for her. We started off with a trip to Grandma’s flower shop to pick out the flowers for our experiment. The type of flower isn’t super important. We chose some daisy poms because they hold up well at room temp, and are overall, pretty resilient. Some of the more delicate flowers may wilt after a few hours. The big thing is to (obviously) get WHITE flowers so your little one can observe the color change.

0814181251a.jpg

We also got three different stems of daisy poms. Each stem has multiple flowers, so we would get to see more action.

Next, pull out your food coloring and a few glasses of water. I let Neyland choose what colors we would make in each glass. It was also a good way to review which colors can be mixed to form other colors. She chose to make: Purple, Blue, and Green.

0814181250.jpg

0814181254a.jpg

0814181255.jpg

0814181255a.jpg

We mixed up the colors, trimmed excess foliage off the stems, and then finally snipped the stems to freshen the ends. One trick to note is that the shorter you trim the stem, the faster the experiment will yield results. The colored water has a shorter distance to travel. Also, by getting rid of the excess foliage, you limit other areas for the colored water to be carried to. After cutting the stems and placing them in the water, we set them near the window.

0815181946a.jpg

Within an hour or two we were already getting visible results! We used this to discuss how plants draw up water and use sunlight to make energy and grow! It was an exciting thing that she got to check on for the next few days. Our “blue” flowers yielded the best color. The green was very subtle and not easily noticeable.  The purple was very interesting. It yielded some purple spots, some red, and some blue. For whatever reason, the colors separated back out somewhat.

This is a super easy and cheap experiment to recreate at home! Even if you have never done it before as a kid. You probably have food coloring in your pantry, and you might even have some white flowers growing out in your yard! Get out there and have a great time with what you have!

Rainbow Flowers

Supplies

  • White flowers (that remain sturdy at room temp) – Rec. carnations, daisies, poms
  • Variety of food coloring
  • Glasses
  • water

Directions

Fill the glasses 3/4 full of water. Color each glass of water with a different color using the food coloring. Trim excess foliage from the flowers and snip the end of the stem before placing it in the water. (Snip the stem IMMEDIATELY before placing it in the water) Set the glasses in a sunny spot and monitor them periodically for changes. You can keep this experiment going for a few days! Just remember to trim the stems on your flowers fresh each day to maximize the amount of water they take in!


Activities, featured, Food

Sunday Sundaes

How is the weekend already over??? We had such an awesome weekend, it just doesn’t seem fair that tomorrow is already Monday. Well, here’s to starting this week off right!

This weekend, my friends and family were kind enough to throw me a surprise birthday party for the big 3-0. Thankfully, someone decided it was a good idea to tell me about it since they planned it at MY HOUSE. Pretty sure full blown panic would have set in if 20-30 people had just randomly shown up at my place on Saturday. It was a great time full of food and lots of laughs! Thanks to everyone who came and celebrated! (Unfortunately we were all having such a blast, we totally failed to take any pictures!)

This morning we enjoyed an absolutely fantastic church service! I love when service just “happens” to be on things that I’ve been studying privately! Our service today was on worship. We discussed the different examples of worship in the bible and the specific kinds of worship God specifically asks for! There are many terms for types of worship in Hebrew. It was really interesting and eye opening!

After service, we enjoyed a nice relaxing day out by the pool, followed by homework for Neyland, and most importantly…..the post homework treat! ICE CREAM!

We discussed taking a trip downtown to try the new Cruze Farm location…but as with most new places, IT WAS PACKED. We elected to give it a few more weeks to let the “newness” die down. We decided instead to visit one of my favorite ice cream spots of all time. It is also conveniently, right across the street.

Phoenix Pharmacy & Fountain is everything you could possibly want with a super authentic “old time” feel. This place has a HUGE menu of sundaes, malts, floats, and seasonal specials. They make everything from scratch. All the toppings, whipped cream, you name it. All their ice cream is served in old fashioned glass dishes, and the staff even dresses in classic attire! The pharmacy is still in operation too! Bottom line: This place is the FULL experience. Amazing treats and a full authentic soda shop experience. Check out what we got this time!


Check out their website & menu HERE.

IMG_20180819_194010_624.jpg
Neyland’s Sidecar – Classic Sundae, only smaller for kids
IMG_20180819_194010_627.jpg
I had the “All American.” It was mixed berry cobbler with homemade vanilla ice cream!
IMG_20180819_194010_625.jpg
My brother had “The Great Smoky Mountains.” A fudge soaked vanilla cake  & a fudge brownie topped with vanilla ice cream, homemade brittle, and homemade caramel sauce!
IMG_20180819_194010_629.jpg
My Mom had the “Twixy.” Scoops of vanilla on top of homemade shortbread crumbles with milk chocolate & caramel drizzle.
IMG_20180819_214332_604.jpg
Neyland was happy to help finish off any leftovers.

We enjoyed a nice stroll through Market Square and Gay Street before calling it a night!

IMG_20180819_214332_590.jpg

If you’re into an authentic experience, don’t pass this place up! After all, Sundays are for Jesus and Sundaes!


Food

Birthday Breakfast

IMG_20180816_141758_493.jpg

If it hasn’t become extremely obvious by now, I thoroughly enjoy celebrating birthdays & holidays. I’m always looking for some reason to decorate or make someone feel special. I’m quite certain that I came by this trait honestly. My Grandmother is without a doubt the kindest most loving person you will ever know. She goes above and beyond even in small ways to make people feel special and loved. Ever since I was a little girl, (and even before my time I’m sure) she has had a tradition that has been passed down through the family. Enter: THE BIRTHDAY PLATE.

0816180932.jpg

That’s right. A big red birthday plate, gold silverware, & a special napkin. It makes an appearance for everyone’s birthday and makes you feel super special. I’m really thankful that my Aunt got me a set a few years back, and now I can carry on the same tradition!

You may be wondering why “The plate” was out today…. In less than 1 week I will be celebrating the death of my twenties. o_0  Everyone says your thirties are better, and I’m ready to find out! Since Thursdays are spent with my Grandma, I got the birthday plate today along with a DELICIOUS breakfast! My Grandma’s #1 favorite past time is to spoil those she loves with food. I’m sure glad to be one of those lucky people! The recipe she made today is one of my favorites. My Aunt discovered it a few years back at a restaurant in California.

Lemon pancakes are seriously the perfect pancake. I used to be anti-lemon when it came to baked goods & sweets, but my tastes have changed considerably. These things are absolutely amazing. The tart lemon cuts through the sweetness of the pancake and just makes this breakfast so refreshing. I have never encountered a pancake that goes so well with so many topping options. These guys don’t even need syrup. They are fantastic by themselves with a little sprinkle of powdered sugar! You can cover them with a variety of fruit. My Grandma had fresh peaches, strawberries, and raspberries as options today. All were absolutely fantastic. I’m sure they would be great with blueberries and blackberries. We discussed making fresh lemon whipped cream for them….the possibilities are endless.

If you’re tired of the same old pancakes, give these guys a try. You WON’T be disappointed!

0816181004.jpg

Lemon Pancakes

Ingredients

  • 1 cup all-purpose white wheat flour
  • 1/3 cup sugar
  • 1.5 tsp baking powder
  • 1/2 tsp baking soda
  • 1/4 tsp sea salt
  • 3/4 cup sour cream
  • 1/3 cup milk
  • zest of 2 lemons
  • 1/4 cup fresh lemon juice
  • 3 Tbsp butter, melted
  • 1 egg
  • 1.5 tsp vanilla extract

Directions

Mix together flour, sugar, baking powder, baking soda, and salt. In another bowl, mix together the remaining ingredients. Pour the wet mixture into the dry mixture and stir quickly. The batter will be thick and bubbly. Use 1/4 cup batter for each pancake, and pour onto hot skillet. Cook until each side is golden brown. Serve with honey, syrup, powdered sugar, etc.

Activities, featured, Parenting

Ice Age Rescue

Most parents would agree that having a routine is really vital for kids. Yes kids are resilient, but they truly thrive when they have a routine. They know what to expect and what is expected of them. I try my best to keep a fairly basic routine with my little one on both a daily and weekly basis. As I mentioned last week, the two of us spend Tuesdays together. I do a lot of housework, but I always make sure we squeeze in some fun activities, and cook dinner together. One of the fun activities that I have had as part of our routine for well over a year now, is SCIENCE EXPERIMENT TUESDAY! I’m a science nerd at heart, and certainly want Neyland to enjoy it too! Science Experiment Tuesday allows both of us to do a fun activity that also has educational value. I have a blast researching and preparing, we both love actually doing the experiment, and then I try to tie it in to some other learning opportunities throughout the week to reinforce the idea.

Finding fun experiments to do with your kiddos isn’t a difficult task. A quick internet search, or even just thinking about some of the activities that stood out from your childhood can yield great results.

This particular experiment is super simple, but a LOT of fun. It’s great for toddlers and preschoolers, and even elementary school kids. There are a lot of learning opportunities for different age groups.

Ice Age Rescue

Supplies

  • Water safe/freezer safe container (Decent size)
  • A bunch of cheap/plastic/water safe toys (you likely have plenty laying around the house)
  • Water
  • Blue Food coloring
  • Plastic utensils
  • Squirt bottle
  • Salt
  • Sponges

The basic idea for this project is to fill the water safe/freezer safe container (I found a random plastic storage box at Goodwill) with water (about 3/4 full.) Add a few drops of blue food coloring and mix. Don’t skip that step, it really does add to the effect. Place a variety of different plastic toys in the colored water. It helps them spread out evenly if some sink and some float. This is a great time to let your little one see the water and touch it. Explain to them the differences between liquids and solids. Let them see you/help you place the container into the freezer. Check on it every hour or so. It’s important to let them feel how cold it’s getting and feel the ice start to form. Eventually (depending on the size of your container,) you will have a solid chunk of ice FULL of plastic critters that need your little one’s help to break free!

1126171234.jpg

At this point we moved our project to the bath tub to contain the imminent watery mess. I freed the giant cube from the plastic container and offered Neyland several options/tools to try and free the animals. I offered plastic eating utensils for her to chip away at the ice, sponges, salt, and a squirt bottle of warm water. We tried each item individually so that we could observe what effect it had on the ice.

1126171235.jpg

1126171236.jpg

1126171239a.jpg

After trying each tool, I let her decide which item she thought was most effective. She quickly decided that the warm water squirt bottle was the best option! As the ice melted, it was really beautiful. The warm water carved out all kind of cool little passages through the ice, and made breaking the critters free even more fun.

1126171308a.jpg

*As a side note- Not long after I first did this, a friend of mine tried it with her son. She added another educational aspect by waiting until winter and allowing the block to freeze outside over several days! Her son really enjoyed checking on it each day, and it was great to connect the actual weather outside with the experiment!*

1126171256.jpg

1126171308.jpg

This is seriously simple and seriously fun. It’s a great sensory activity for toddlers and learning activities for preschoolers. You can teach each child as much or as little as they are capable of absorbing for their age. I guarantee they will be asking to do it again!

Activities, bigfoot, featured, Trips

The Great Outdoors

Neyland and I were fortunate enough to meet up with an amazing group of ladies for a little get away this past weekend! A short trip away was just what the doctor ordered!

It is so easy to forget the beauty of the mountains when we live in this amazing area, and the mountains are our back yard. I realize that I often drive around and overlook them completely even though I adore them!

As I have mentioned previously, I do a bit of bigfoot reseach in my spare time. I have made some of the most amazing friends that share my passion for nature and mysteries. We have just “clicked” ever since we first met. It is a rare thing to find friends with whom you can truly just be yourself. I have laughed with  these ladies, cried with them, traveled with them, camped with them, tick checked them, had midnight forest raves with them, eaten an unhealthy amount of cinnamon rolls atop a mountain at 3am with them, and much much more. I believe it suffices to say that we have a great history together with fantastic memories doing what we love to do. It seems that all of us have walked some deep valleys over the past few years, and have been unable to get together as often as we would have liked. This weekend we were thrilled to not only have a reunion of the “beaver squad,” as we often call ourselves, but to bring our two newest members along for initiation! We decided that since the two little ones were so small, we would stick to a cabin this time rather than though it out in tents.

Neyland and I were the last to arrive Friday evening. A quick game of “being shy” lasted all of 5 minutes, and the girls quickly became best buddies. It was so great to see all my favorite ladies! We enjoyed dinner and a dip in the hot tub out on our amazing deck. Check out that view!

0804181806.jpg

After a quick bath and a ton of play time, the little ones were off to bed. We enjoyed catching up for a few more hours before a wonderful night’s sleep. The AC was certainly more pleasant than the 90 degree temps outside!

In the morning, true to form, Ronie was up making enough food to feed an army.

0804180929.jpg

Breakfast tacos and hashbrowns….and lots of coffee!

0804180841_HDR.jpg

We got the girls dressed, packed up a picnic lunch, and headed up to our favorite spot on the mountain. An area affectionately known as “camp scream.” As it’s name suggests, we’ve had some pretty exciting sasquatch activity there in the past. It is WELL away from where most people go, and we’d certainly like to keep it that way. We were surprised to see that the camp area we had used in the past, was almost completely covered in fallen trees. Thankfully, we were still able to hike back and let the girls play in the creek for a bit. They had a blast clacking rocks and playing in the water.


We then had our picnic lunch and hiked for about 2 miles. The girls did great & had so much fun! Check out the video of them practicing their squatch calls!


0804181341.jpg


Perhaps we were even interesting to some forest spectators, as we did hear a few interesting sounds on our hike!

We continued to another location where the girls could play in the creek again. We were able to catch some salamanders and crawdads, and even saw some rainbow trout.

IMG952969.jpg


IMG954174_01.jpg

On the way back to the cabin, we stopped at our favorite spot for ice cream. The picnic tables where we were eating were right by the water. We got to watch a few guys fly fishing, and even got to see an osprey! Between the guys and the osprey, only one was successful catching a fish. Hint: it was not the humans.

0804181713d.jpg

When we returned Ronie cooked ANOTHER delicious meal complete with her famous homemade doughnuts for dessert!

0804182042.jpg
The master at work!

0804182045_Burst01.jpg

We ended the day out on the deck DESTROYING these little jewels. The girls were COVERED in sugar. We were fortunate enough to hear an owl, and attempted to call back. Our owl calls quickly escalated into tiny squatch calls again. I’m quite certain the neighbors thought we were insane. These are the things that memories are made of.

IMG_20180805_151506_210.jpg

We said our goodbyes Sunday afternoon, and the drive home was bittersweet. It got me thinking about how I’m so thankful to share this life with such amazing people. Every day is an adventure if you chose to make it so.<3


Activities, Parenting

Blackberry Summers

0726181147b.jpg

When I was a little girl, I spent a great deal of time with my Grandparents. Every summer, they always planted a huge garden, with two big rows of blackberry bushes at the very back of the field, closest to the woods. There was nothing growing in that garden that I looked forward to more than those huge plump berries. Each morning, before the heat was unbearable, my best friend and I would grab our buckets, and head out to collect our loot. She wasn’t quite as fond of the blackberries as I was. Her bucket would actually come back with berries in it, while mine…..Well, it was usually empty. Sometimes I would have to make the difficult decision: Do I eat them now, or save them so Grandma can make a blackberry cobbler? She DOES make the BEST cobbler ever.

Over the years, the work of the garden became too much for my Grandparents, and eventually it became only a memory. All that remains today is the lonely berry patch. I’m thankful for this small piece of my childhood to share with my daughter. If there is one thing that I’ve enjoyed most about parenting, it is sharing the things with her that were most important to me. You think that the joy you experienced back then simply can’t get better, but it can. When you see the joy on your child’s face, the magic simply multiples.

Every Thursday, we spend the day with my Grandparents. They were/are such a big part of my life, and I am so thankful that Neyland has the opportunity to know them. My Grandma cooks breakfast, the kind of breakfast only a Grandma CAN make. I’m still convinced that there is something magical about her kitchen. The food ALWAYS tastes better when she makes it. After breakfast this past week, I asked Grandma how the berries were coming along. She indicated that there may be some ready to pick. I quickly showed Neyland where to find a bucket to put our berries, and out we went. She was so incredibly excited. Of course she was intent on gathering more berries than I could, which I’m sure she did. Only problem? There were none in her bucket by the time we got back to the house! It’s funny the way life repeats itself. It amazes me how many things she does naturally that are just like me. I know the memories will be just as sweet for her, and that she can share this tradition with her daughter some day.

0726181137a.jpg

0726181137c.jpg

0726181147.jpg


Activities, featured, Food, Parenting

Princess Dinners

Tuesdays are generally “Mommy + Daughter Days” at our house. We only have one routine commitment, and the rest of the day we spend together. I generally use this time to catch up on housework that I can keep going while playing with my little one. I also do my best to keep a basic routine that she can look forward to. Each Tuesday she can look forward to Science Experiment Tuesday and it is also a night that we try to make dinner together. I want Neyland to enjoy cooking as much as I do, and to be independent and able to cook for herself in the future. She certainly already has the independence part down. She is constantly wanting to help me do the parts of the cooking that still aren’t safe for kiddos her age. To try and help bridge the gap between what she can and can’t help with, I got her some fun kitchen items for her birthday!

First, I purchased her a set of kid safe plastic kitchen knives. I was kind of skeptical about how much they would actually cut, and if they would really be useful. The price was pretty low, so I figured we would give them a try.

You can check out the set I got here.

Before I gave them to her, I ran them back and forth across my hand to see if they were, in fact, skin safe. No issues there at all. Neyland proceeded to try them on several different foods, and they worked great! I even used them a few times tonight, and I was pleasantly surprised. I guess my only gripe is that the 5 colored knives are exactly the same thing, just different colors. I thought perhaps they would have slight differences, but they don’t. I guess I can use the different colors to help teach her food prep safety?

Needless to say, she felt like a pretty big deal getting to use a knife like a big girl. She cut up butter, ham, and some veggies.

0731181754a.jpg

I also purchased her a Princess Cook book. I loved the idea that the recipes were simple, and that each recipe is attached to one of the Disney princesses. She was STOKED to flip through the pages and pick  which recipes SHE wanted to make. I can tell that she will be more willing to try these recipes, simply because they are tied to a princess. If it gets her to branch out and try new things….I’m ALL FOR IT.

Check out the Cookbook here!

Tonight she chose to make Rapunzel’s Ham & Cheese Biscuit Braids. She helped me from start to finish. She did have a bit of trouble braiding the dough, but who wouldn’t? I found them to be a bit bland for my tastes. Solution: Cover in mustard. Yellow mustard works well for Rapunzel’s magic golden hair anyway, Right??? Lol.

0731181745b.jpg

0731181756.jpg

0731181803.jpg

0731181834.jpg

0731181900.jpg

We ate our Princess dinner, watched Tangled (obviously,) and even ended our night with a surprise visit from a prince disguised as a frog. 😉

God certainly has a sense of humor when he graces us with his creation.

A hysterical game of Twister before bed, was the end to another lovely Mommy + Daughter day. Check out the recipe below to make Rapunzel’s Ham & Cheese Biscuit Braids with your little ones!

0731181922_Burst01.jpg

0731181924a.jpg

Ham and Cheese Biscuit Braids: 

(From The Disney Princess Cookbook)
Ingredients:

  • 2 cups flour
  • 1/2 cup cornmeal
  • 3 tsp baking powder
  • 1 tsp salt
  • 5 tbsp cold butter, cut into several pieces
  • 1/2 cup diced ham
  • 1/2 cup shredded cheese
  • 1 cup milk


Directions:

Heat oven to 400 degrees.
Stir together flour, cornmeal, baking powder and salt in a bowl.
Use your fingertips to pinch the butter into the flour mixture until the bits are the size of peas.
Stir in ham and cheese.
Add milk and work the mixture with your hands until it starts to look like dough.
Sprinkle some flour on a cutting board or counter and place the dough on top. Sprinkle a little more flour on the dough to keep it from sticking. I also floured my rolling pin.
With your rolling pin, flatten the dough into a 12 inch square. The dough should be between a 1/4 and a 1/2 an inch thick.
Slice the squares into quarters, and then slice each quarter into 12 strips, each about 6 inches long.
Braid the dough like you would braid hair – gather 3 strips and pinch them together at the top. Take the right section and cross it over the center section so they switch places. Then, take the left section and cross it over the center section. Keep going until the whole strip is braided.
Pinch the strands together at the bottom.
Repeat until all the strips are braided.
Place each braid on a cookie sheet and bake for 8-10 minutes.
*They don’t really turn as golden brown as you’d expect, so check the bottom after about 10 minutes.


Activities, DIY, featured, Parenting, Uncategorized

The Simple Things

20170815_120028

Gardening

I can’t recommend gardening enough. It is therapeutic for the soul, and a GREAT learning tool for kids. Each spring, Neyland helps me clean out the plant skeletons from our small raised garden out behind our pool house. She plays in the dirt, digs, sifts, and creates a huge mess. More importantly, she has a blast. Last year she was too small to really distinguish between weeds and the plants we were growing, but this year, she is doing a great job helping me keep the weeds pulled. Gardening is such a great illustration for kids to show them what hard work and patience can bring! We live in a society where everything is instant. We want what we want NOW. Instant gratification is the name of the game. While this is very convenient, is this all we want to teach our kiddos? I want to remind mine that good things take time, effort, and a lot of patience. Working to grow food helps them see value in what you buy at the store. It’s so important for them to know where food comes from.

17434755_10208689031452392_3232867358822246060_o

We start seeds off in the spring in old cardboard egg containers and toilet paper rolls. She waters them carefully until they are big enough to be transplanted into the garden. This part can also be a fun biology lesson. It’s a great time to try the “place a Lima bean & a moist paper towel in a ziplock bag and watch it grow” experiment.

In addition to growing seedlings, we also recycle a lot of produce when we can. I usually purchase at least a few boxes of hydroponically grown artisan lettuces and some romaine to use in cooking. As I use the lettuce, I simply save the stem, cut the tip to freshen it’s ability to take up water, and place them in a shallow dish of water in the window until roots sprout.  It begins growing and producing more lettuce remarkably fast. I personally use the lettuce so much and so quickly that I leave the constantly growing batch right in the window. Occasionally I have transplanted them into the garden once the roots were growing. I’ve done the same with scallions, and other herbs. My only issue is that my cats want to graze on the greens if I keep them on the counter for very long!

We get to go out and check the garden daily. This is something she always looks forward too. She is super independent and always wants to water by herself. She gets to watch the plants grow and change, and finally to harvest what they produce. It’s also a GREAT way to get her to try some veggies that she might not sample otherwise. Growing it yourself always makes her more excited about trying things.

We also have a special “root garden” just so that Neyland can watch the veggies grow in the soil. We made our own, but there are a lot of commercially available ones on the market these days. The basic idea is similar to an ant farm. Create a thin garden, using plexiglass for the sides, so that curious eyes can watch all the growing action. (See below) We planted radishes, carrots, and scallions in it this year!

What are your favorite gardening projects to do with your kids?

Check out our harvest! It’s not a lot, but plenty for the two of us & loads of fun & memories!

20157869_10209667431791789_5364874985643416801_o

18423904_10209077549885110_8473435820184827905_n