


Our Science Experiment Tuesday was postponed this week due to some pressing engagements. We were both pretty bummed about missing our weekly activity, so we held our first ever Science Experiment *Thursday* at my Grandmother’s house! This wasn’t an experiment that I planned on, so I didn’t bring any supplies…Thankfully Grandmas are ALWAYS prepared for any emergency, including scientific experimentation! (Seriously though- My Grandma could probably set a broken bone, mend some pants, lend you a toothbrush, and provide you a coupon to any restaurant, simply with the supplies in her purse!)
We’ve been focusing on plants a lot lately since summer is drawing to a close, and we’ll soon see the leaves beginning to change. I decided to focus this experiment on what exactly makes plants green. As adults, we know that this is chlorophyll. But how can we extract the chlorophyll from the leaf so that curious eyes can see it?
I remember doing this activity as a kid. If I’m not mistaken, I learned about it on a children’s science program on tv. It must have been pretty cool to stick with me all these years! It is fairly easy, and uses supplies that you probably already have at home! If you can’t already tell, it’s great for a quick unplanned activity.


Step 1
Take your little one outside and collect your leaves. (Please don’t skip this step!) It is great to let them look at all the different shapes and textures of leaves in their very own yard! As you can see, Neyland chose a variety of shapes and sizes. We even found a “lamb’s ear” leaf (See title photo) that was fuzzy and super soft!
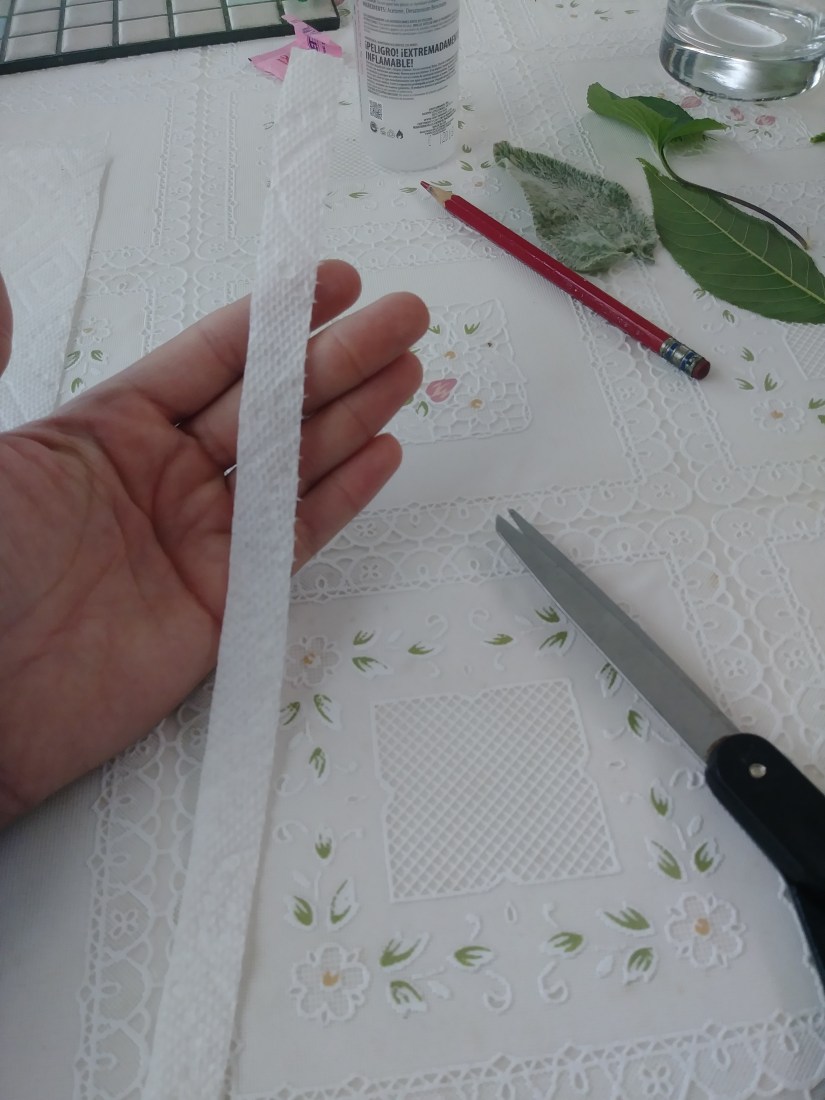
Step 2
Use the scissors and cut a long thin strip of your napkin/toilet paper. It needs to be taller than the glass that you are using, and about twice the width of the pencil. The most important thing is that you are using a WHITE piece of toilet paper or napkin. We need it to be nice and white for the green chlorophyll to stand out.
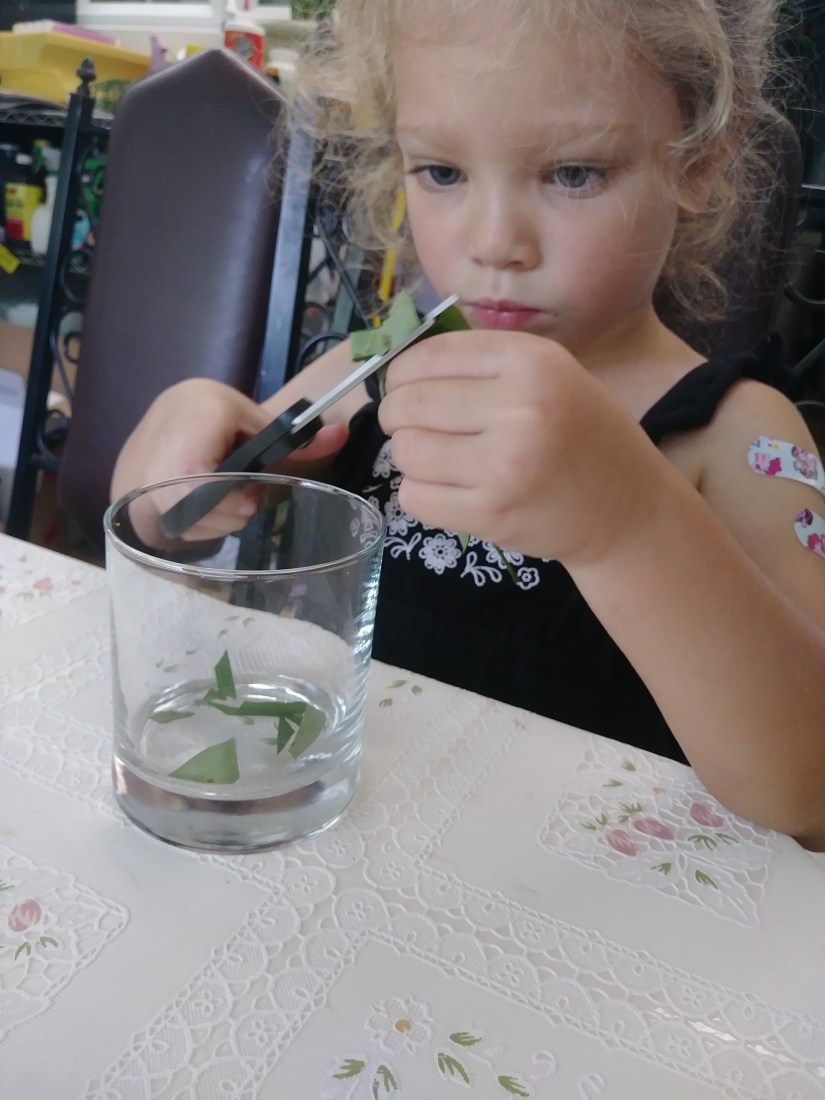


Step 3
Snip up the leaves into tiny pieces and place them into the clear glass. If your little one is old enough to use scissors, this is also a GREAT fine motor skill for them! We basically need to get to the inside of the leaf where the chlorophyll is contained. The more of the “inside of the leaf” you expose, the easier this will be. I chose to grind up the leaf bits with the flat handle of a screwdriver after Neyland cut them up, just to make sure we wouldn’t have any trouble.
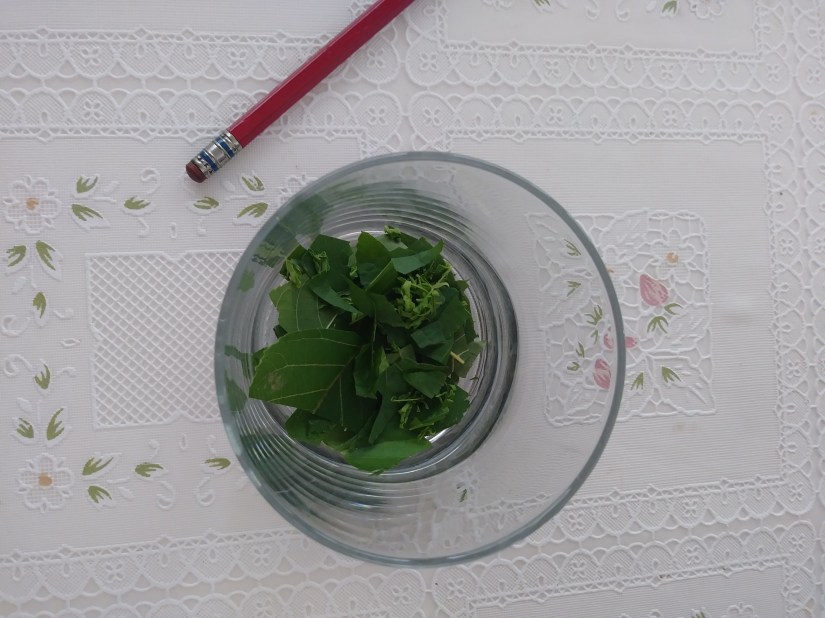

Step 4
Add enough finger nail polish remover to barely cover the leaves. We want enough to mix the leaves up into a little “leaf soup.”
*Remember that nail polish remover is highly flammable – do this in a safe location*
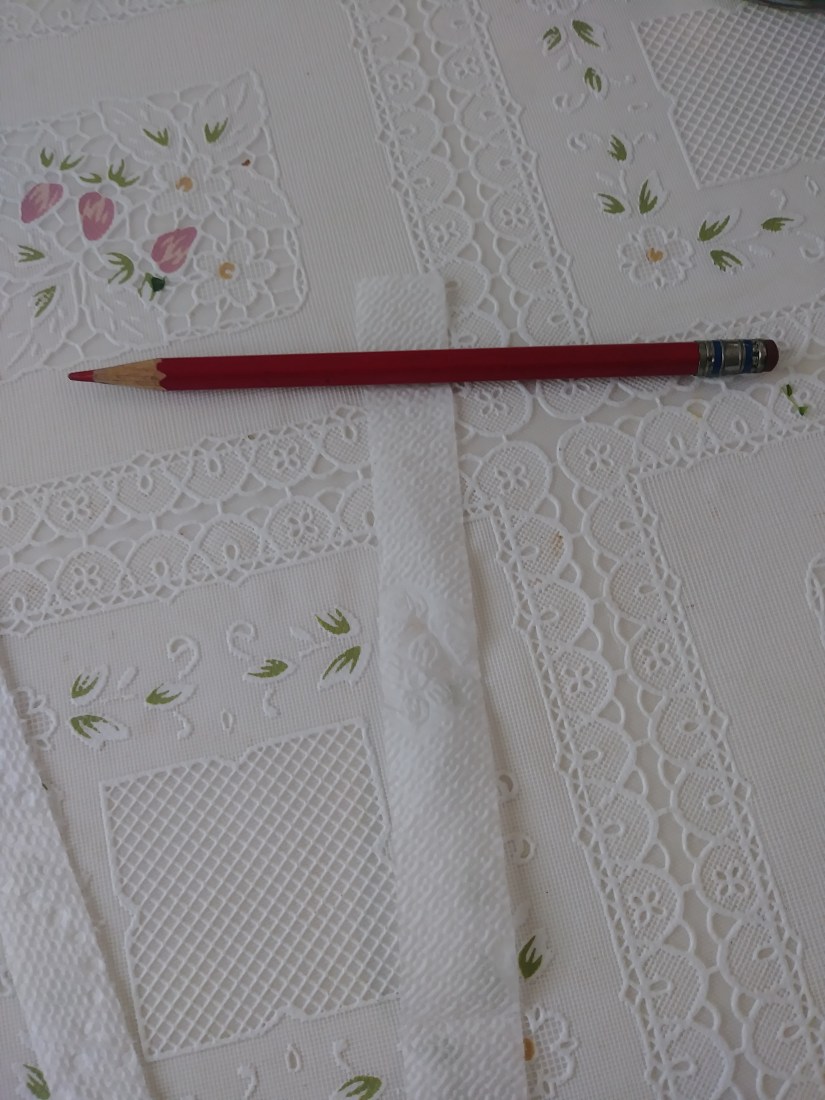
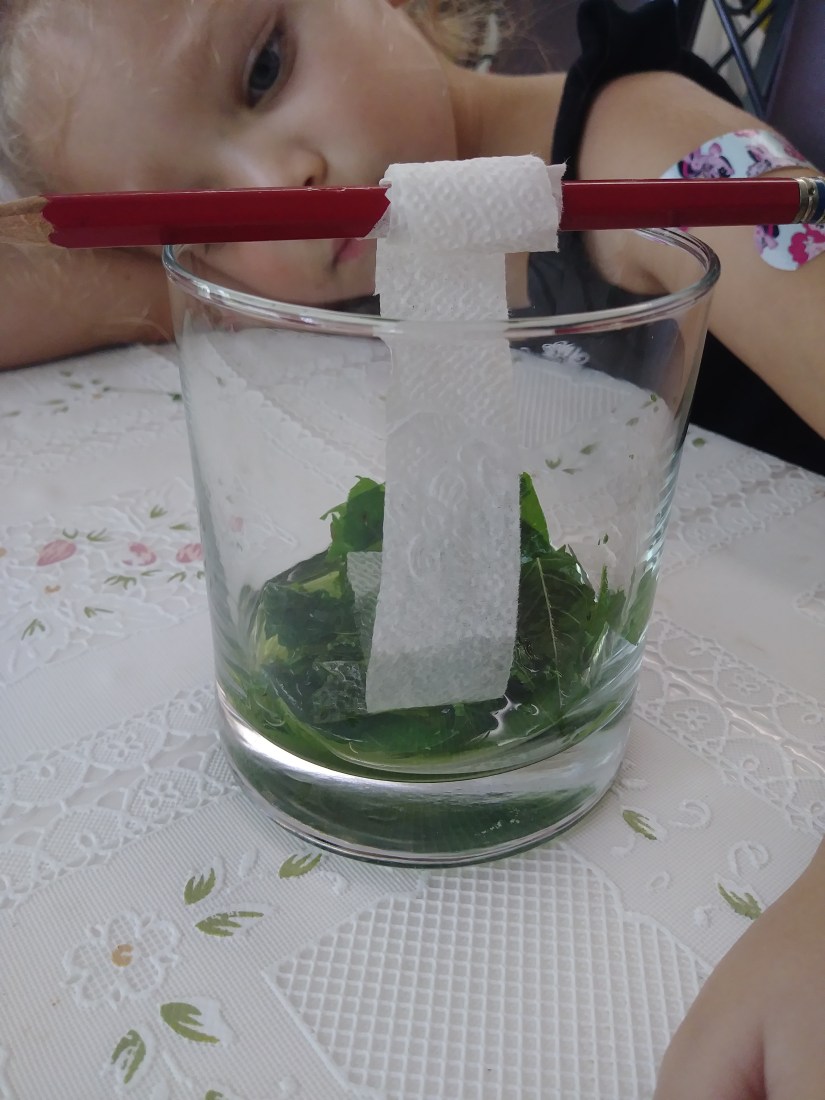
Step 5
Lay out your strip of napkin/TP. Place your pencil at the top of the strip. Use a tiny piece of tape to secure the strip to the middle of the pencil, and roll up the strip around the pencil a few times. The pencil will sit across the top of the glass allowing the paper to dangle down into the “leaf soup.” Use the pencil to shorten or lengthen the paper to the appropriate length for your glass. It should look like…..
Step 6
The paper should be touching the “leaf soup.” The nail polish remover will draw the chlorophyll out of the smashed leaves and it will “wick” up the white paper. While you can see some movement & color change right away, it is far more dramatic if you let it sit for a few hours.
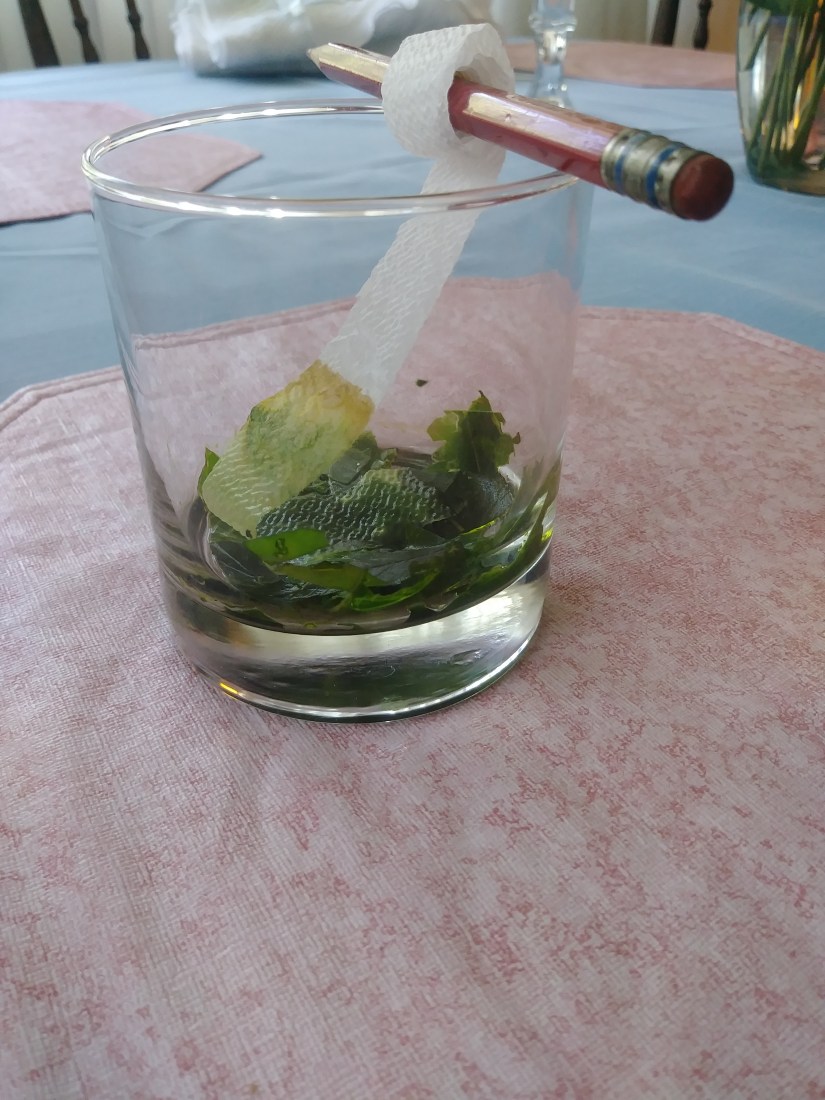
The finished product is pictured above.
We discussed how the chlorophyll uses the sun to make energy for the plant. This is why a plant’s leaves are wide and stretched out toward the sun. We also discussed that the leaves will soon be changing and eventually fall off of the trees because the days will be shorter & there won’t be much sun for energy.
I can’t wait to take this line of learning full circle as we continue to watch what happens to the trees and plants this fall and winter!

So amazing! I never did this as a child that I can remember, but it is fascinating.
LikeLike
This is incredible!! Gah you always blow me away with your experiments! So cool & yay for upcoming changing leaves!
LikeLike